

WordPress guide 2025
WordPress is the most popular CMS in the world. No matter what type of website you are creating, you can use WordPress to do it. Even those who have never been involved with making a website have likely heard of WordPress – it’s a household name these days.
Best of all, WordPress is free and accessible to everyone. Even if you are new to WordPress, you can begin building your website today.
However, it can be overwhelming getting started. This how-to guide will answer all of your questions about WordPress.
From installing the software and choosing a hosting provider, to website maintenance and customising your theme, you will find the answer below.
WordPress FAQ
WordPress is a content management system (or CMS), which allows anyone to manage the content of their website without any programming experience.
WordPress.org is the free, open-source WordPress software which is available for anyone to download and install. WordPress.com is a commercial, hosted version of the WordPress.org software.
WordPress is used for managing every aspect of your website. It allows anyone to edit the content of their website and create new posts and pages without any programming knowledge.
WordPress themes are used to customise the design on your website. This includes stylistic elements such as font, colours and page templates.
A WordPress plugin is software that can be added to your website to create a specific feature or function.
With managed WordPress hosting, your provider would control your website and server. It is a service that supports the technical and administrative aspects of a WordPress website such as installation, daily backups, and software updates.
In our opinion the best option for hosting a WordPress website is Bluehost. Bluehost is a recommended WordPress hosting partner.
You should start by learning your way around the WordPress dashboard, which is the first screen you will see when you login.
Installing WordPress is very simple and many hosting providers will automatically install WordPress for you. However, if you would prefer to install WordPress manually, you can follow the instructions below.
Follow the three simple steps below to add Google Analytics to your WordPress website.
There are several plugins that can help you to back up your WordPress website, such as UpdraftPlus.
It is easy to duplicate a page in WordPress with a plugin such as Duplicate Page.
To update your PHP, log into your control panel and click on the “Select PHP Version” tab. You should now be able to see your current version of PHP. Select the latest version from the menu and click “Set as Current”.
To browse the WordPress.org theme directory, go to Appearance » Themes and click “Add New”.
We will share two methods for editing your footer in WordPress below.
The easiest way to change your WordPress password is by clicking “Lost your password?” on the log in screen.
If there is a newer version of WordPress available, you will see a notification on your admin dashboard. Click the link in this message to get started.
You can usually purchase an SSL certificate from your hosting provider (it might even be included in your hosting package). Alternatively, there are third party providers that sell SSL certificates.
The easiest way to make a child theme in WordPress is using a plugin such as Child Theme Generator.
Making your WordPress website private is a straightforward process with the help of a plugin, such as My Private Site.
We have shared our top tips below to help optimise the speed of your WordPress website.
Select Plugins » Add New and use the search bar to find a plugin you would like to install.
There are only a handful of ways that you can change the font in WordPress. Fortunately, the two methods below are straightforward and do not require any coding knowledge.
By default, your WordPress homepage includes a list of posts in date order. However, if a blog is not the focus of your website, you might want to create a static homepage instead. To do so, follow our simple instructions below.
New categories can be added while writing a post. Alternatively, go to Posts » Categories. Write a name and description for the category and click “Add New Category”.
To customise permalinks in WordPress, you can either change your website’s URL structure, or edit a specific page or post URL. We have included instructions for both methods below.
The Yoast SEO plugin has a number of valuable features to help improve your SEO. This includes adding meta descriptions.
Adding a contact form to your WordPress website is easy with the WPForms plugin.
There are several ways to do this, including using the WordPress Customiser or editing the code directly.
If you are changing your hosting company, your new provider might move your website for you. However, don’t worry if you need to do this yourself; you can move your WordPress website to a new host or server without the need to reinstall the software.
Installing WordPress is very simple and many hosting providers will automatically install WordPress for you. However, if you would prefer to install WordPress manually, you can follow the instructions below.
See below for two methods to easily embed a YouTube video in WordPress, in just two or three steps.
You can either downgrade WordPress manually or using a plugin. We will cover both methods below.
Within your WordPress Admin area, go to Settings » General.
Go to Appearance » Themes. Select the theme that you would like to delete.
If you want to edit your header in WordPress, read our three methods below (including options with or without a plugin).
By adding a slider to your WordPress website, your most valuable content can be displayed in an attractive and easily absorbed slideshow format. There are lots of plugins available that can help you with this, such as Soliloquy.
Creating a powerful landing page in WordPress is easy with the SeedProd plugin.
Our top pick is WooCommerce, which is used by millions of ecommerce websites.
We have simplified the process for you, with our step-by-step guide on how to make a WordPress website.
What is WordPress?
WordPress is a content management system (or CMS), which allows anyone to manage the content of their website without any programming experience. It uses PHP and MySQL and is supported by most hosting providers. Although it may sound complicated, WordPress is very user-friendly. Anyone can create and manage a website using WordPress.
It is easy to use for beginners, but WordPress also has powerful features that can help your business to grow. From blogs and portfolios to business and ecommerce websites, WordPress is a popular choice for every type of website.
What is the difference between WordPress.com and WordPress.org?
You can use either WordPress.com or WordPress.org to create a website. However, they are significantly different in terms of hosting, price and flexibility. To help you decide which option is best for you, it is important for you to understand these differences.
When we refer to WordPress in this guide, we mean WordPress.org. WordPress.org is the free, open-source WordPress software which is available for anyone to download and install. It offers complete freedom to customise your website, including installing your own plugins and uploading themes.
You will need to purchase a domain name and find your own hosting provider. By hosting your own website, you will also be responsible for its maintenance which includes managing security, backups and updates.
WordPress.com is a commercial, hosted version of the WordPress.org software. It is quick and easy, as you can simply create an account and get started. You don’t need to install WordPress software, buy a domain name or worry about maintenance and security.
However, you will not have much flexibility in terms of development. The free plan includes a limited amount of storage, a selection of themes and a URL ending in “.wordpress.com”. Additional features can be included if you pay to upgrade your plan, but this can be expensive. You are likely to find a much cheaper solution with WordPress.org.
What is WordPress used for?
WordPress is used for managing every aspect of your website. It allows anyone to edit the content of their website and create new posts and pages without any programming knowledge.
It may have started as a blog publishing platform, but WordPress can now be used to build and manage any type of website. This includes business websites, online portfolios and e-commerce websites. WordPress is used by individuals, global companies, and everyone in between.
What is a WordPress theme?
WordPress themes are used to customise the design on your website. This includes stylistic elements such as font, colours and page templates. You can quickly and easily change the whole look of your WordPress website by choosing a new theme.
There are thousands of themes available in the WordPress Theme Directory. An effective theme enhances the appearance and functionality of your website, which ultimately improves user experience. It is therefore vital for you to choose the right theme for your website.
What is a plugin in WordPress?
A WordPress plugin is software that can be added to your website to create a specific feature or function. Plugins include pre-packaged code which can easily be installed, or “plugged in”, to your website.
There are thousands of free WordPress plugins available in the WordPress Plugin Directory. Paid options are also available from third parties. Whatever functionality you require, it will almost definitely be possible with a plugin.
What is managed WordPress hosting?
Hosting is a service that you can purchase from a hosting provider, that enables you to publish your website on the internet. Hosting providers store your website’s files and data on a server so that when users visit your website, their device will connect to the server and display your website.
There are various hosting packages available, including managed WordPress hosting solutions which are tailored to WordPress websites. If you are worried about the technical elements of running your WordPress website, you may want to consider managed WordPress hosting to ensure your website runs smoothly.
With managed WordPress hosting, your provider would control your website and server. It is a service that supports the technical and administrative aspects of a WordPress website such as installation, daily backups, and software updates. Plus, your chosen hosting company would provide a server that is optimised for WordPress, meaning your website would remain fast and secure.
What is the best hosting for WordPress?
With so many hosting companies to choose from, it can be difficult to choose one. DreamHost, SiteGround and Tsohost, for example, are all popular WordPress hosting companies.
However, in our opinion the best option for hosting a WordPress website is Bluehost. Bluehost is a recommended WordPress hosting partner. They offer WordPress-specific hosting plans which currently start at just £2.13 a month and include automatic WordPress installation and updates.
Bluehost also has a solution for managed WordPress hosting which includes additional benefits such as:
- Auto-scalability to meet traffic demands
- SSD storage and multi-layer caching to maximise website speed
- Auto backups
- Malware protection
- Multi-tiered security
If you have any questions or would like help getting started, you can contact the Bluehost WordPress support team 24 hours a day.
How to use WordPress?
Now that you have followed our step-by-step guide and created your WordPress website, you can explore how to use WordPress to ensure you make the most of all of the features available.
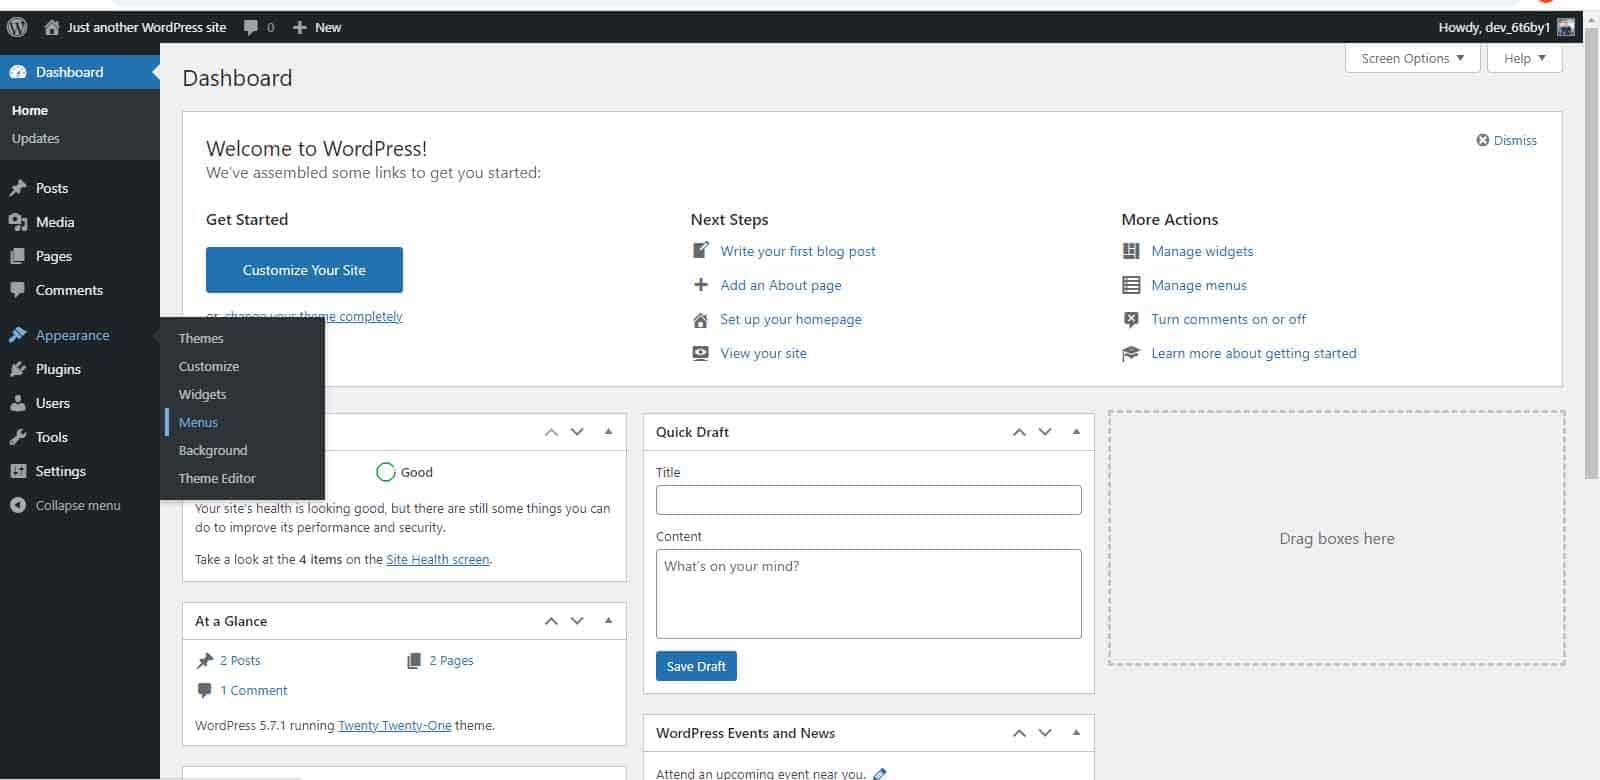
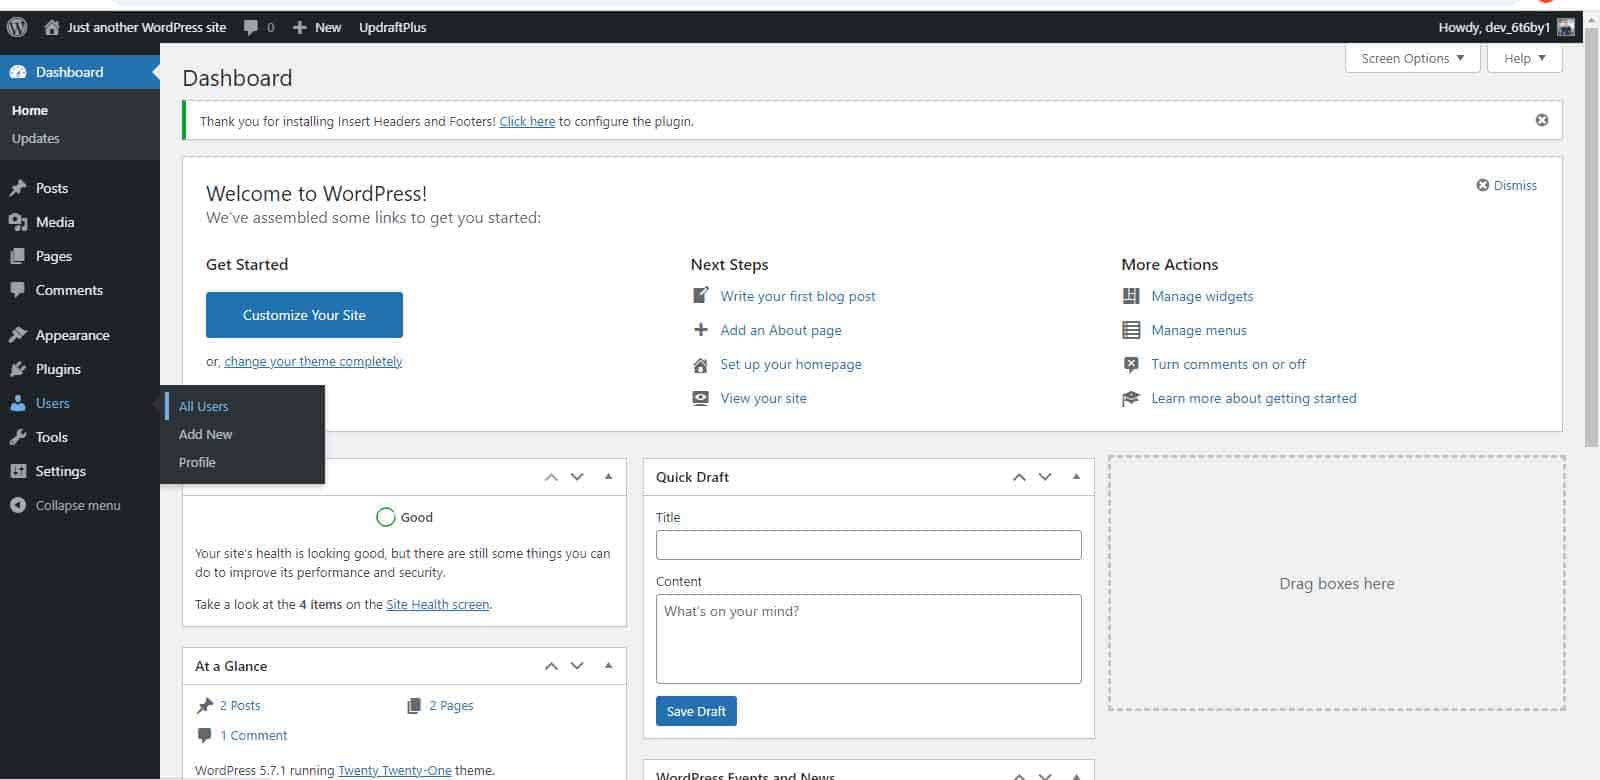
You should start by learning your way around the WordPress dashboard, which is the first screen you will see when you login.
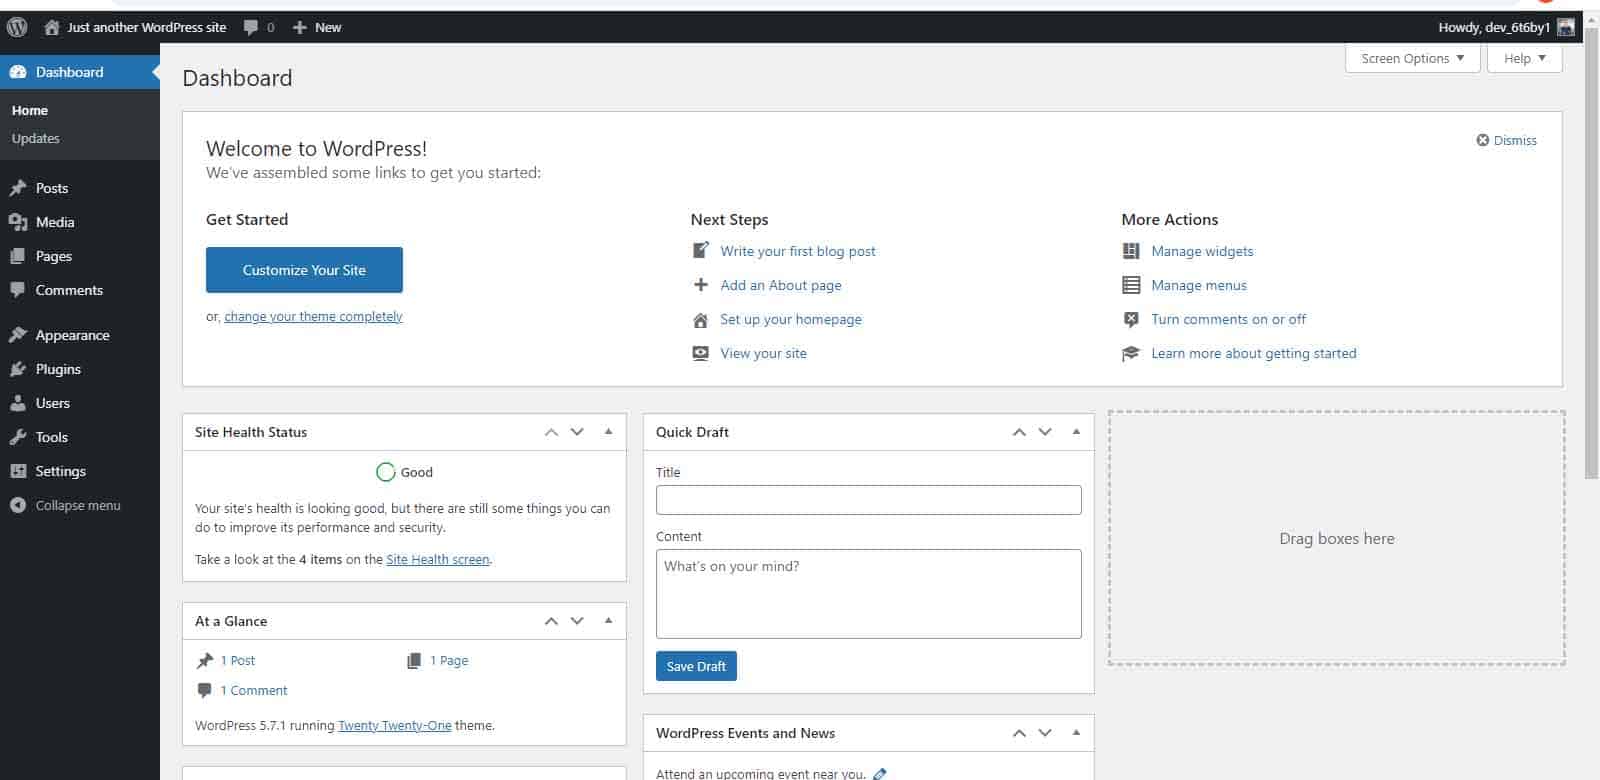
The toolbar at the top of the page notifies new comments and any available updates. It also includes a link to the live version of your website.
The navigation menu on the left includes links to all administrative areas such as pages and plugins.
The welcome menu includes suggested links to help you get started. For example, click the “Customise Your Site” button to modify your theme, or select “Add an About Page”.
From your WordPress dashboard, it is easy to add and manage all of your website content. You can:
Install a plugin:
If you want to add specific functionality to your website, it will almost definitely be possible with a plugin.
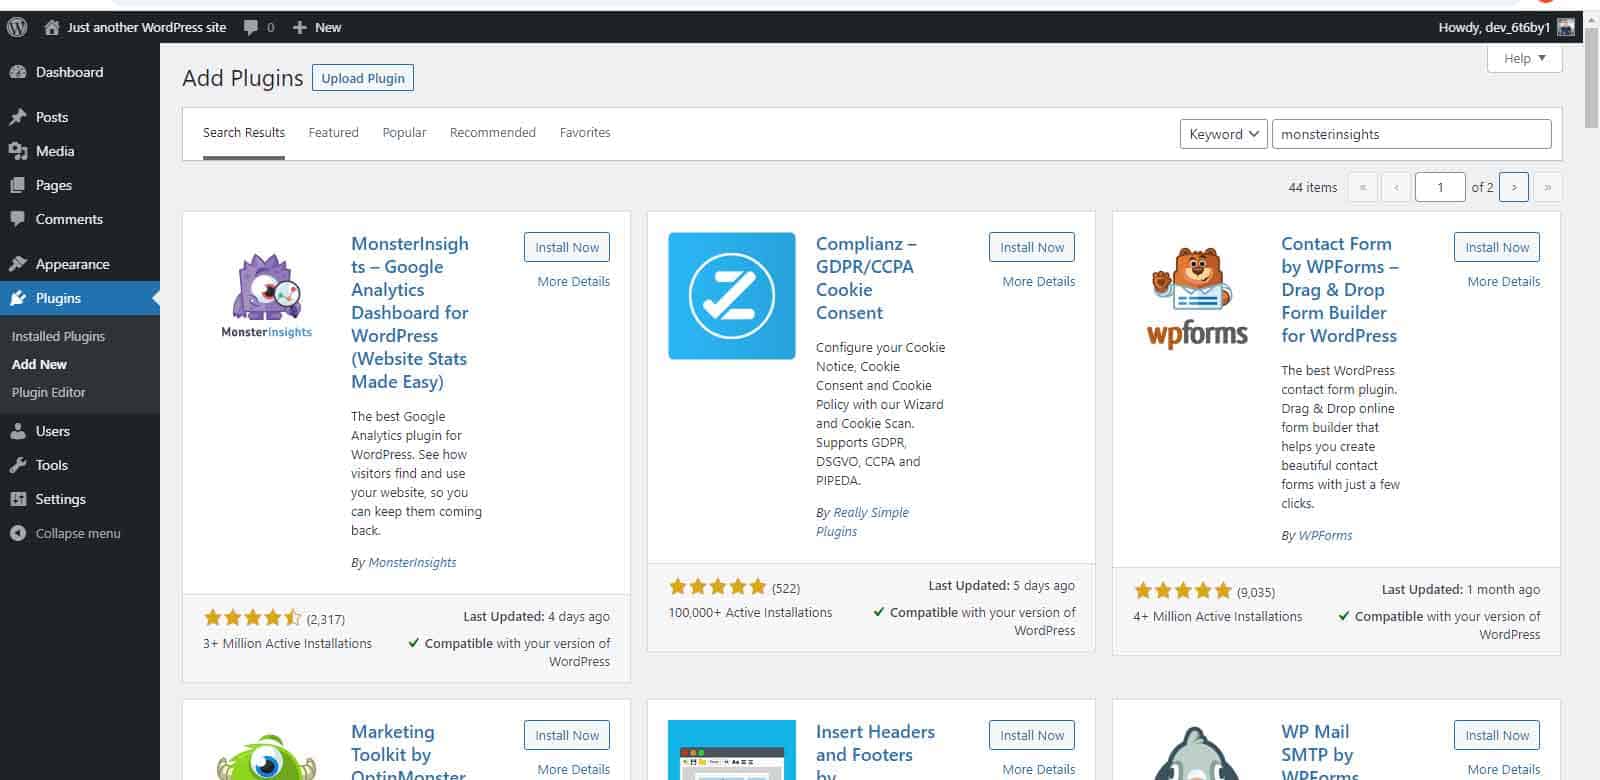
To install a plugin, select Plugins » Add New and use the search bar on the top right to find a plugin you would like to install.

Select Install Now » Activate.
Create a page:
If you want to create static content, such as an “About” page, you can create a page. To publish a page, go to Pages » Add New.
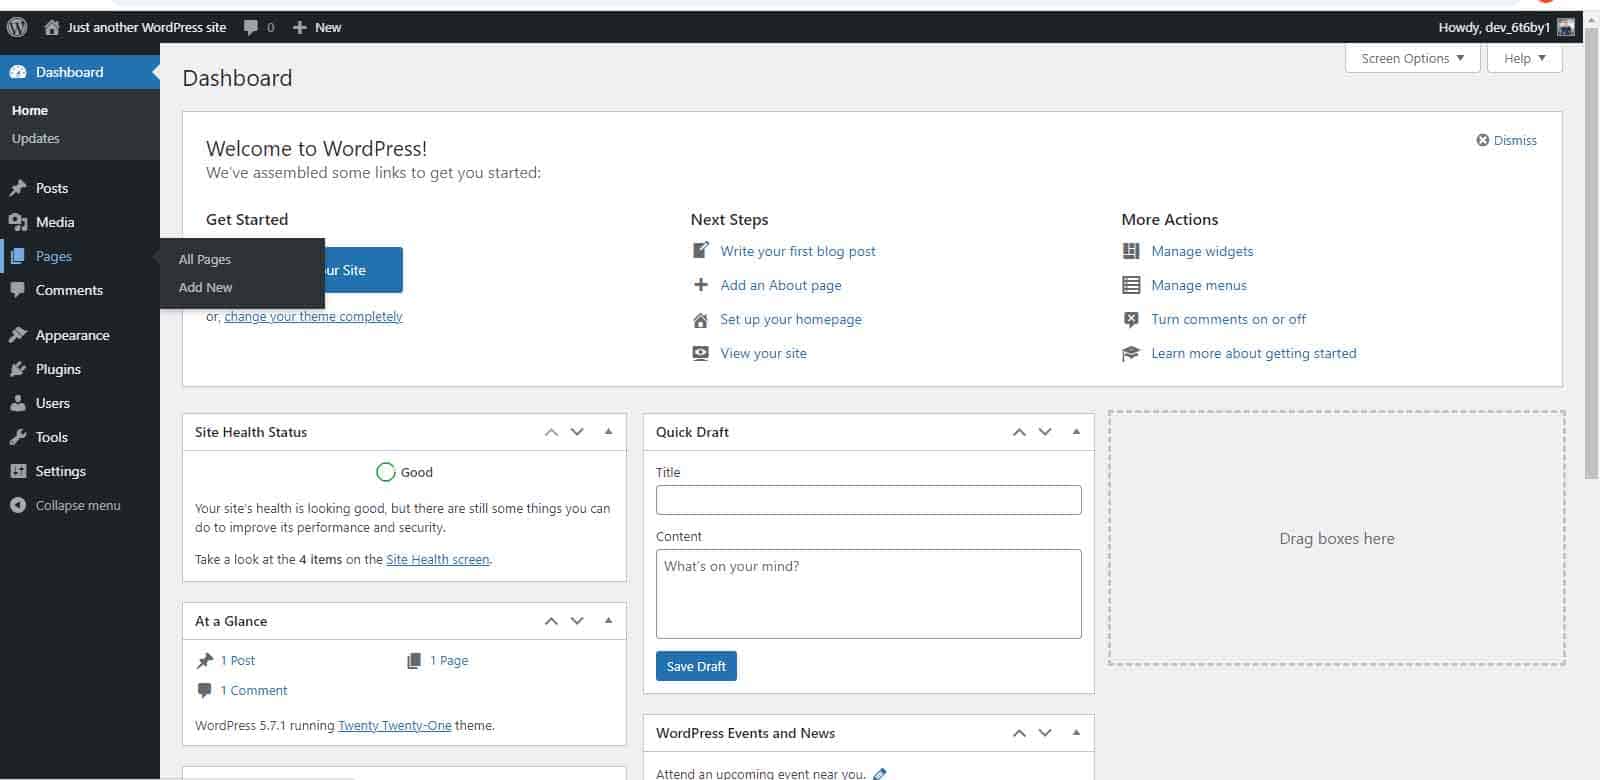
This will bring you to the page editor. From here, you can add a page title and page content such as text and images.

Post a blog:
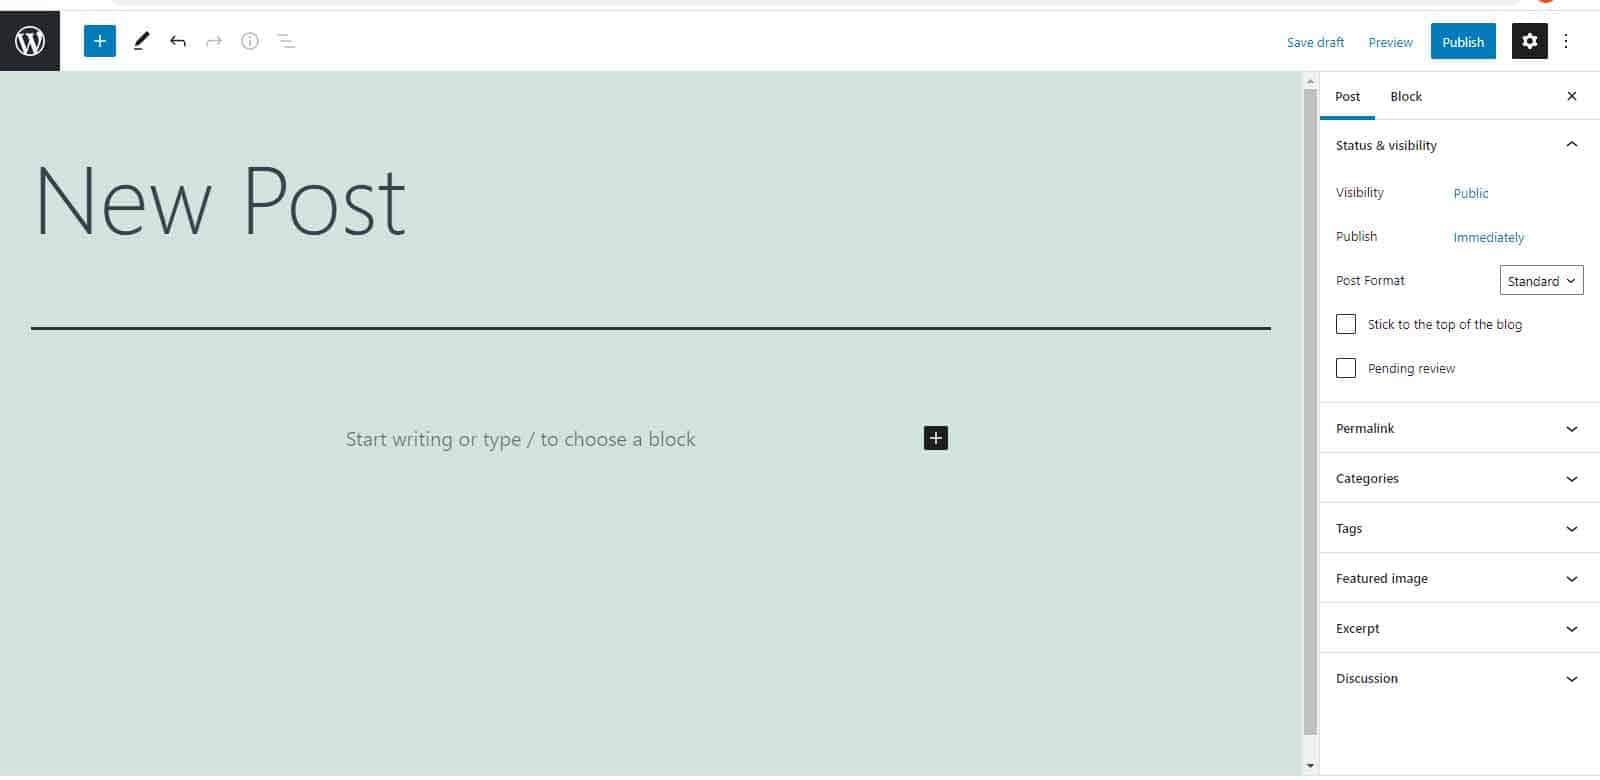
If you add a new blog post, it will appear at the top of your blog. To publish a post, go to Blog Posts » Add New.

You can now add your content in the post editor.
Add a navigation menu:
To help people find your pages and posts, you should also create a navigation menu. To do this, click on Appearance » Menus.
Simply enter a name for your menu and click “Create Menu”. To add pages to your navigation menu, select the pages and click “Add to Menu”.
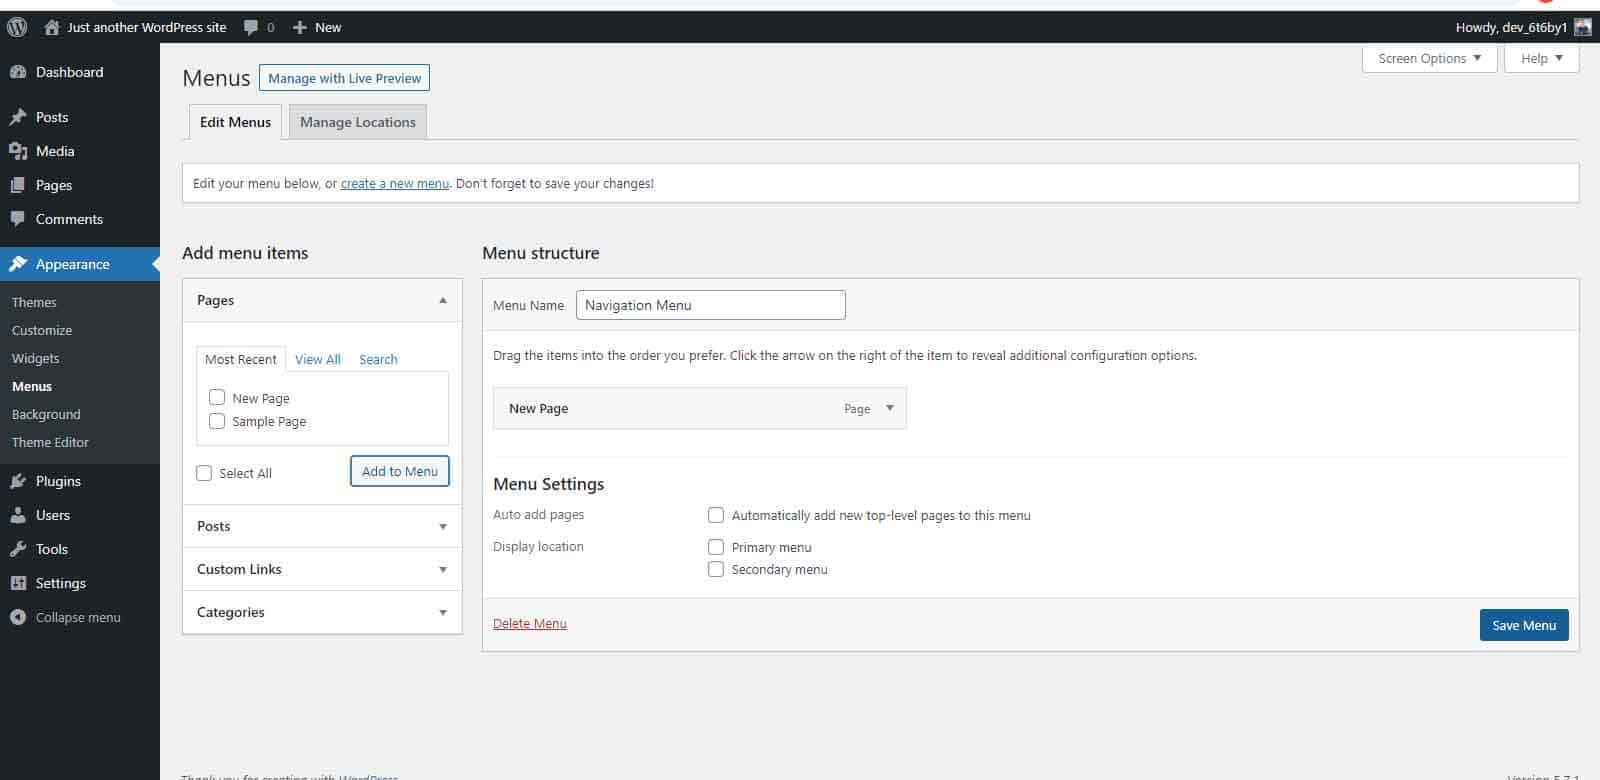
Your selected pages will appear under your menu. If you would like to change the order in which they appear, you can drag them to move them around. Choose your display location and click “Save Menu”.
How to install WordPress?
Installing WordPress is very simple and many hosting providers will automatically install WordPress for you. However, if you would prefer to install WordPress manually, you can follow the instructions below.
Step 1: Download WordPress
Visit WordPress.org to download the latest version of WordPress.
Step 2: Create your database and user
Your hosting provider may have already set this up for you, but if not, you can create your database and user using phpMyAdmin.
Step 3: Upload your files via FTP
Before you do this, you should decide where on your domain you would like your website to appear. If you want to integrate WordPress into the root of your domain (e.g. www.yourwebsite.com), use an FTP client to upload the contents of your WordPress directory into the root directory of your web server.
Alternatively, if you want your website to appear in a subdirectory, you can create a new folder (named “blog”, for example) to install WordPress. This will make your website accessible at www.yourwebsite.com/blog. When uploading your files to your server, rename the directory to your chosen name and use an FTP client to upload the entire directory to your chosen location.
Step 4: Run the WordPress installer
Finally, run the install script. If you uploaded the WordPress files into the root directory, you should visit: http://yourwebsite.com /wp-admin/install.php. If you uploaded the WordPress files in a subdirectory, you should visit: http://yourwebsite.com/blog/wp-admin/install.php.
How to add Google Analytics to WordPress?
Every website should use Google Analytics.
Google Analytics provides in-depth detail about your website traffic and valuable insights into your audience. You can use this information to make improvements to your website, such as improving your lower-performing pages or tailoring your content to your audience. Plus, it is free to use!
Follow the three simple steps below to add Google Analytics to your WordPress website.
Step 1: Visit Google Analytics to create your account
Go to analytics.google.com and click “Start Measuring”. You will be prompted to provide the details of your website such as website name, URL and time zone.
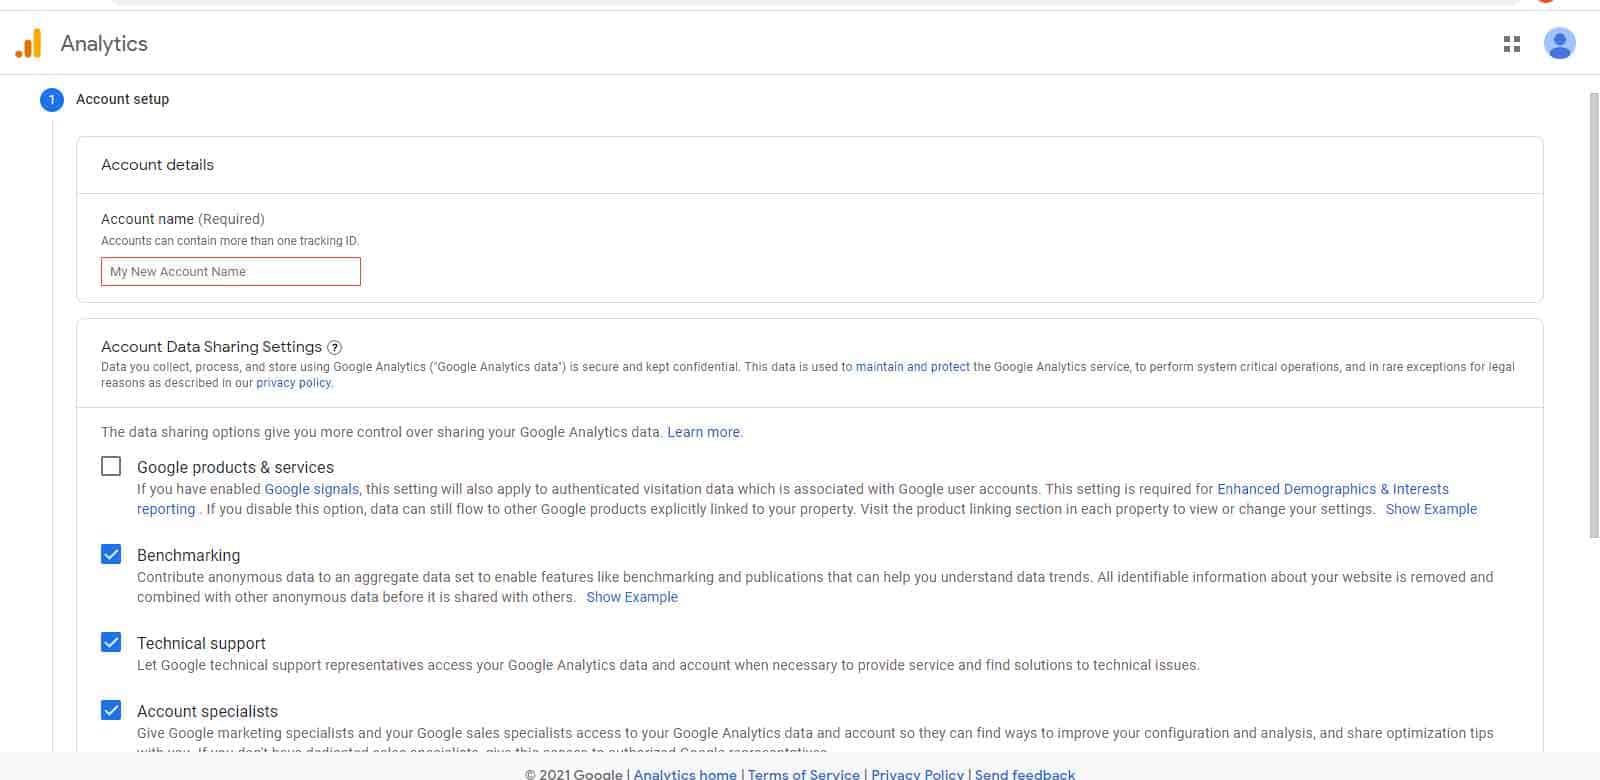
Once you have created your account, you will be given your Google Analytics tracking code.
Step 2: Download the MonsterInsights plugin
There are several plugins that can add Google Analytics to your WordPress website, such as MonsterInsights.
Install and activate the plugin.

Step 3: Setup the MonsterInsights plugin
“Insights” will now appear in your menu. Click “Insights” and launch the setup wizard. Follow the on-screen instructions and click “Complete Connection”.
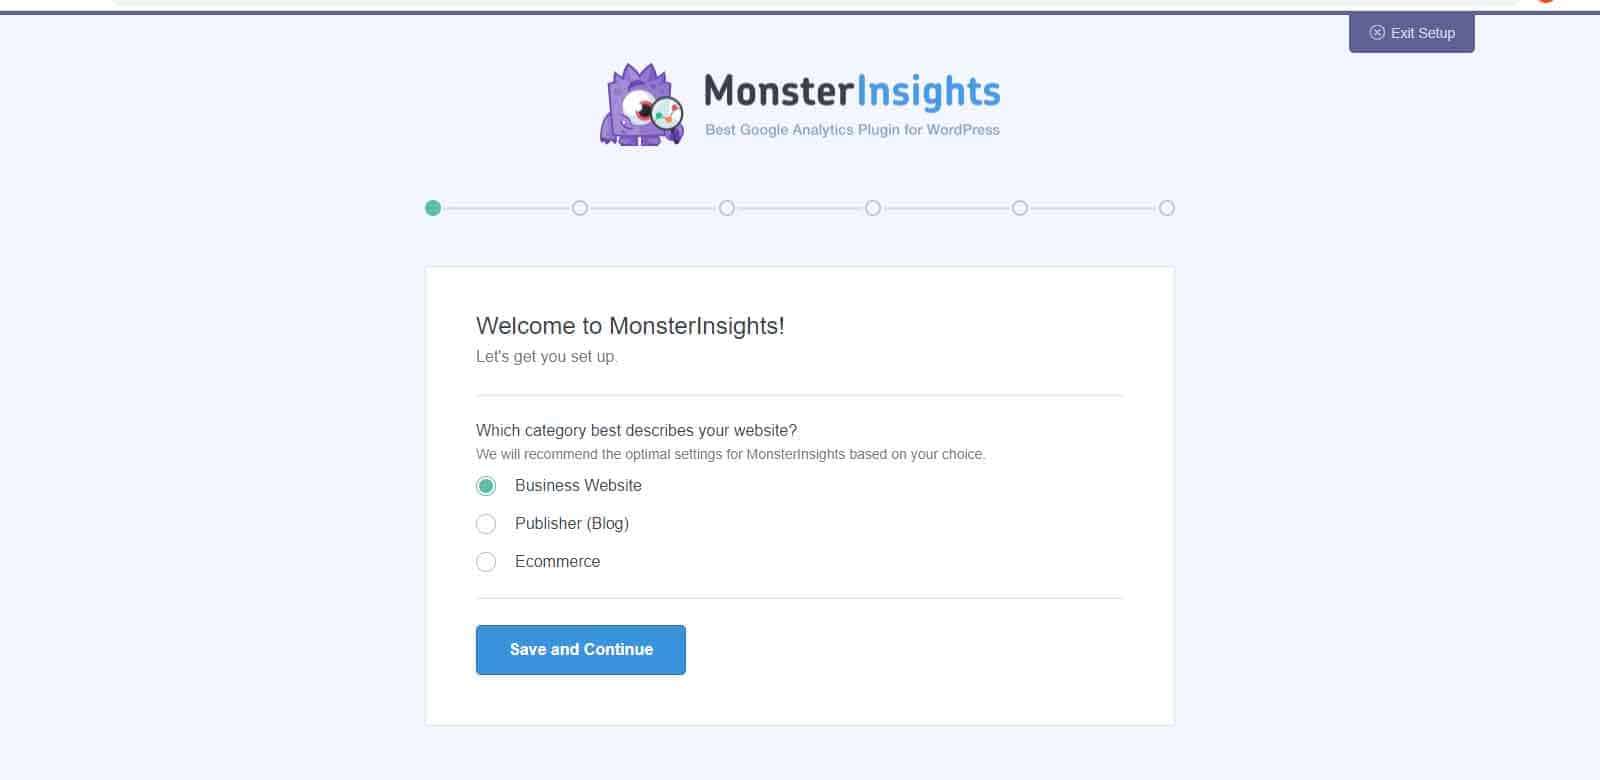
MonsterInsights will now install Google Analytics on your website. You can either select your preferred settings or choose to use the default settings.
How to backup WordPress site?
Performing regular backups of your website is crucial. Backups should include your WordPress files (such as uploaded media, plugins and theme) as well as your database, which includes all of your content.
There are several plugins that can help you to back up your WordPress website, such as UpdraftPlus. This popular plugin can run automatic or manual backups of your WordPress website. It also includes a tool that helps you to restore your website from a backup.
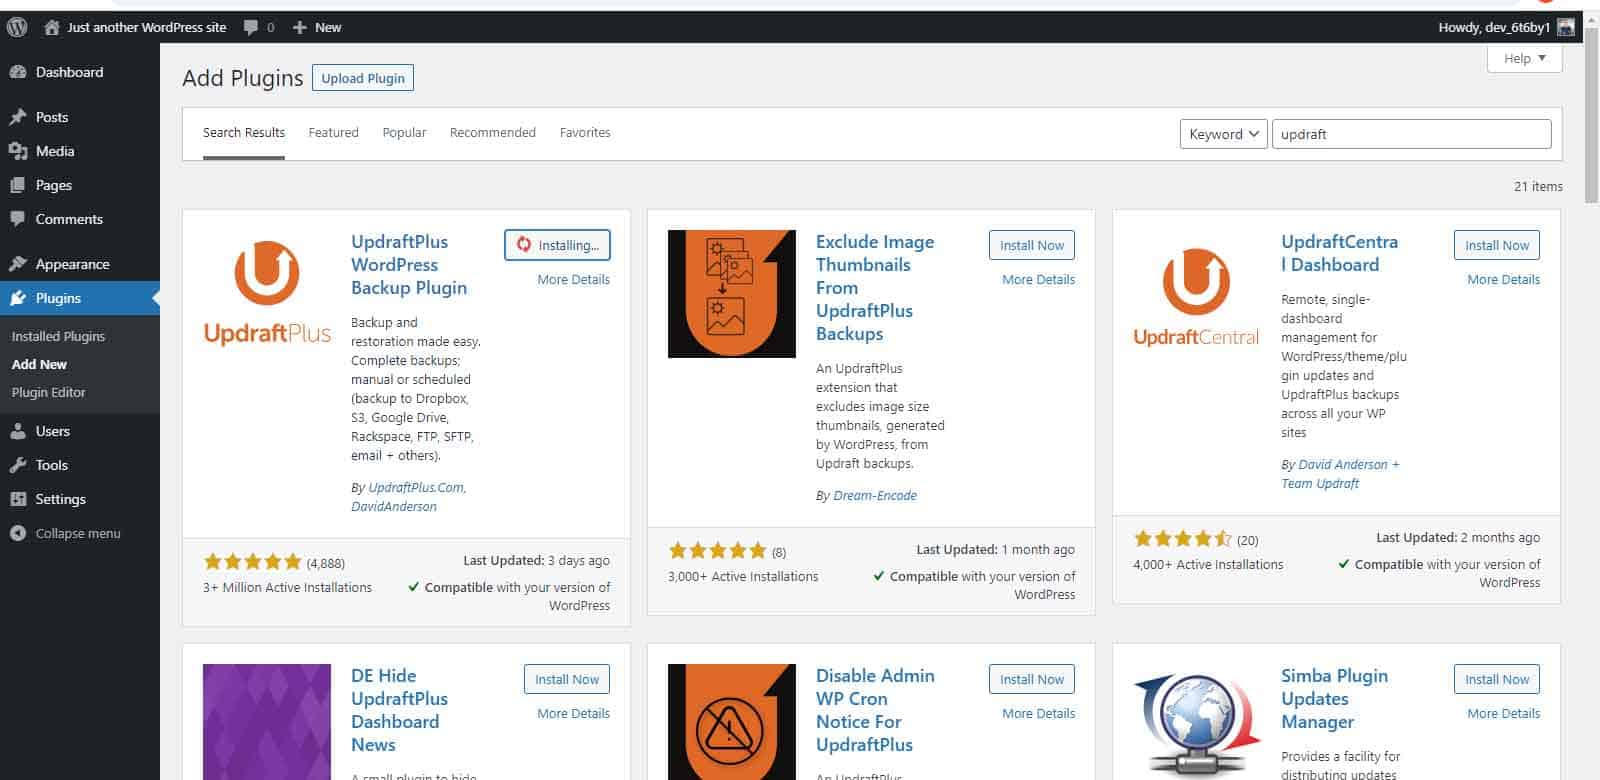
Step 1: Download the UpdraftPlus plugin
Install and activate the plugin.
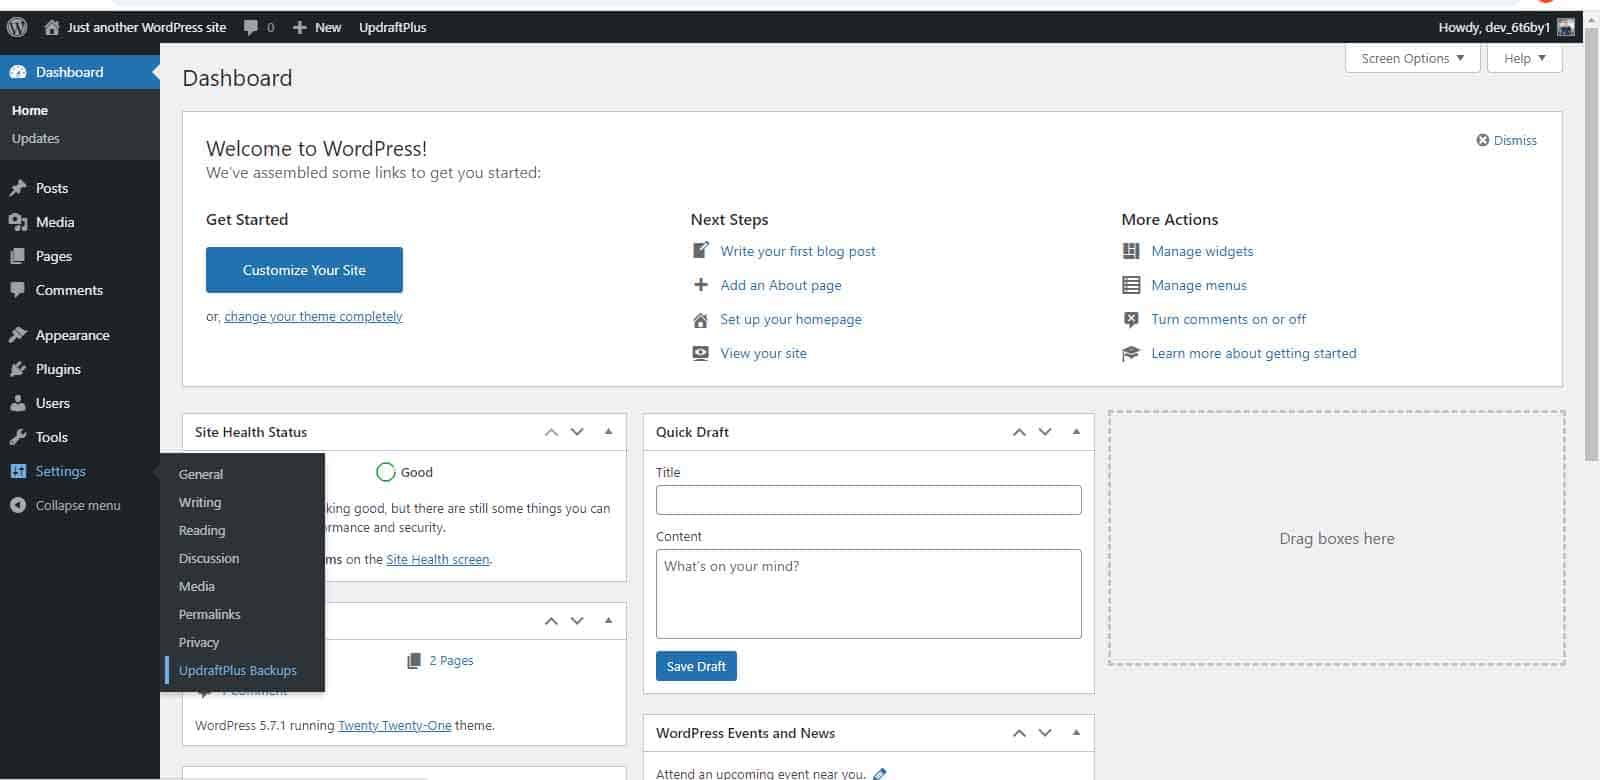
Step 2: Set up the UpdraftPlus plugin
To set up the plugin, go to Settings » UpDraft Plus Backups.
Navigate to the “Settings” tab.
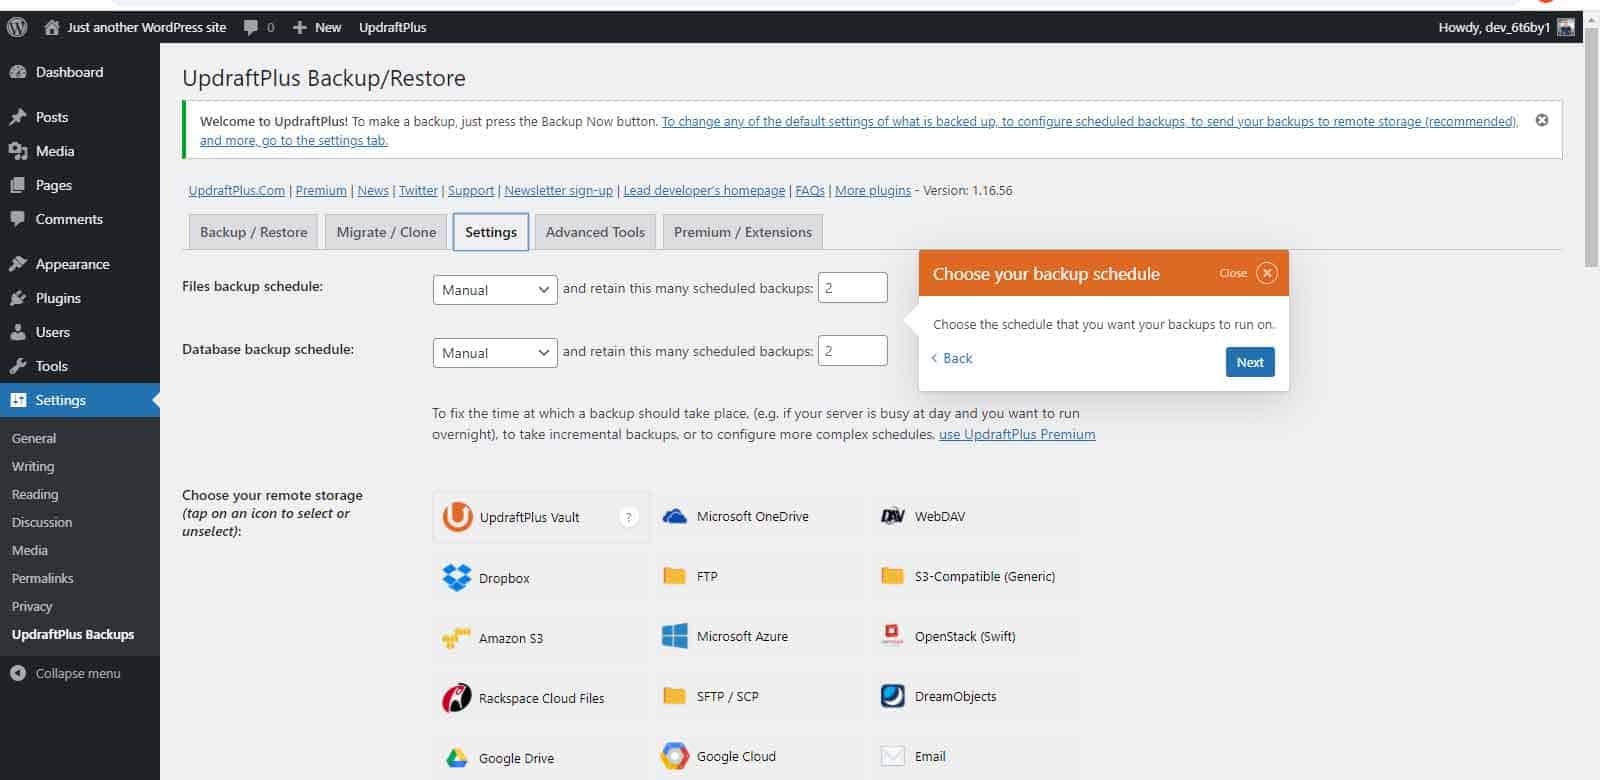
From here, you can schedule automatic backups at your chosen frequency. You can also select how many backups to keep at a time and choose a remote location to store your backups (such as via email, Google Drive or Microsoft OneDrive). Click “Save”.
Step 3: Run your first backup
To run your first backup, click “Backup Now” from the UpdraftPlus plugin page.
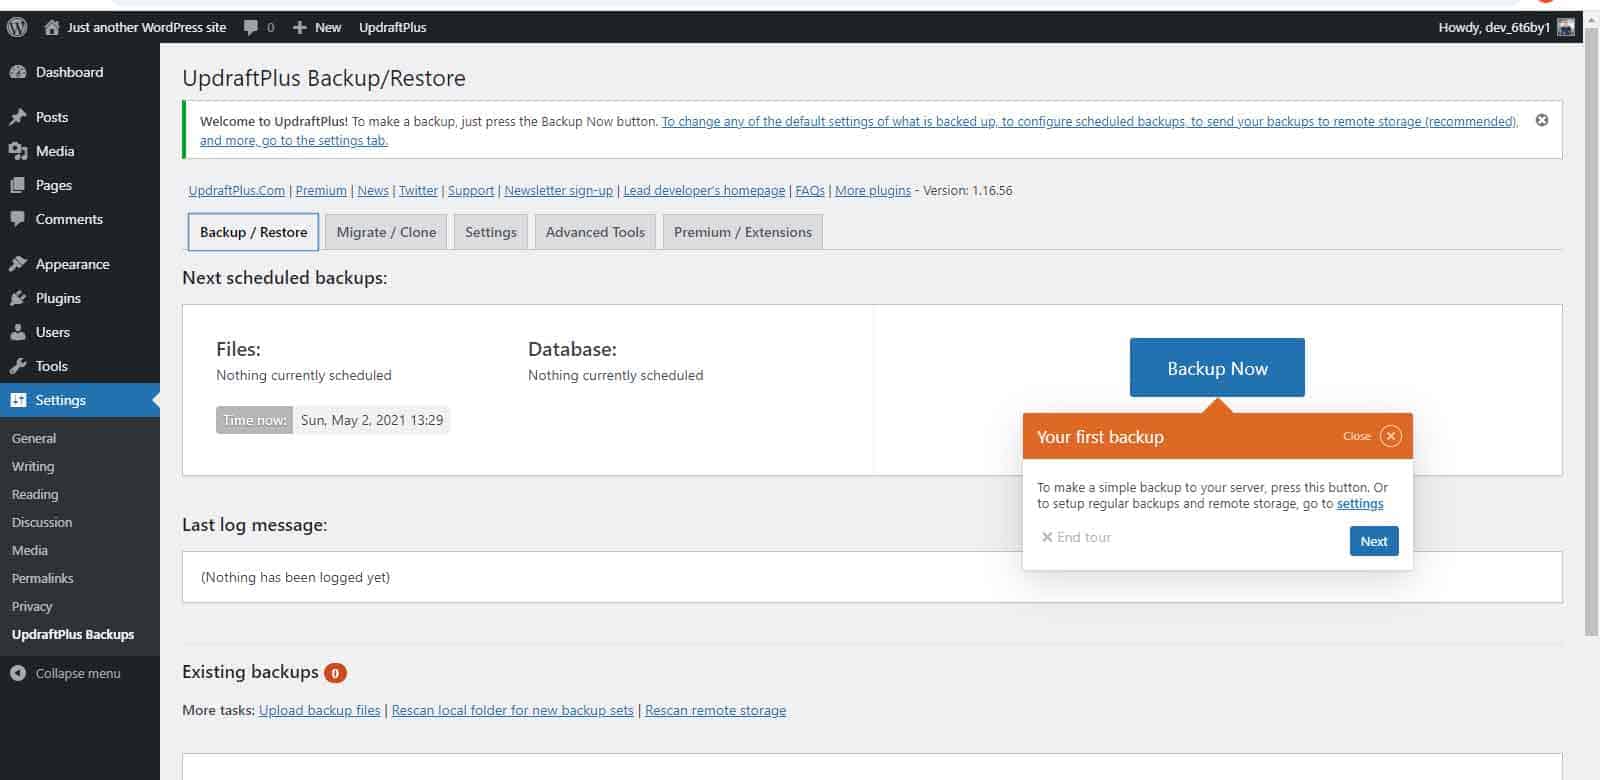
Remember to select both your database and your files and click “Backup Now” once again.
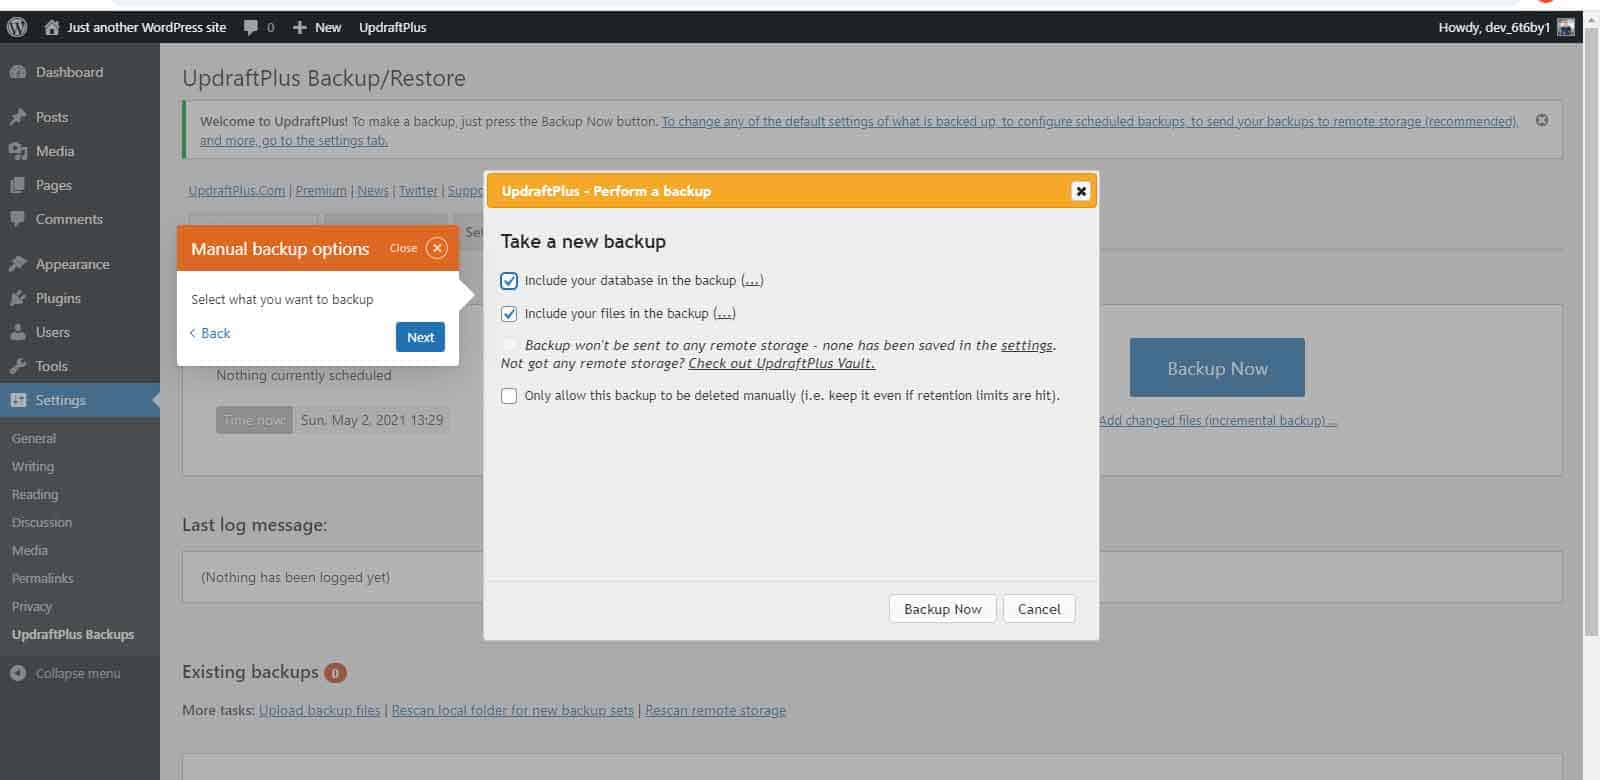
When the backup is complete, it will appear listed in the “Existing Backups” area.
How to duplicate a page in WordPress?
It is easy to duplicate a page in WordPress with a plugin such as Duplicate Page.
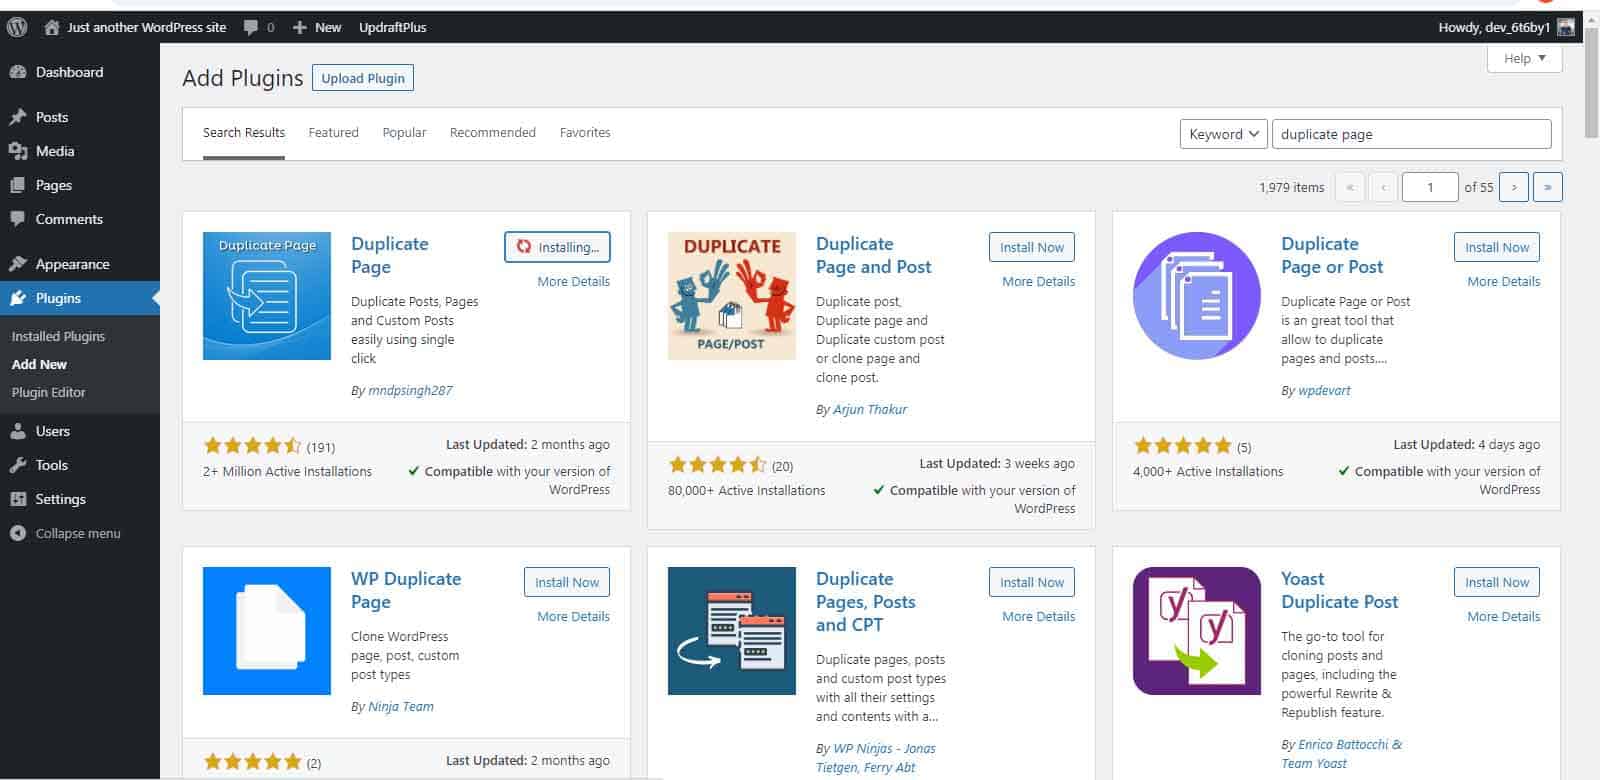
Step 1: Download the Duplicate Page plugin
Install and activate the plugin.
Step 2: Duplicate the page
Go to Pages » All and hover over the page you want to duplicate. There will be new “Duplicate This” link below the page.
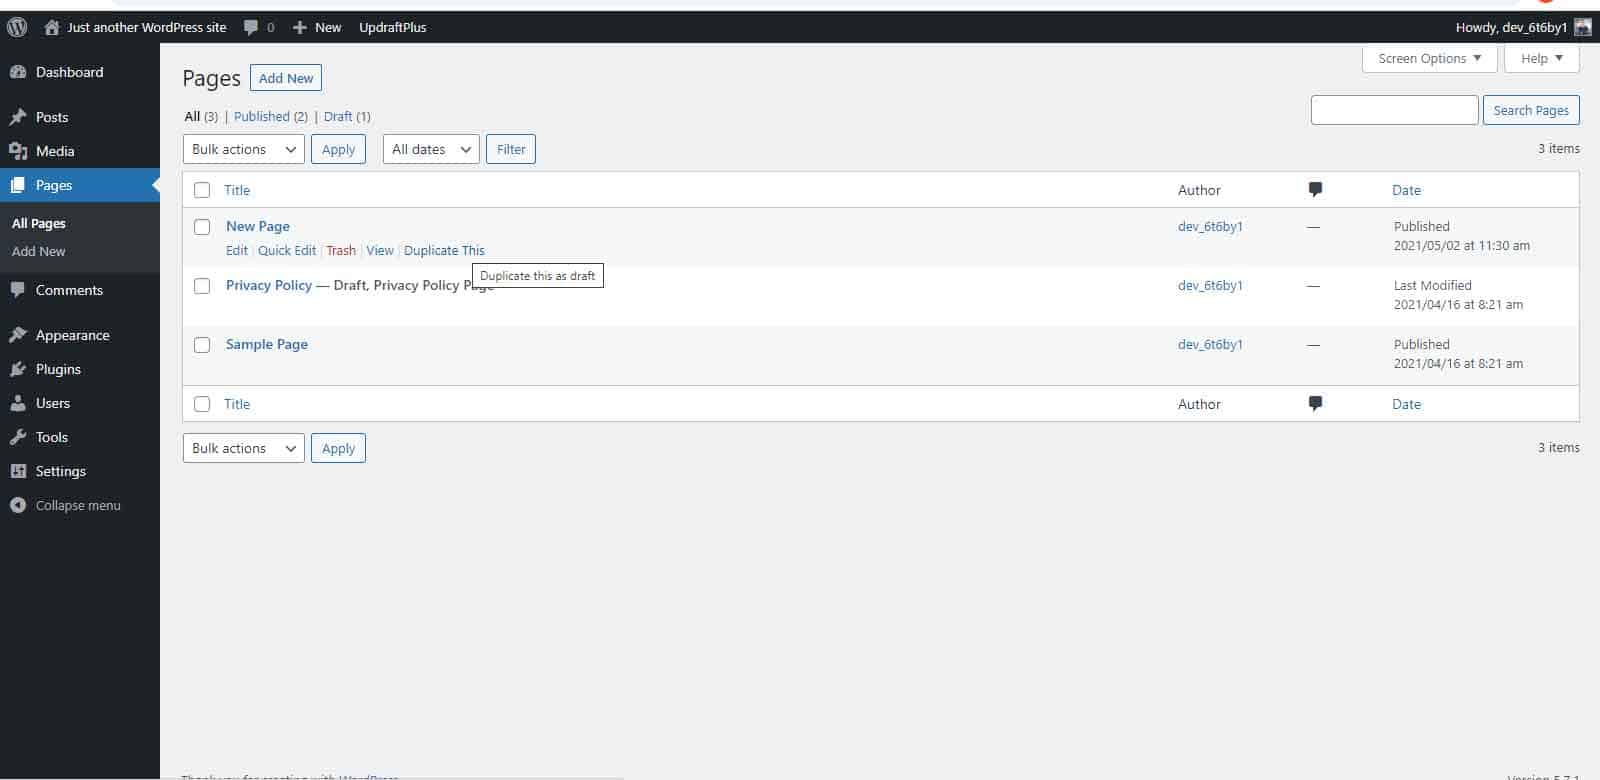
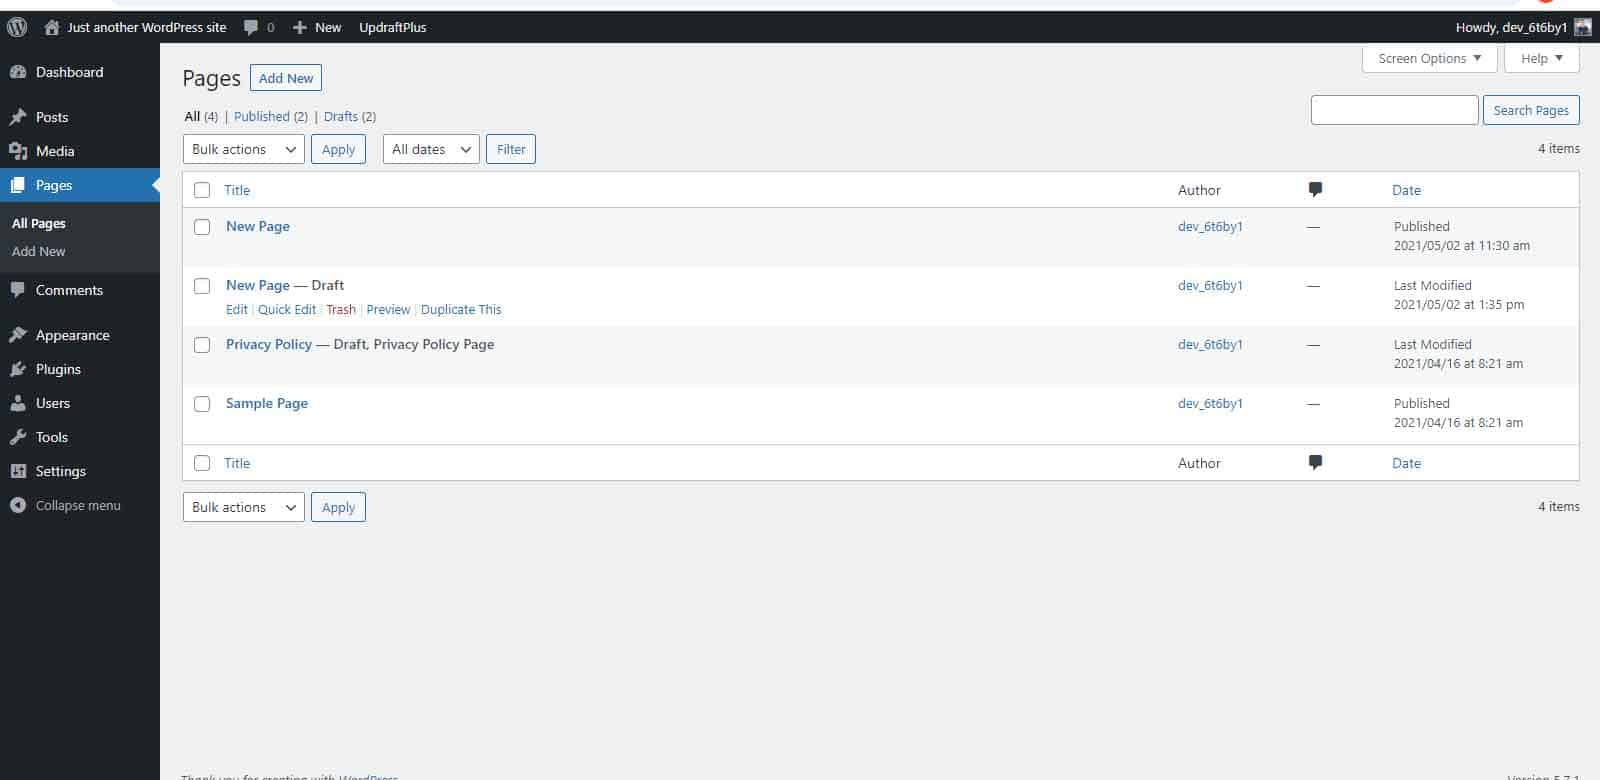
Click this link and the duplicated page will appear as a draft.
How to update PHP in WordPress?
PHP is the scripting language that WordPress is built upon. It is important to keep your PHP version up to date for two main reasons: it can make your WordPress website faster and more secure. This will make your website more effective in terms of UX and will allow you to rank higher in search engines.
Step 1: Backup your website
Before you begin, it is important to run a backup in case anything goes wrong.
Step 2: Ensure your plugins will be compatible with the update
This step is straightforward with the help of the PHP Compatibility Checker plugin.
Step 3: Update your PHP
To update your PHP, log into your control panel and click on the “Select PHP Version” tab. You should now be able to see your current version of PHP. Select the latest version from the menu and click “Set as Current”.
If this option isn’t available in your control panel, contact your hosting company for help. They may even be able to update your PHP for you.
How to install WordPress theme?
There are thousands of themes available in the WordPress.org theme directory. By choosing the right theme, you can improve the appearance and functionality of your WordPress website.
Step 1: Choose a theme
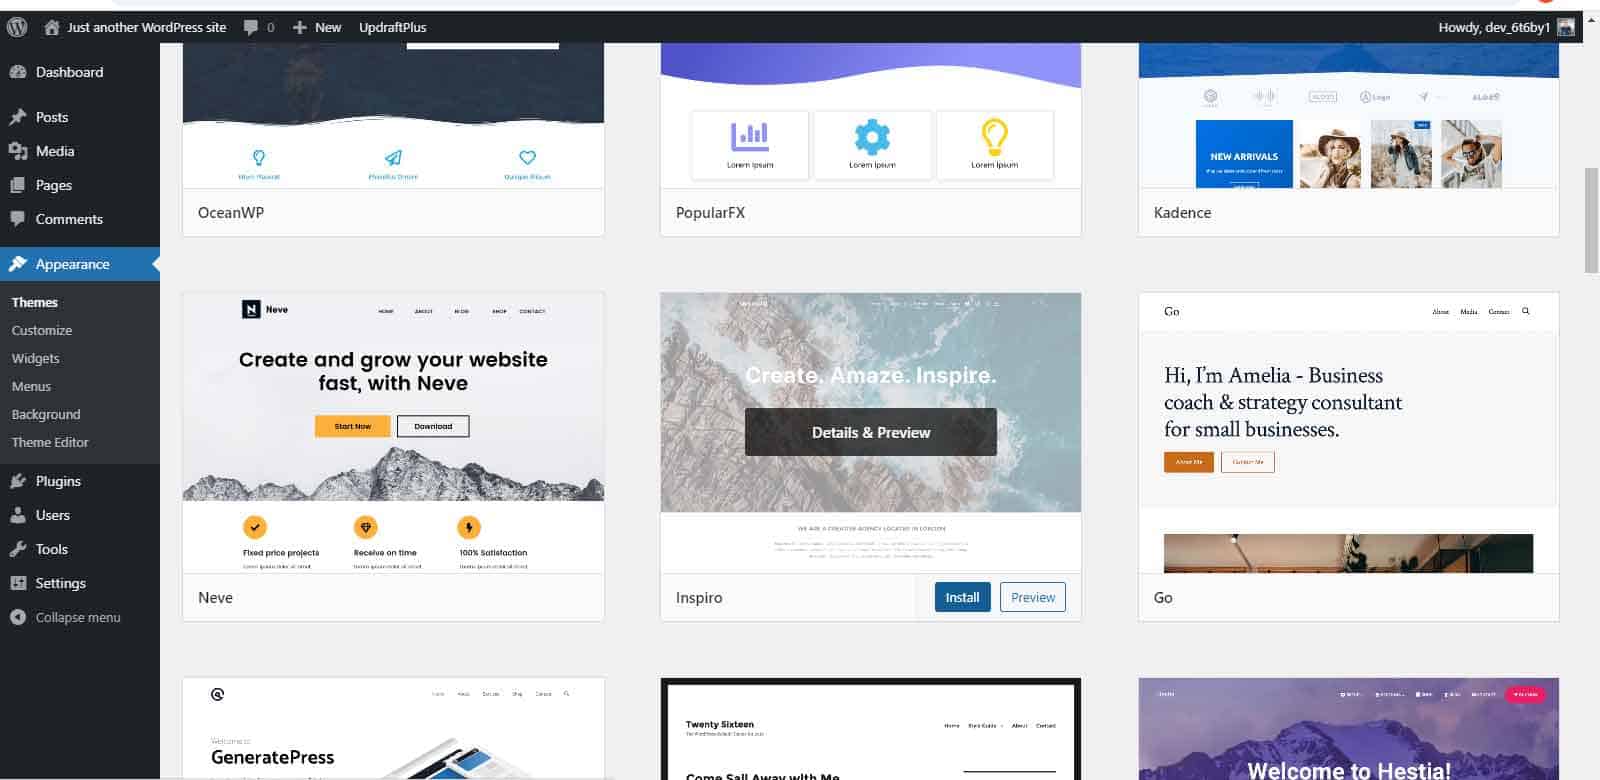
To browse the WordPress.org theme directory, go to Appearance » Themes and click “Add New”.
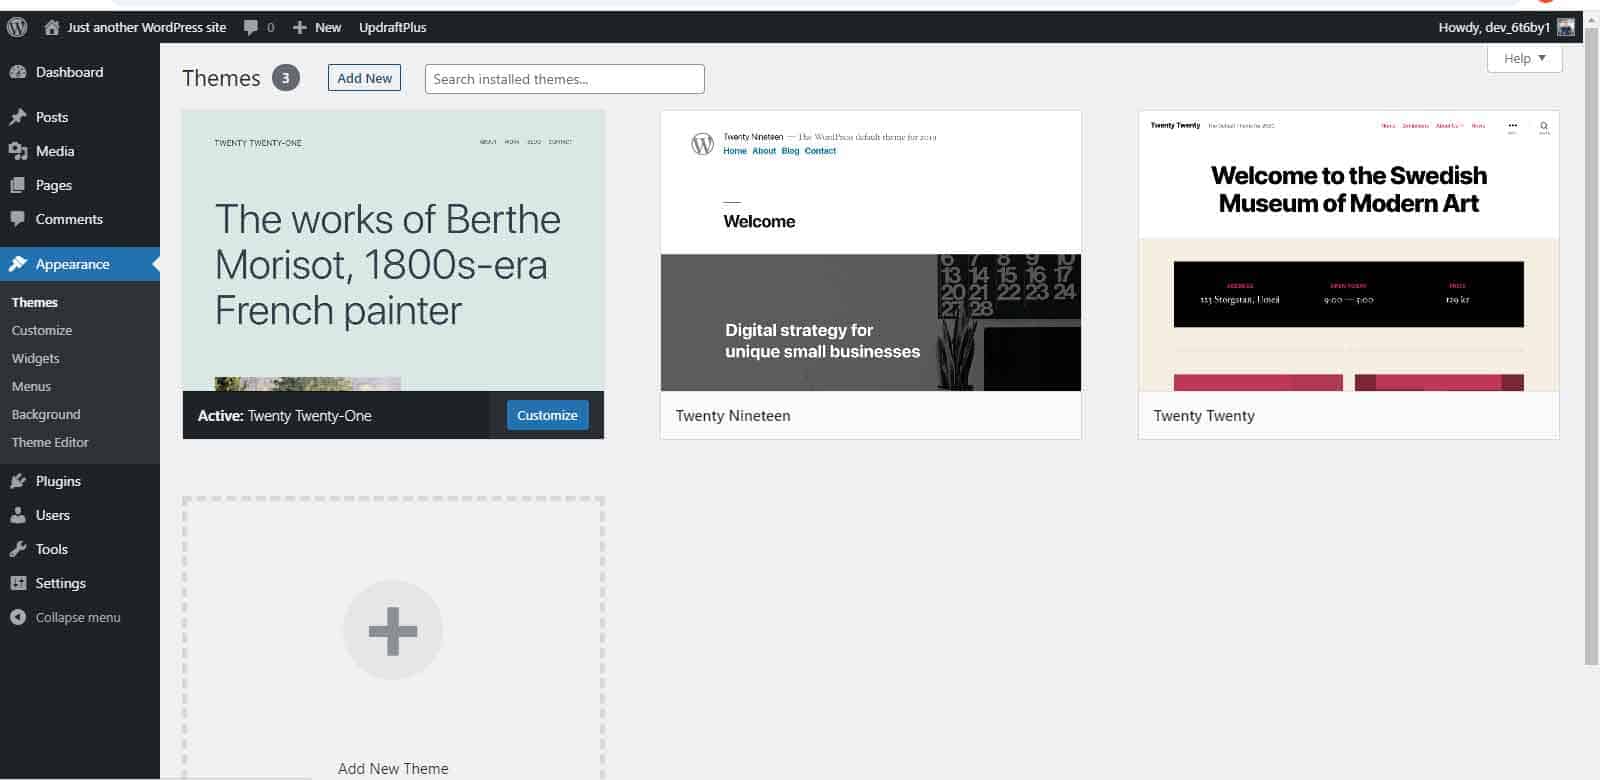
Step 2: Install your theme
Move your mouse over the image to reveal the “Install” button. Click this button on your chosen theme. Once your theme is installed, click “Activate”.
Step 3: Update your settings
Your chosen theme may require additional settings, such as recommended plugins. On-screen instructions will guide you through this process.
Alternatively, you may wish to install a custom theme. This must be done using the upload method below.
Step 1: Upload your theme
Go to Appearance » Themes and click “Add New”. At the top, you will see an “Upload Theme” button. Click this button and select the zip file for your theme.
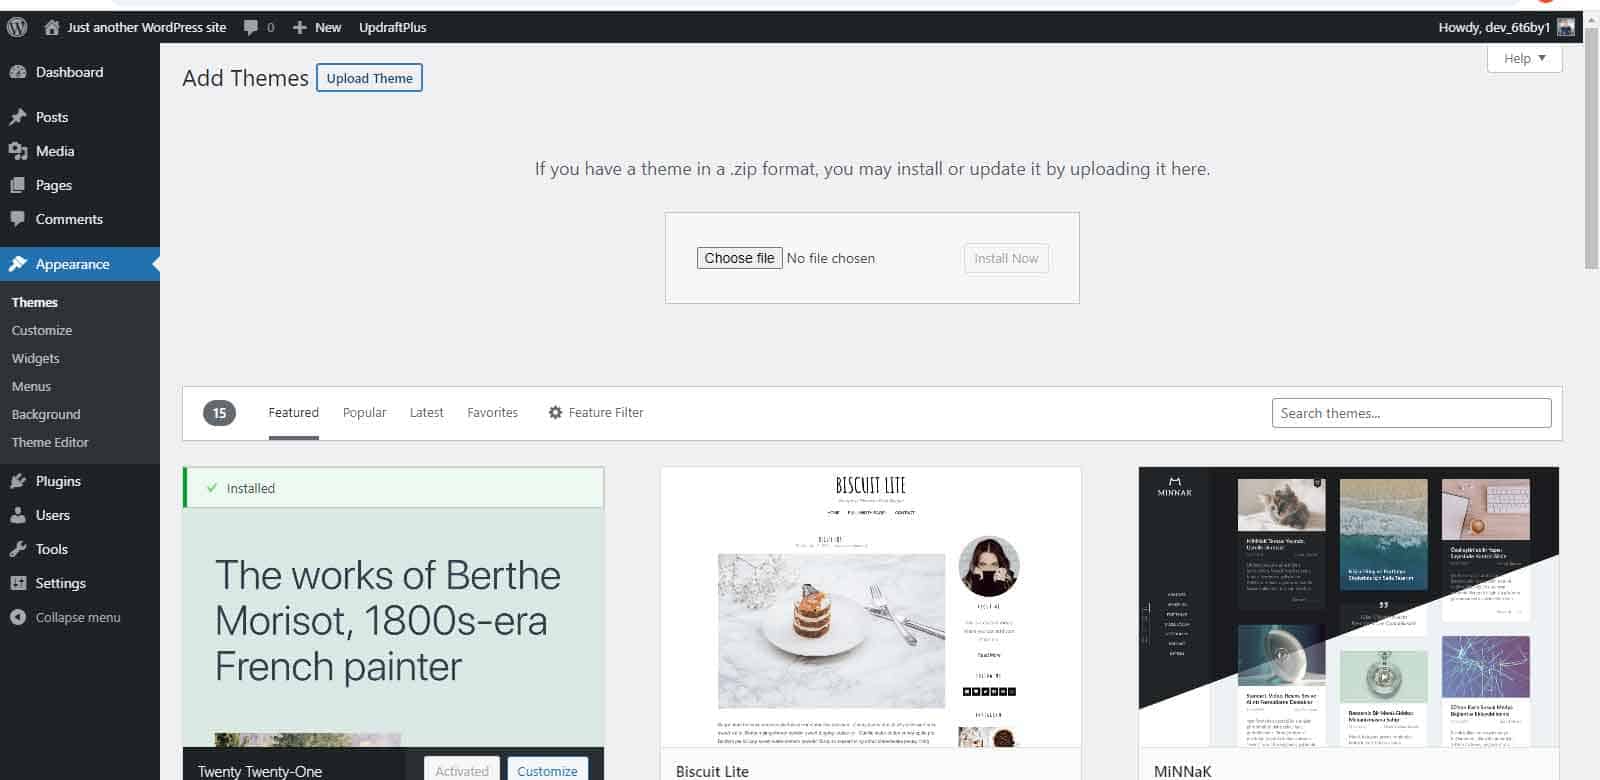
Step 2: Install your theme
With the zip file of your theme selected, click “Install Now”. Once your theme is installed, click “Activate”.
How to edit footer in WordPress?
The footer is located underneath the main content area of every page on your website. Despite being located at the bottom of the page, the footer is one of the most important elements of your website. It can provide easy access to additional information and encourage users to keep browsing your website once they reach the bottom of the page. It can also have an impact on your search rankings.
We will share two methods for editing your footer in WordPress below.
Method 1: Using widgets
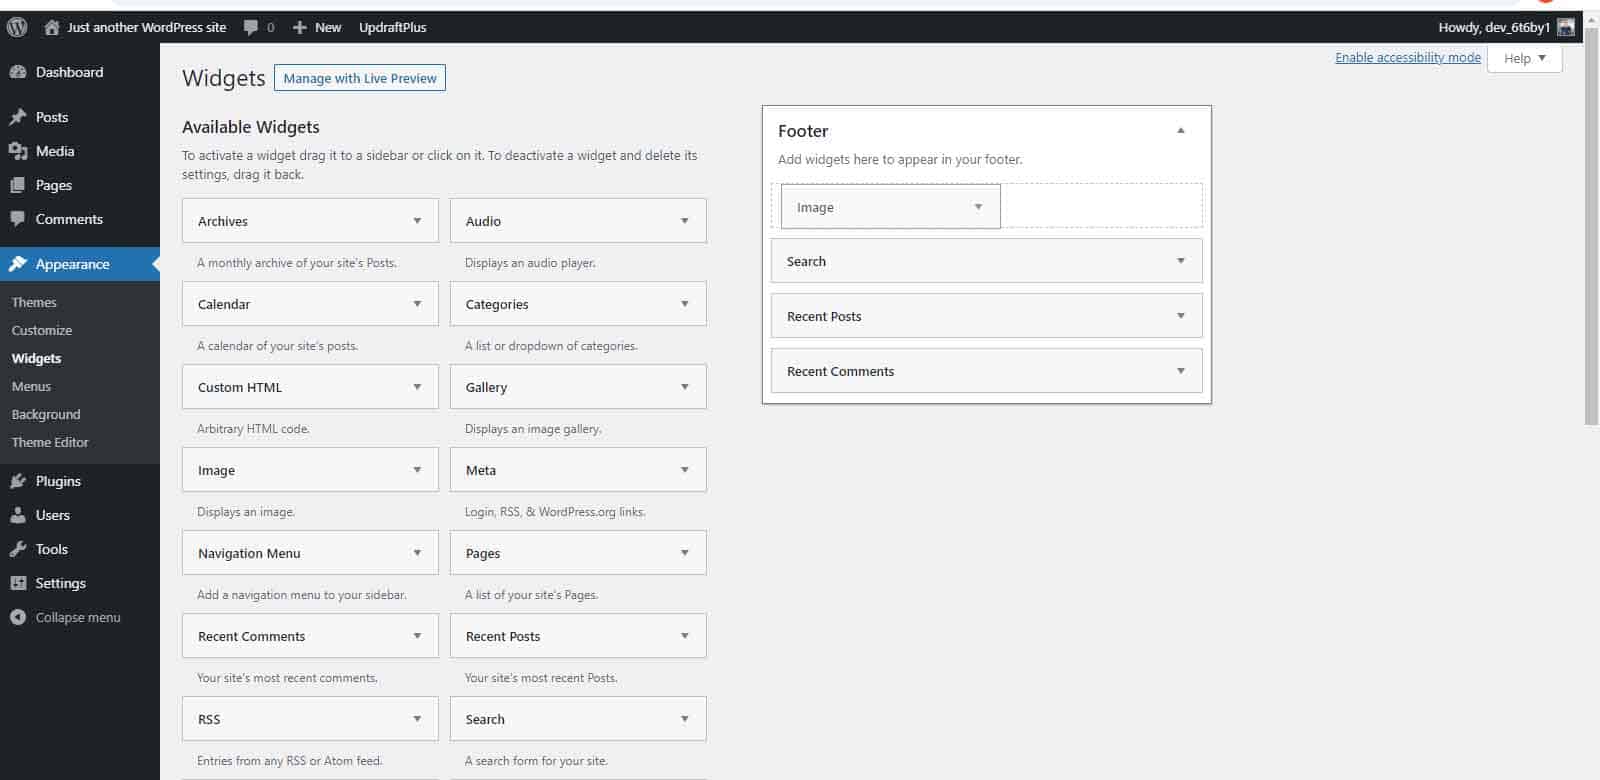
Most themes include widget areas where you can add text, images or links to your footer.
To add text or images to your footer, go to Appearance » Widgets. Drag and drop either a Text or Image widget into the footer area.
To add links to your footer, you will first need to create a new navigation menu. Go to Appearance » Menus and click “Create New Menu”. Choose a name for your menu (such as “Footer Menu”) and select the pages or posts you would like to add. Click “Save Menu”.
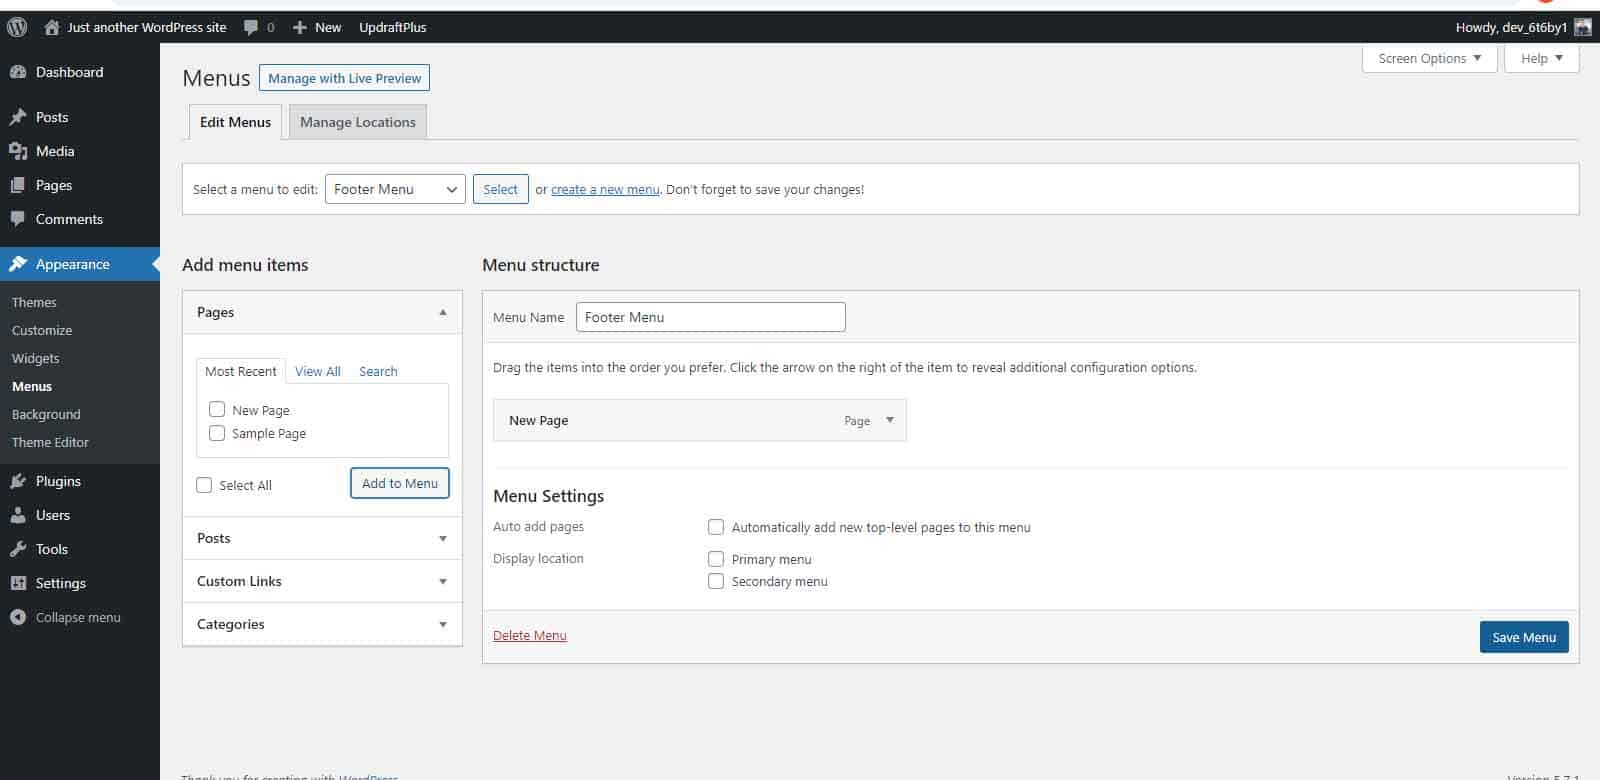
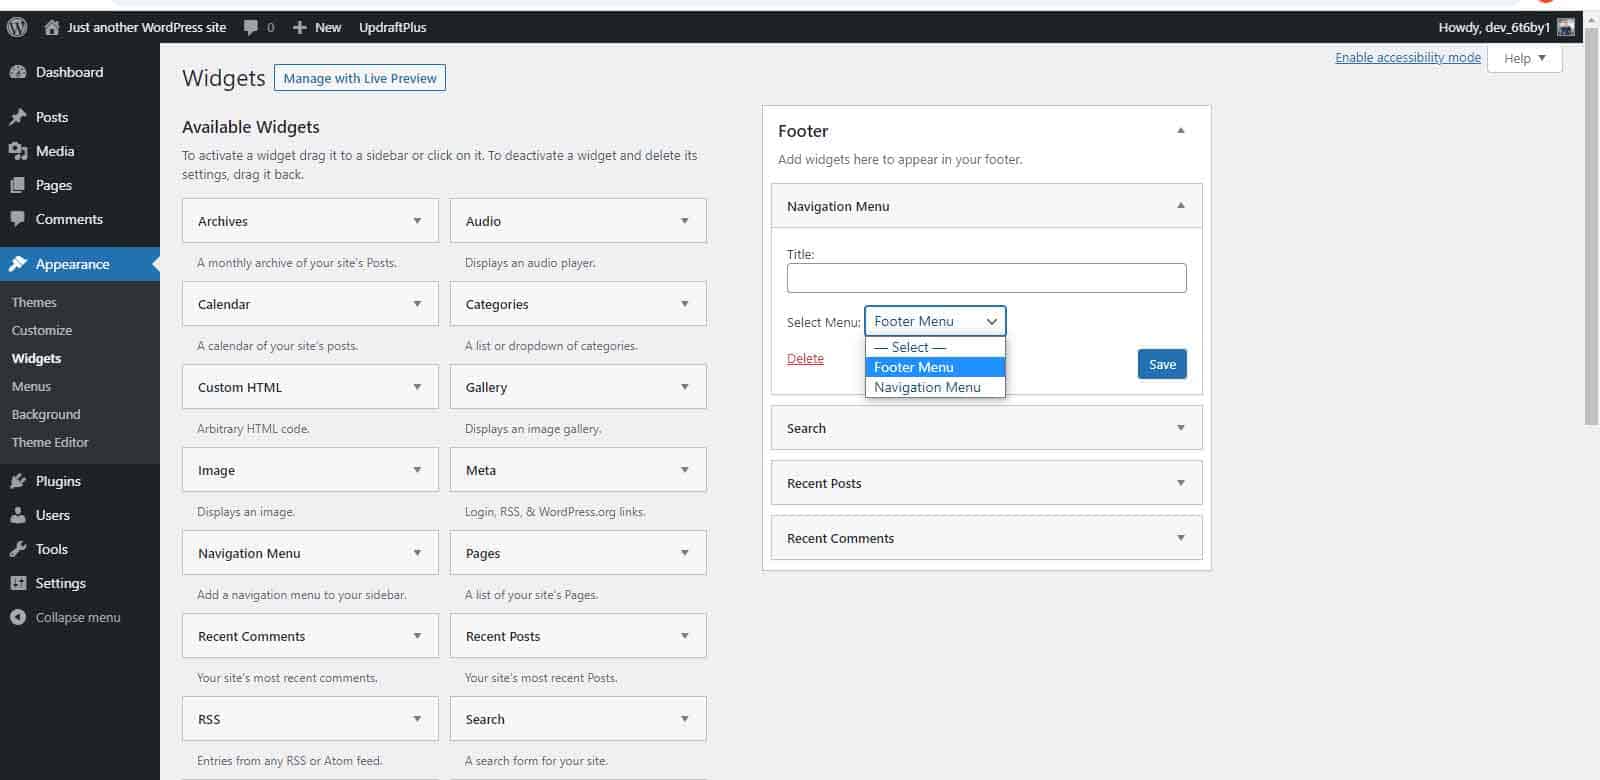
To add this new menu to your footer, go to Appearance » Widgets and add the Navigation Menu widget into your footer area. Select the correct navigation menu from the dropdown and click “Save”.
Method 2: Adding code
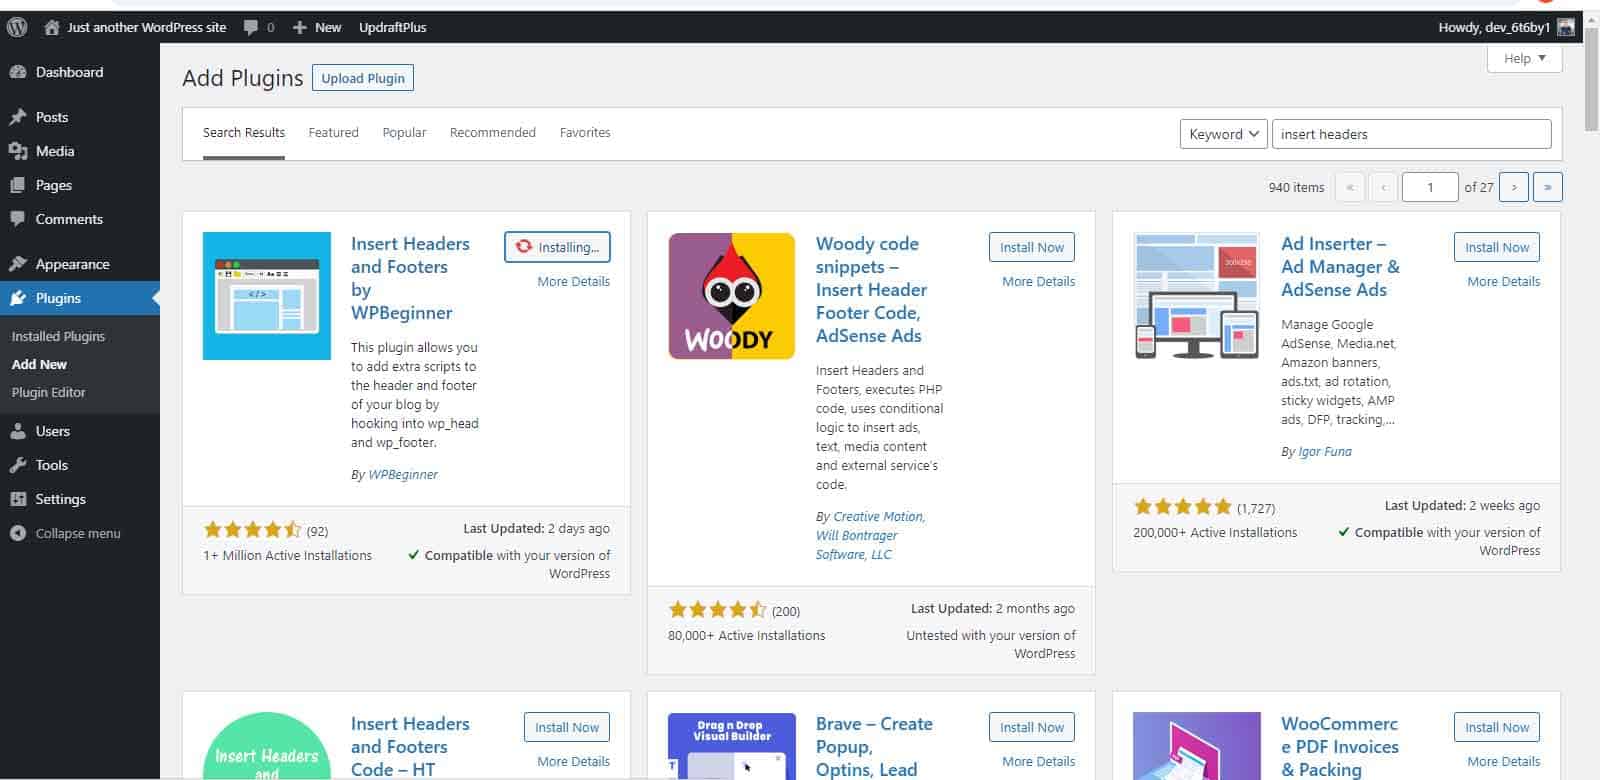
You might need to add code to your WordPress footer, for example, to add the Facebook pixel or link to an external app. Fortunately, you can do this easily, without editing your theme files, using the Insert Headers and Footers plugin.
Step 1: Download the Insert Headers and Footers plugin
Install and activate the plugin.
Step 2: Add the required code to your footer
Go to Settings » Insert Headers and Footers and add the code to the “Scripts in Footer” section.
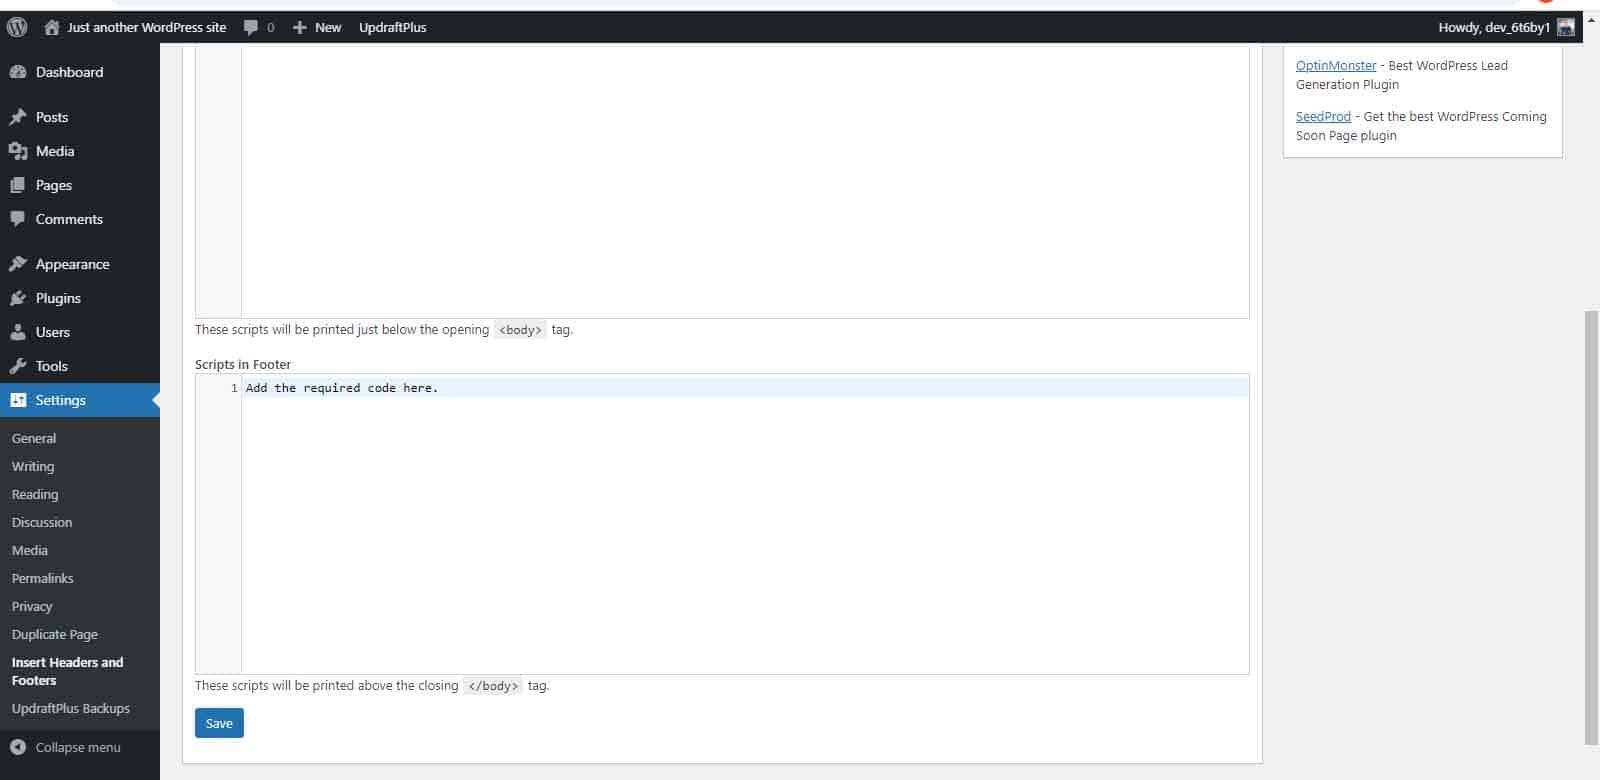
Click “Save”.
How to change WordPress password?
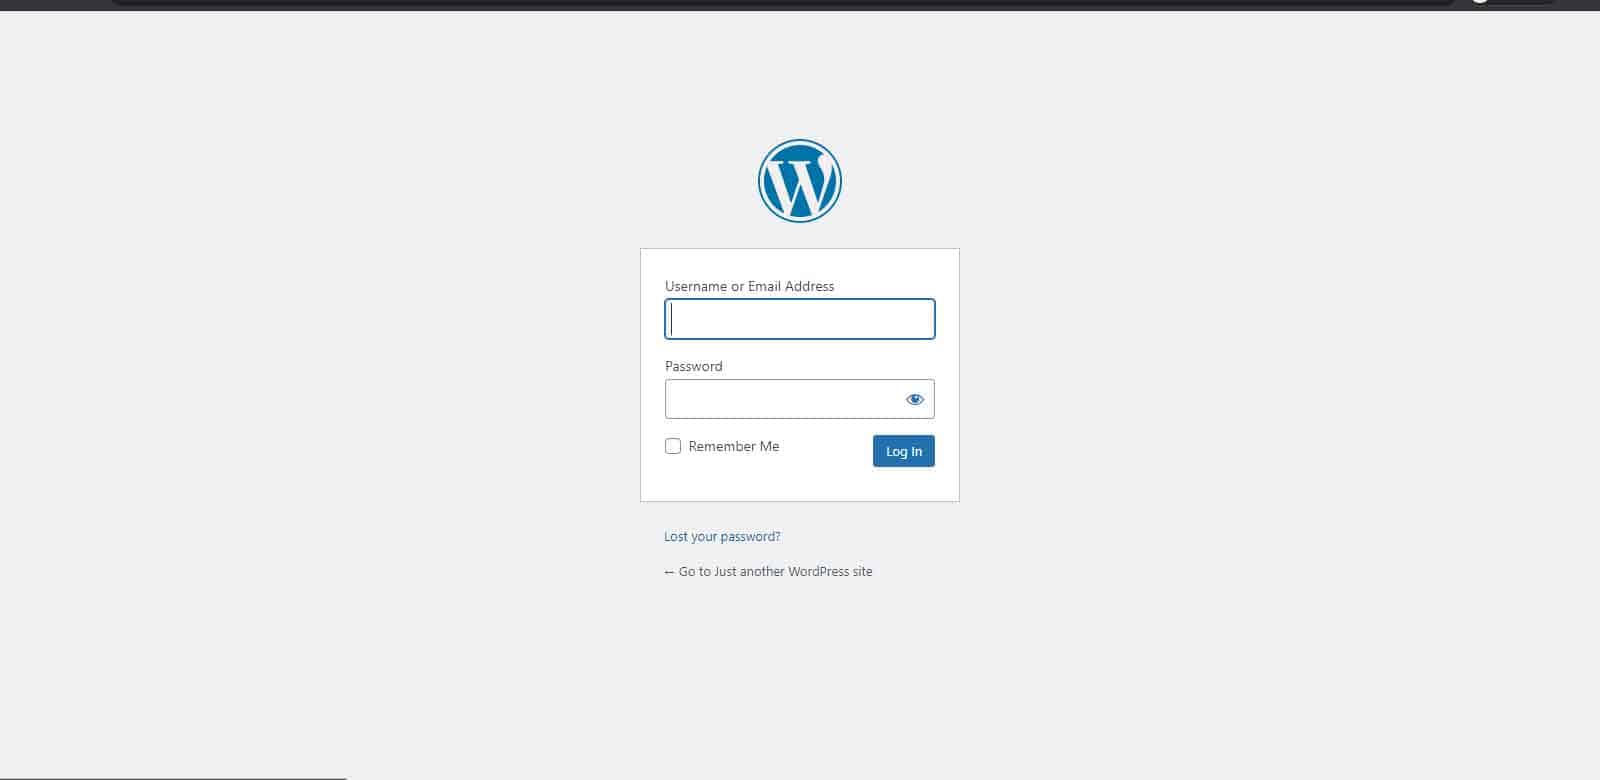
The easiest way to change your WordPress password is by clicking “Lost your password?” on the log in screen. You will simply have to provide your username or email address and a new password will be emailed to you.
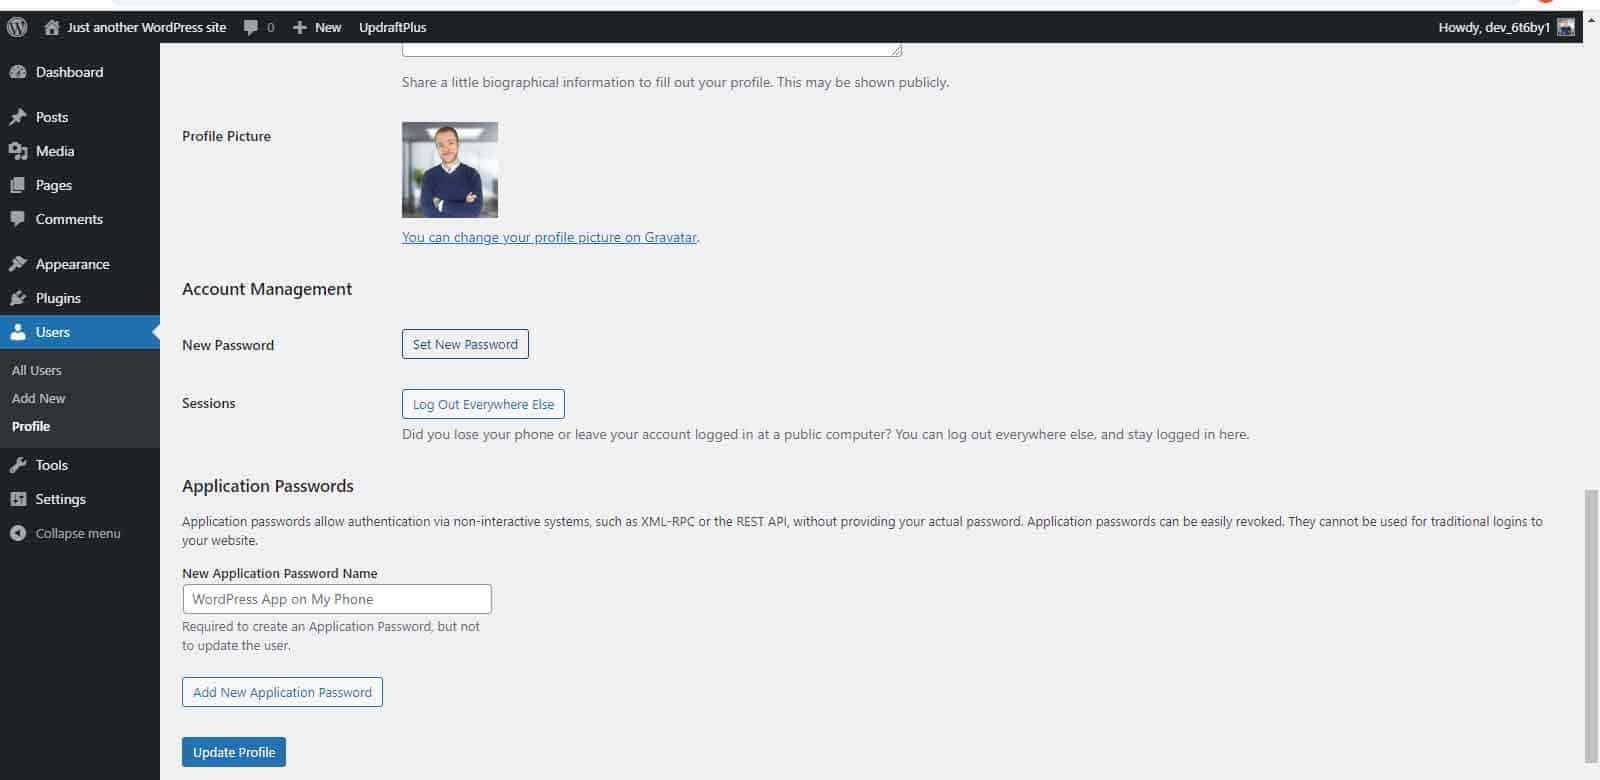
Alternatively, you can go to Users » All Users. Select the user to edit.
Find the New Password section and click “Set New Password”. You can either use the randomly generated password or enter your own. Click “Update Profile”.
How to update WordPress?
Every WordPress update includes enhancements that could improve and protect your website, so you must keep WordPress up to date to maximise your website’s speed and security.
For the same reason, you should also ensure all themes and plugins are updated regularly.
If there is a newer version of WordPress available, you will see a notification on your admin dashboard. Click the link in this message to get started.
WordPress will now advise you to run a backup of your website. Once the backup is finished, click “Update Now”.
You will be redirected to a confirmation page when the update is complete.
How to install SSL certificate in WordPress?
SSL certificates allow your website to use HTTPS and protect the information between your website and its users. This is essential if you are processing customer data of any kind.
Fortunately, installing an SSL certificate in WordPress is a straightforward process.
Step 1: Purchase your SSL certificate
You can usually purchase an SSL certificate from your hosting provider (it might even be included in your hosting package). Alternatively, there are third party providers that sell SSL certificates.
Step 2: Install your SSL certificate
To install your SSL certificate, go to the section for security in your control panel. Click on “SSL/TLS” and “Manage SSL sites”. Add the certificate details and click “Install Certificate”. You have now activated the SSL certificate for your domain.
Step 3: Migrate to your website to SSL
The easiest method is to use a plugin such as Really Simple SSL, which will do this automatically for you. Install the plugin.
When you activate the plugin, you can enable your SSL certificate by clicking the “Activate SSL” button.
How to make a WordPress child theme?
A child theme is a copy of your main theme. It has the same functionality, features and stylistic elements, but its files are kept separate. This means you can customise your child theme safely, without the risk that comes with editing your main theme directly.
The easiest way to make a child theme in WordPress is using a plugin such as Child Theme Generator.
If you would prefer to create your child theme manually, follow the steps below.
Step 1: Create a folder for your child theme
Login to your control panel and create a subfolder within your themes folder.
Step 2: Create the style sheet file
Create a file called style.css and add the below information:
/*
Theme Name: [Name of parent theme] Child
Template: [Name of the parent theme folder]
*/
Step 3: Create the functions.php file for your child theme
To import the style of the parent theme, create a file titled “functions.php”. Paste the following code:
<?php
add_action( ‘wp_enqueue_scripts’, ‘enqueue_parent_styles’ );
function enqueue_parent_styles() {
wp_enqueue_style( ‘parent-style’, get_template_directory_uri().’/style.css’ );
}
?>
Step 4: Activate your child theme
Go to Appearance » Theme in your WordPress dashboard. Here, you can activate your new child theme.
How to make a WordPress site private?
Making your WordPress website private is a straightforward process with the help of a plugin, such as My Private Site.
Install and activate the My Private Site plugin.

Go to My Private Site and navigate to the “Site Privacy” tab.
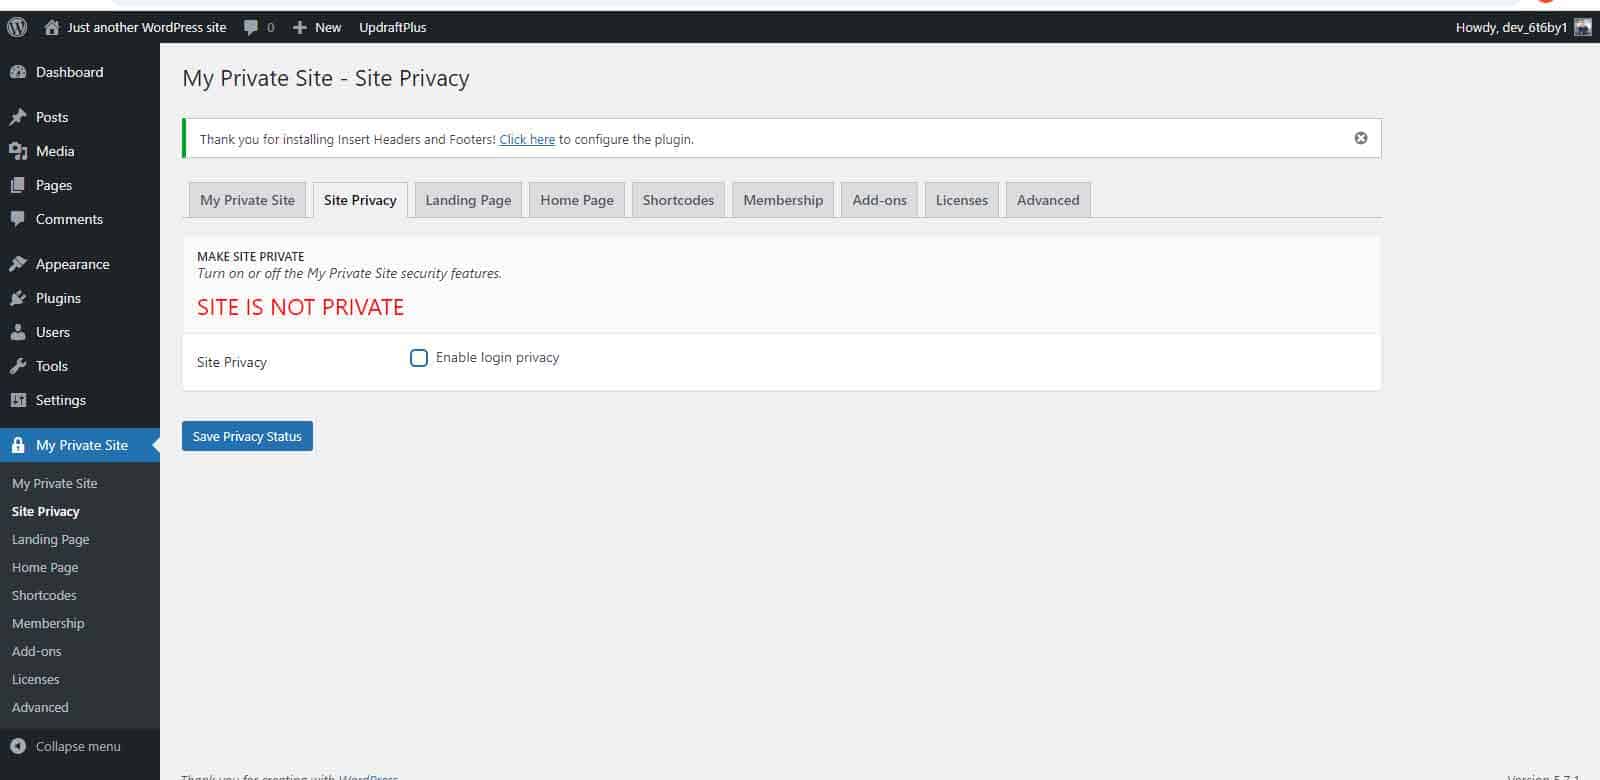
Tick the “Site Privacy” box. When you press “Save Privacy Status” your WordPress website will be private.
How to speed up your WordPress site?
By speeding up your WordPress website, you can appear higher in search engine rankings, increase your website traffic and improve overall user experience. We have shared our top tips below to help optimise the speed of your WordPress website.
Choose a good quality hosting provider
Many providers offer managed WordPress hosting on a server that is optimised for WordPress, meaning your website will perform faster.
Update your WordPress website
Every WordPress update includes improvements that could enhance the speed of your website, so it is important to update your website.
You should also ensure all themes and plugins are updated regularly.
Choose a simple theme
Some themes include so many unnecessary features that they can slow down your website. We therefore recommend using a simple theme. If you need any additional functionality, you can add this with plugins.
Optimise your images
All of your media files should be compressed, as larger images can impact the speed of your website. A plugin such as WP Compress will automatically reduce your file sizes to improve load times.
Use a caching plugin
Caching is the process of saving data from websites to help them load more quickly. Caching plugins, such as WP Fastest Cache, can therefore help to optimise the speed of your WordPress website.
Optimise background tasks
If your WordPress website runs any background processes, (automatic backups for example), these should be scheduled for a time of day with less traffic.
Test the speed of your plugins
It is good practice to test the speed of your website before and after installing a plugin. If the plugin affects performance, you should look for an alternative solution.
How to install WordPress plugins?
A WordPress plugin is software that can be added to your website to create a specific feature or function. Whatever functionality you require, it will almost definitely be possible with a plugin.
Method 1: Installing a plugin from the WordPress Plugin Directory
Step 1: Find the plugin
There are thousands of free WordPress plugins available in the WordPress Plugin Directory.
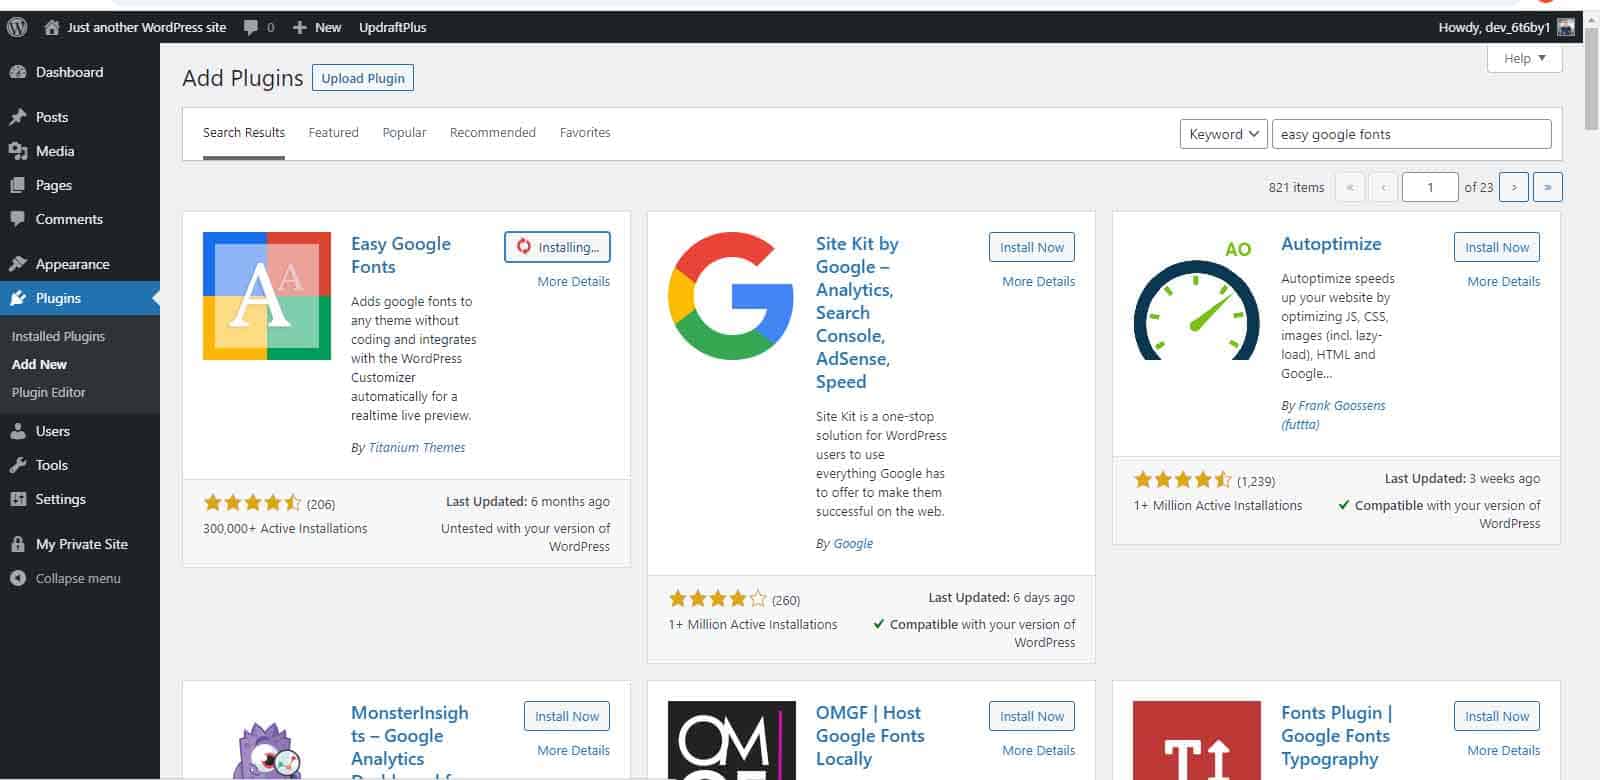
Select Plugins » Add New and use the search bar to find a plugin you would like to install.

Step 2: Install and activate the plugin
Select Install Now » Activate.

Method 2: Installing a paid plugin
You can also buy plugins from third parties. These aren’t available in the WordPress Directory, so they need to be installed using the upload method.
Step 1: Download the plugin
After purchasing your third-party plugin, download the zip file to your computer.
Step 2: Upload the plugin in your WordPress admin area
Go to Plugins » Add New. Click “Upload Plugin”.
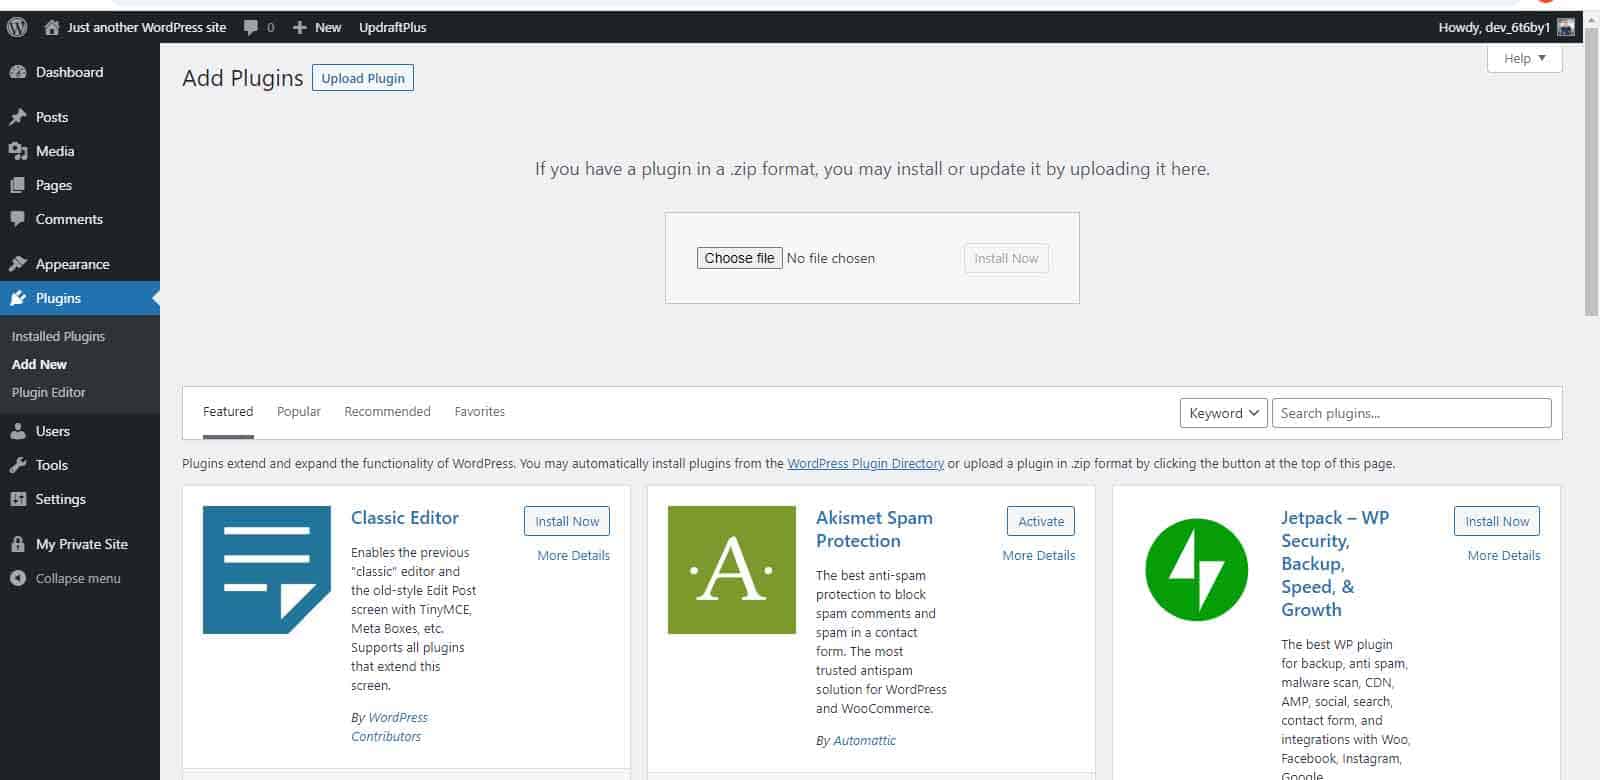
Select the zip file for the plugin and click “Install Now”. WordPress will now upload and install your third-party plugin.
Step 3: Activate the plugin
Click “Activate”.
How to change font in WordPress?
Font choice is an important detail in your website’s design. Therefore, if the default font in your WordPress theme doesn’t set the right tone, you should change it to a font that better suits your brand.
There are only a handful of ways that you can change the font in WordPress. Fortunately, the two methods below are straightforward and do not require any coding knowledge.
Method 1: Using the WordPress Customiser
Many themes will offer a range of fonts that you can change using the Customiser, which you can find by going to Appearance » Customise.
Method 2: Using a plugin
If your theme does not offer your preferred font, you can use a plugin such as Easy Google Fonts. This plugin is compatible with any theme and has a choice of over 600 fonts.
Install and activate the Easy Google Fonts plugin.
Go to Appearance » Customise » Typography.
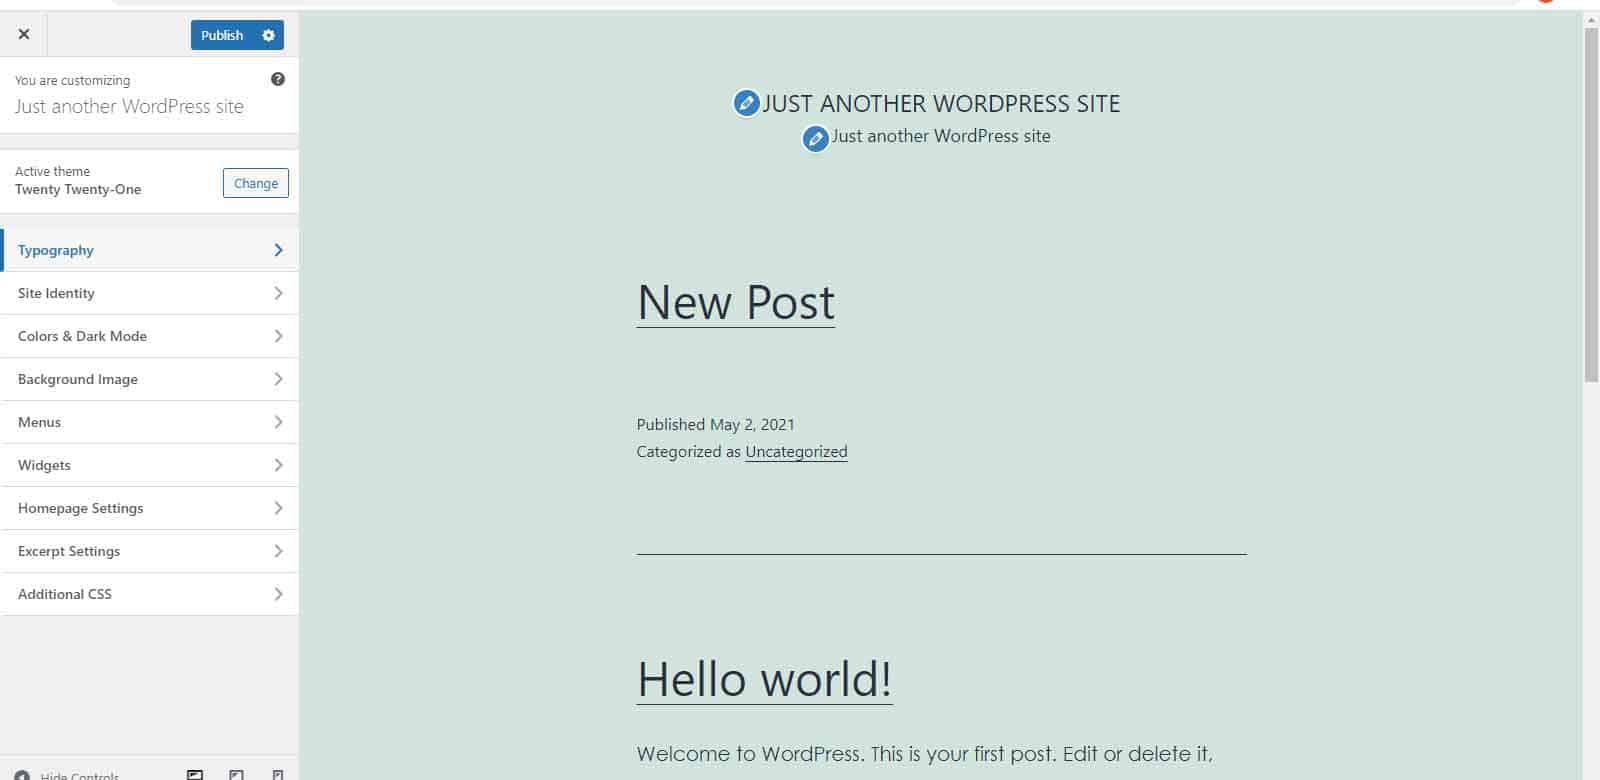
From here, you can edit the font style, appearance and positioning for each section of a page.
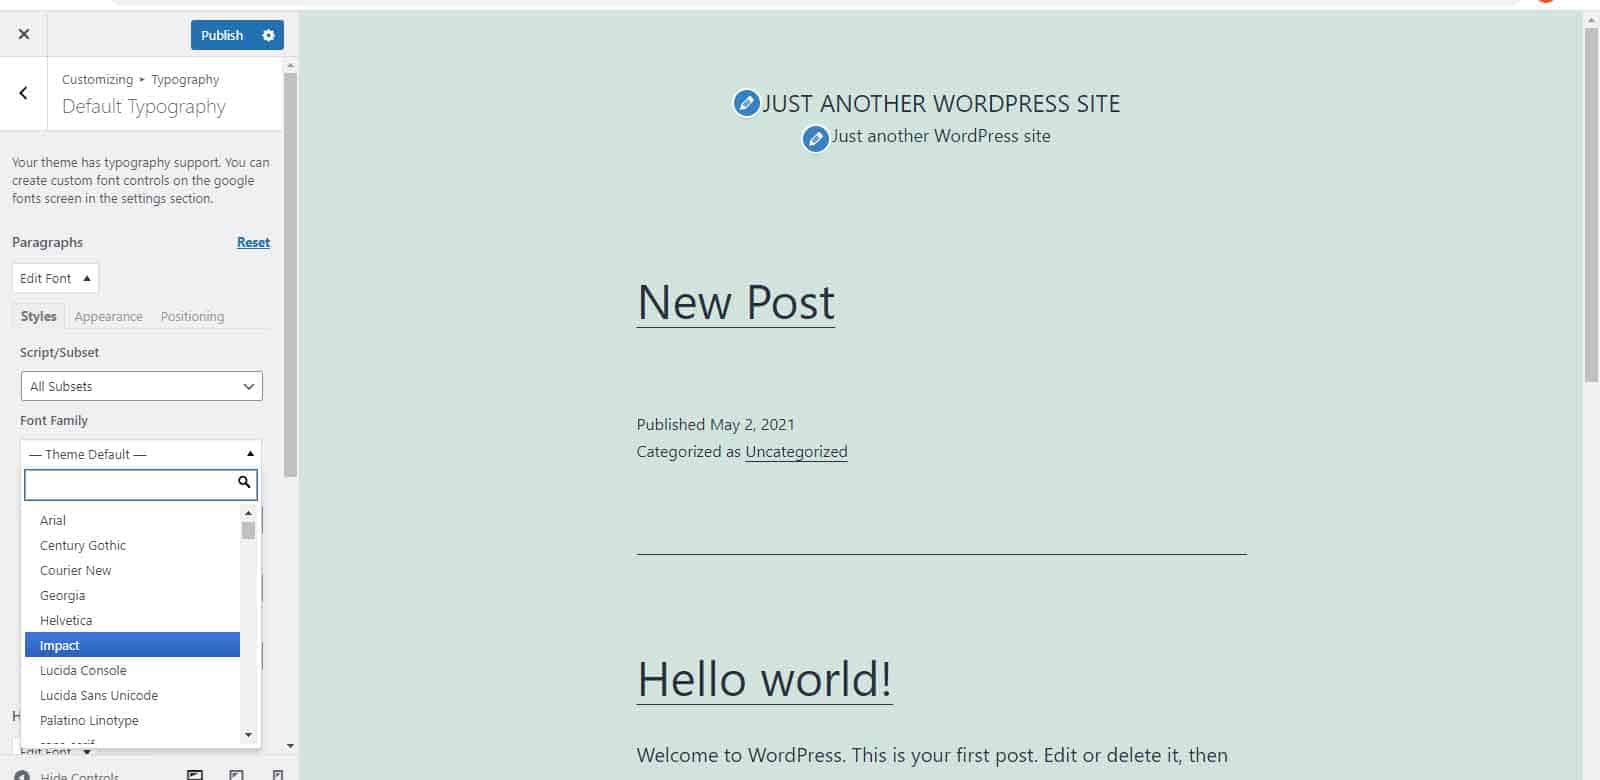
When you are finished, simply click “Publish”.
How to change front page in WordPress?
By default, your WordPress homepage includes a list of posts in date order. However, if a blog is not the focus of your website, you might want to create a static homepage instead. To do so, follow our simple instructions below.
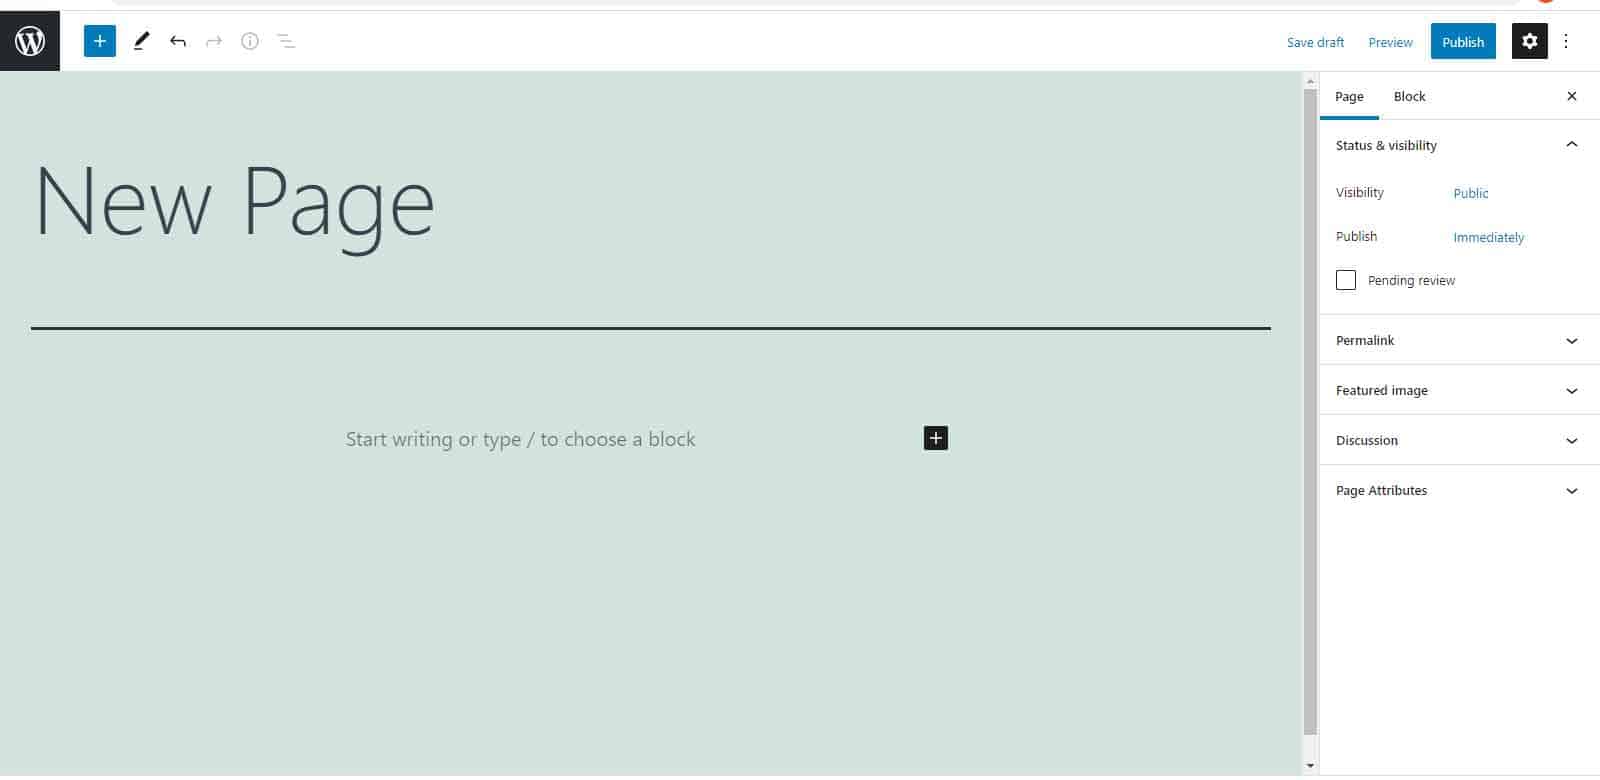
Step 1: Create your front page
To create a page, go to Pages » Add New. This will bring you to the page editor. From here, you can add a page title and page content such as text and images.
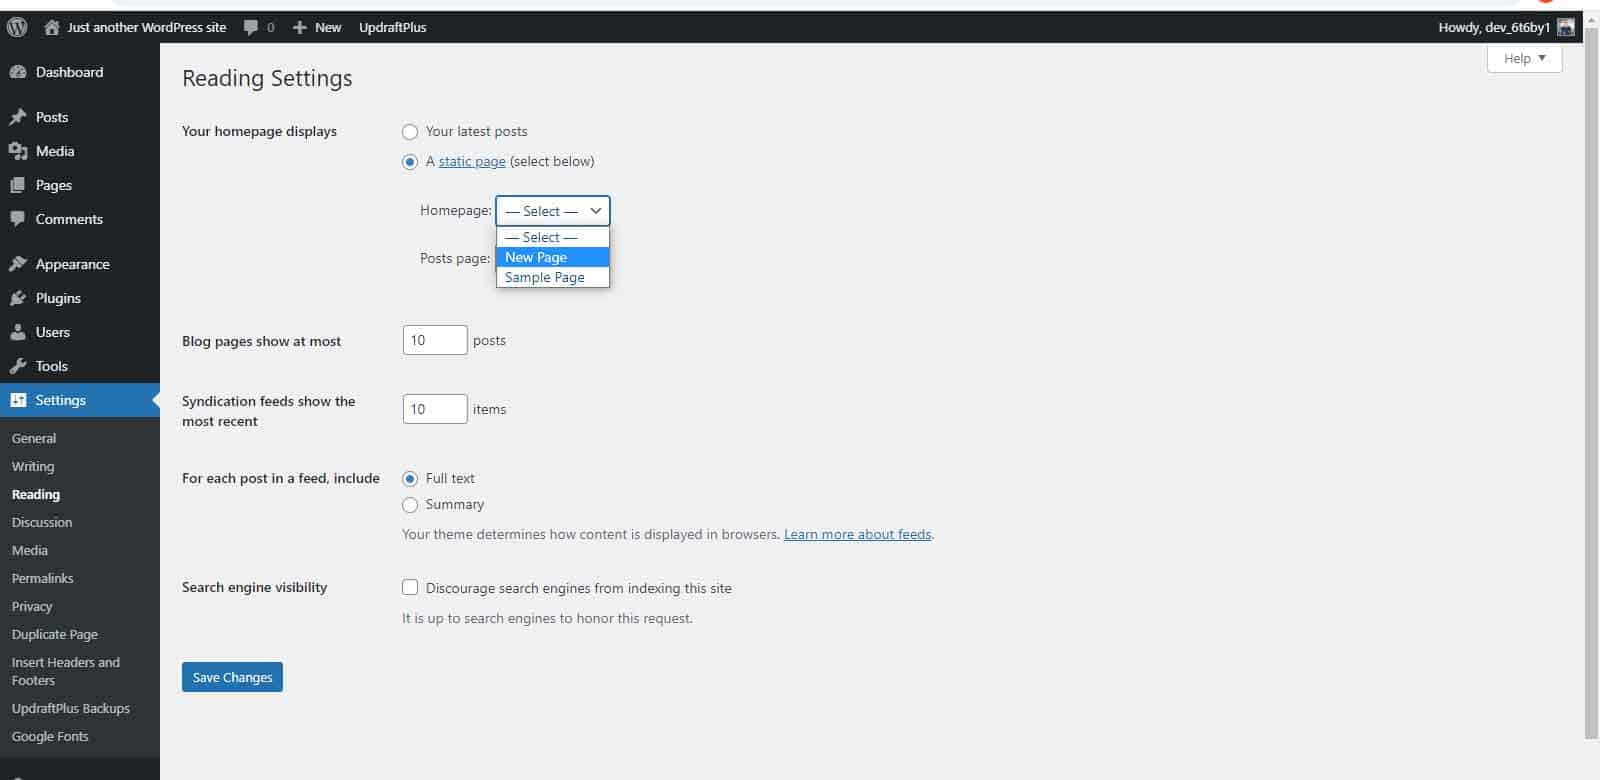
Step 2: Update your homepage in Settings
Go to Settings » Reading and select “a static page” to display on the homepage. Use the dropdown menu to designate your front page.
How to edit categories in WordPress?
WordPress categories help you to organise your posts into groups, making it easier for your visitors to navigate your website.
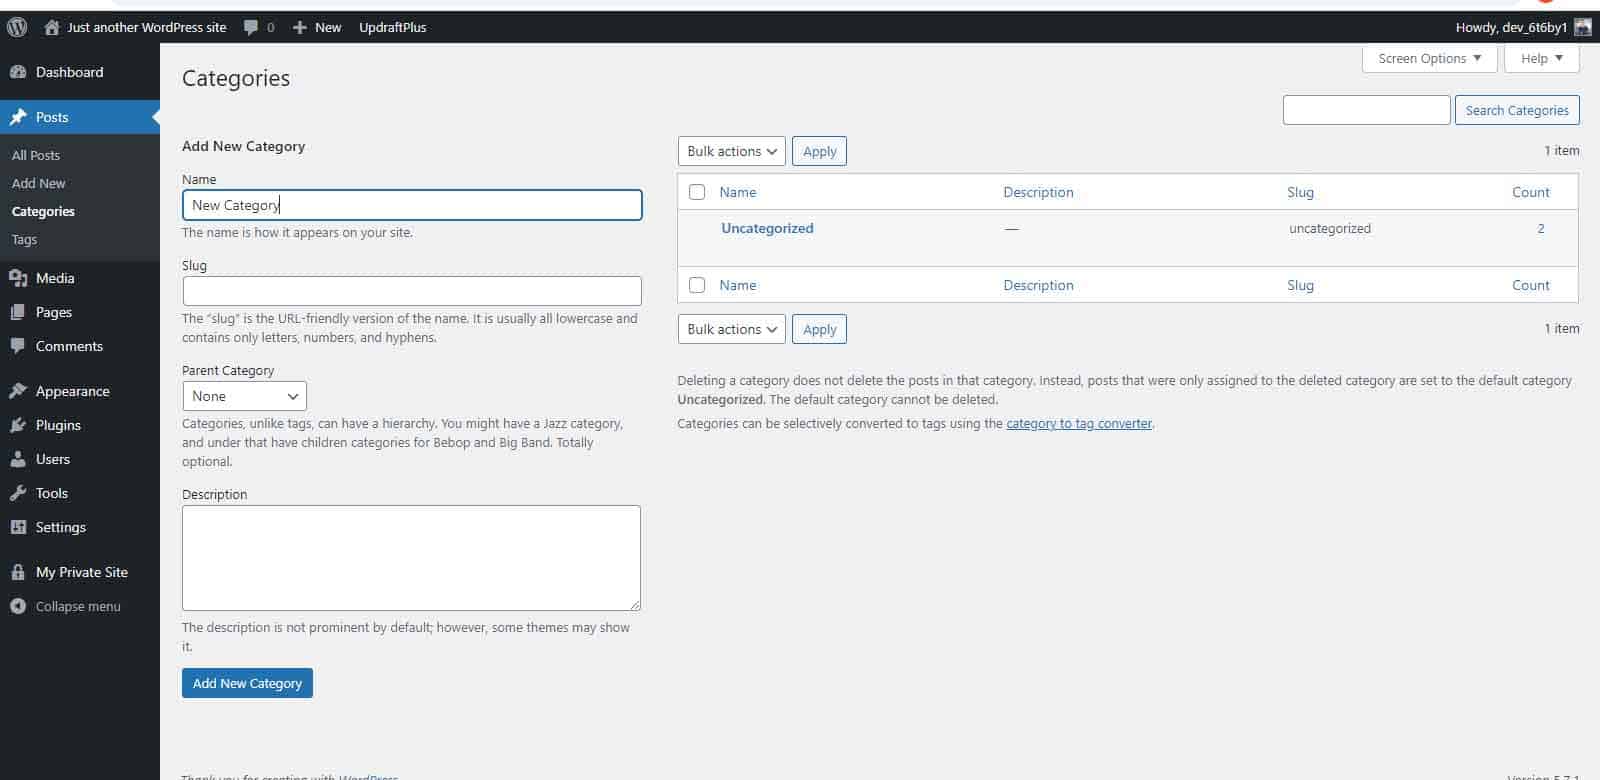
New categories can be added while writing a post. Alternatively, go to Posts » Categories. Write a name and description for the category and click “Add New Category”.
The process is just as easy if you need to edit an existing category. Go to Posts » Categories and hover over the category you want to edit. Click “Edit”.
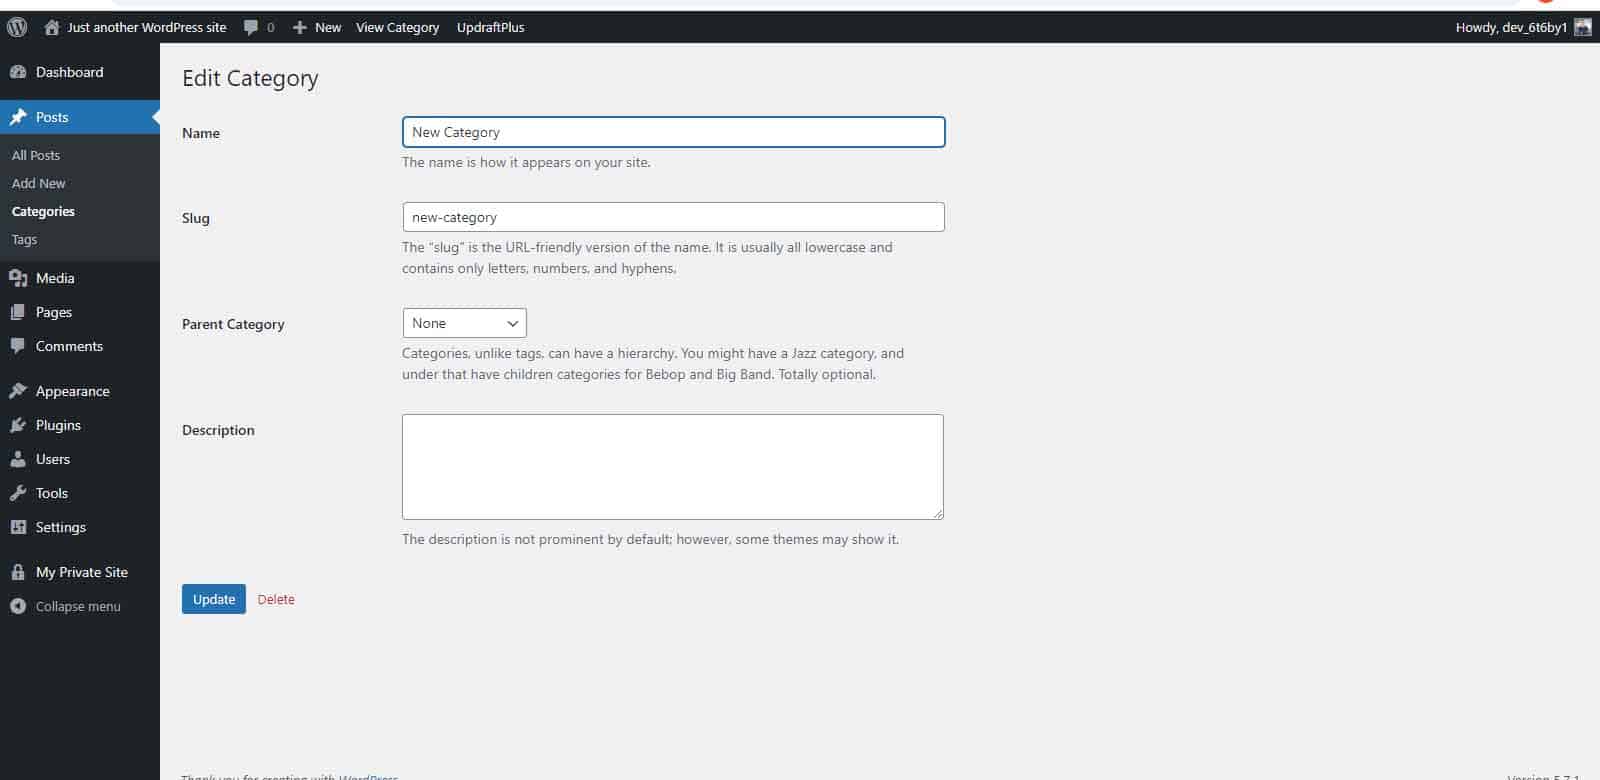
From the edit section, you can edit the category name, slug and update parent categories. There is also an option to delete a category entirely. This will delete the category and move any associated posts to the default categories.
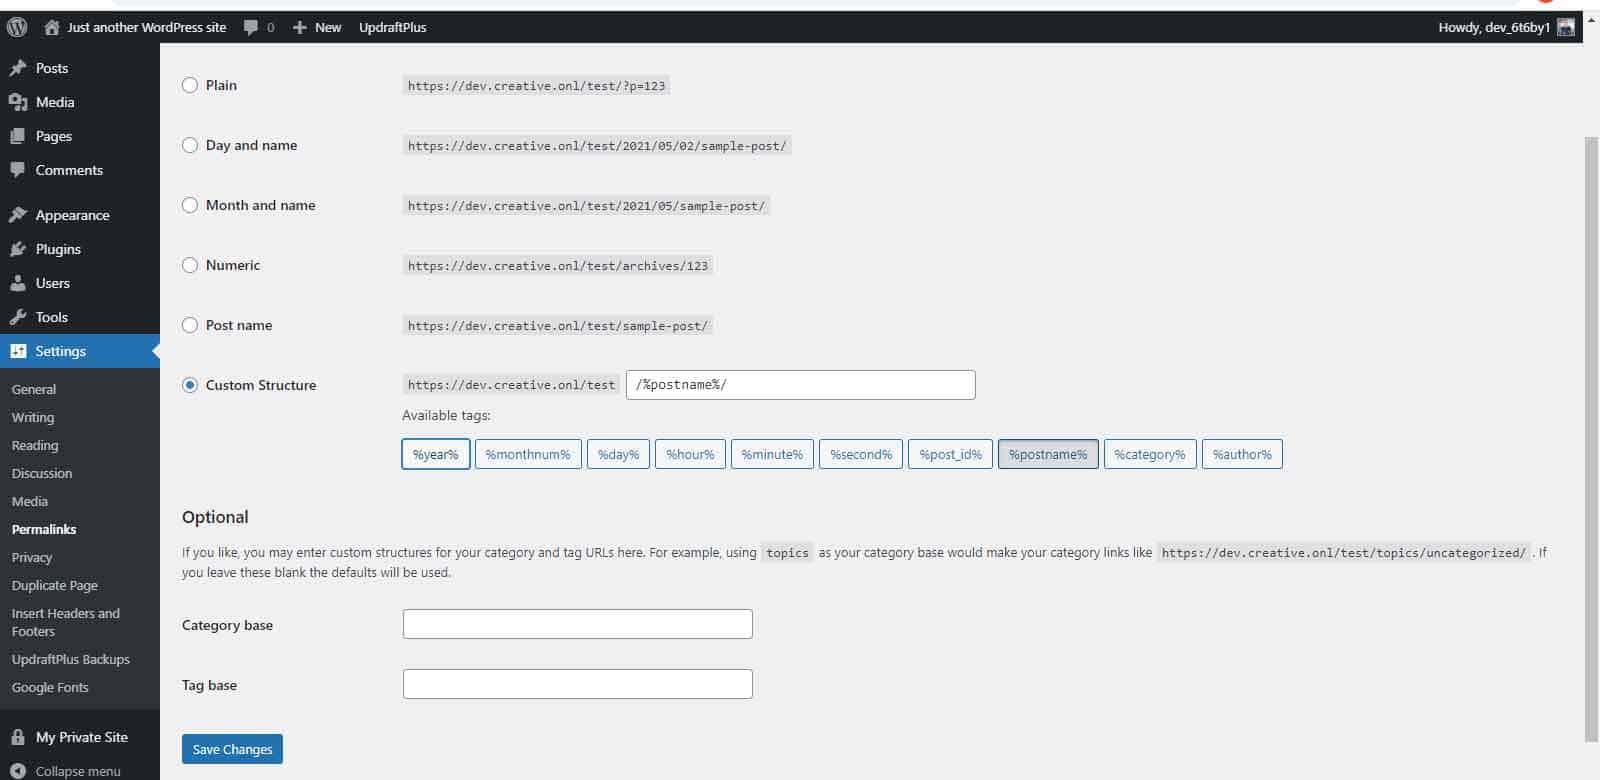
How to change permalink in WordPress?
To customise permalinks in WordPress, you can either change your website’s URL structure, or edit a specific page or post URL. We have included instructions for both methods below.
If you are amending permalinks after the content has been published, you should also consider setting up URL redirection to avoid any broken links.
Change the structure of permalinks across your website
Go to Settings » Permalinks. Select “Custom Structure” and add your desired tags in the order you would like them to show. Click “Save Changes”.
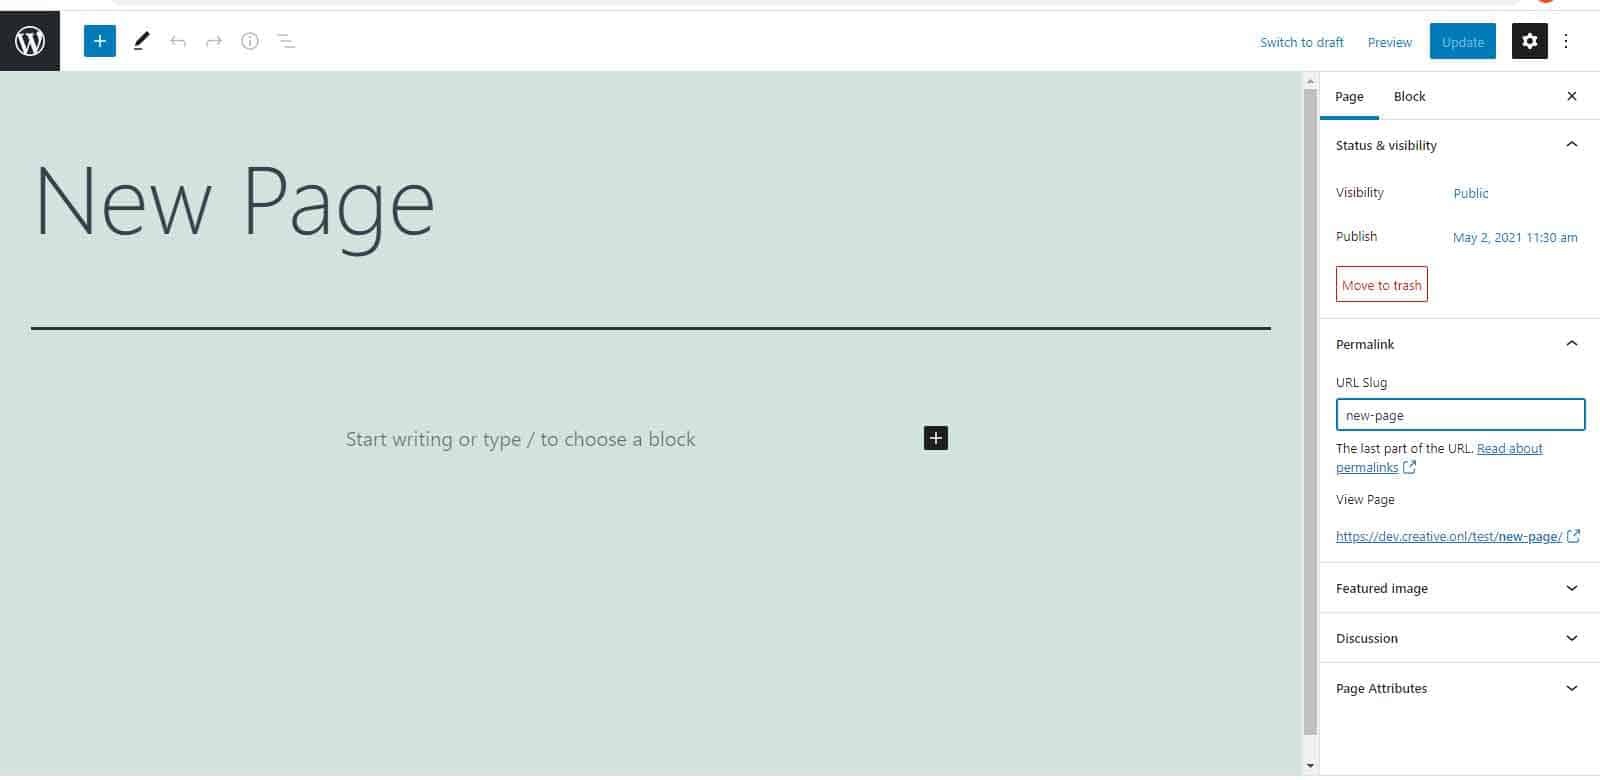
Change the permalink for an individual page or post
In the page or post editor, click the “Edit” button next to the existing permalink. You will now be able to change the end of the URL.
How to add meta description in WordPress?
Meta descriptions provide a short description of a page’s content, which is displayed by search engines in their search results. A successful meta description will persuade the user to visit your page and increase the amount of traffic to your website.
It is beneficial to add a meta description for every post and page on your WordPress website.
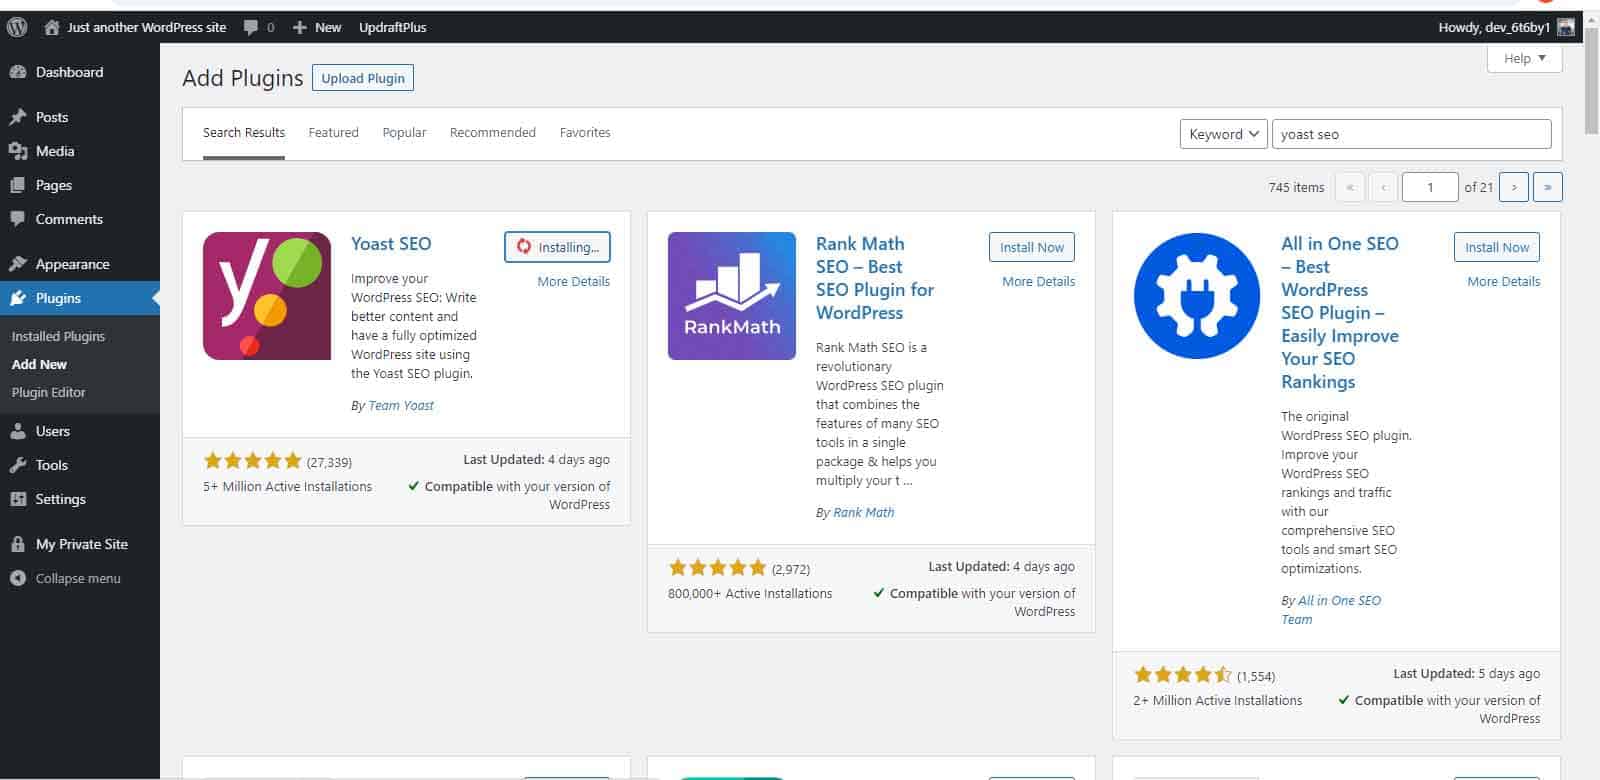
The Yoast SEO plugin has a number of valuable features to help improve your SEO. This includes adding meta descriptions.
Step 1: Download the Yoast SEO plugin
Install and activate the plugin.
Step 2: Add a meta description to your page
On the page editor, there should be a new Yoast SEO tab.
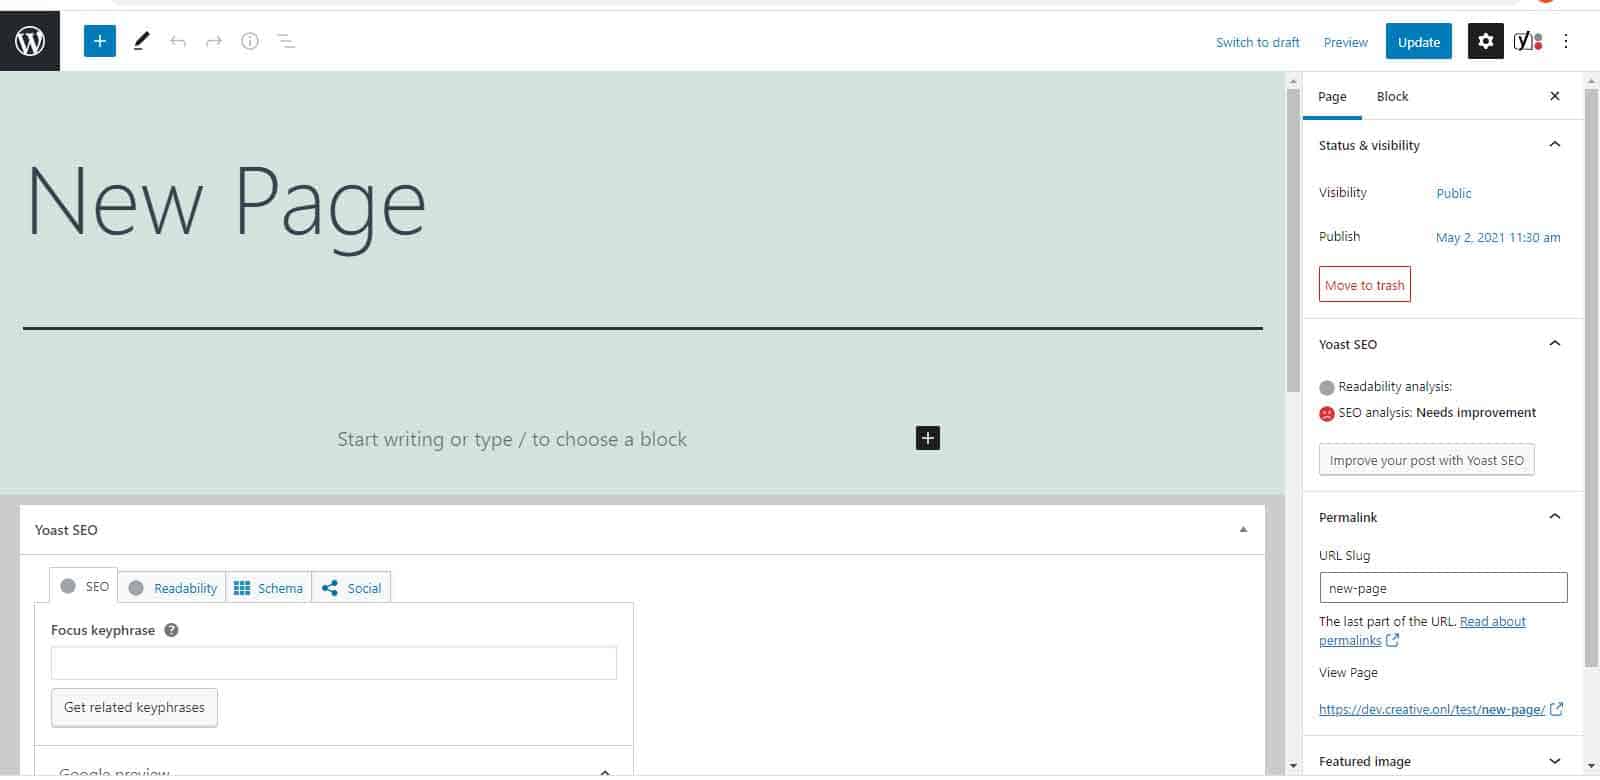
Scroll down to find the “meta description” field. Type your meta description into this field. The bar underneath will turn green when your meta description is the recommended length.
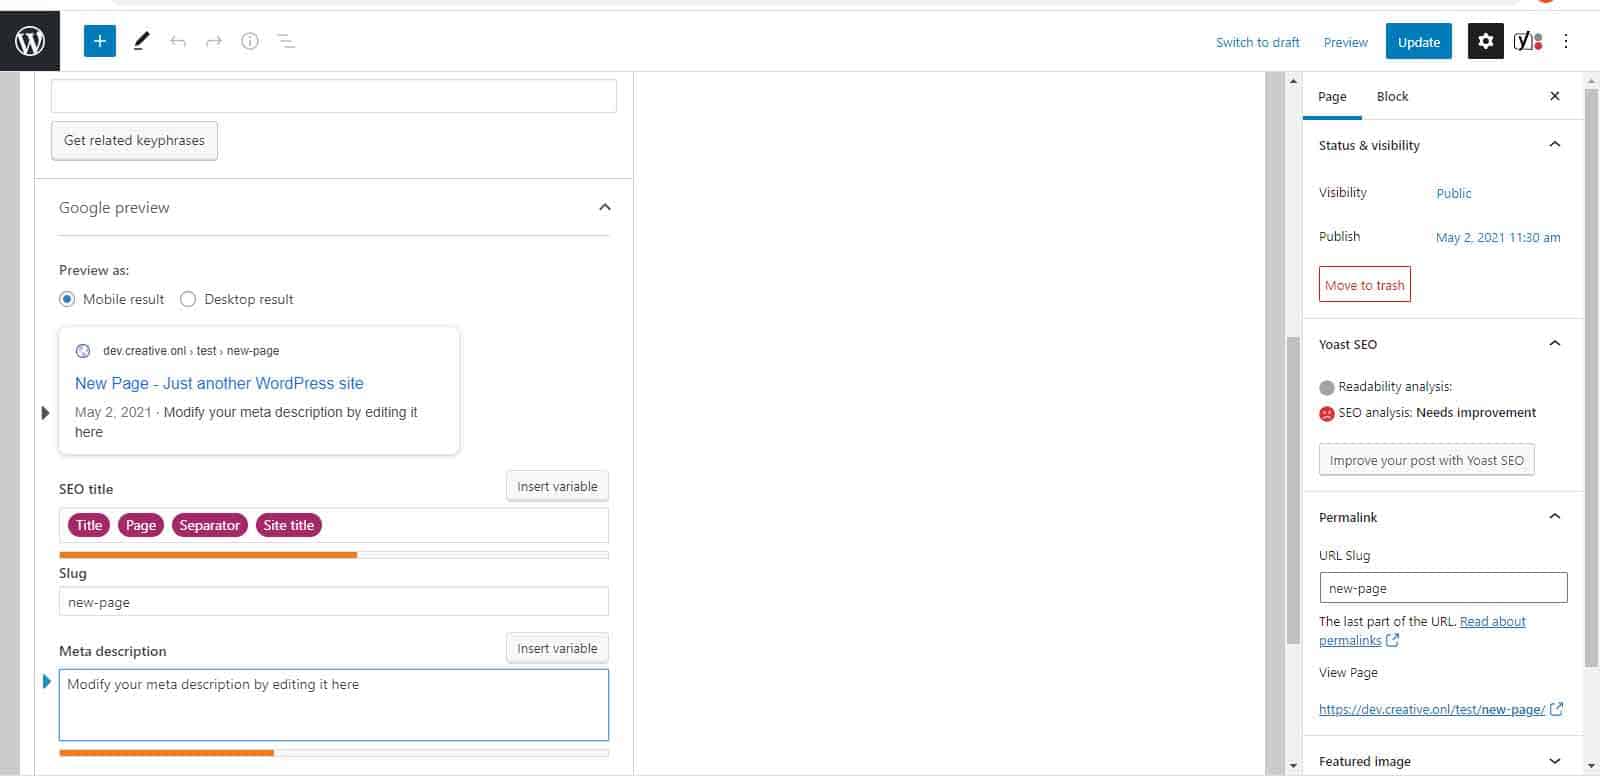
Click “Update”.
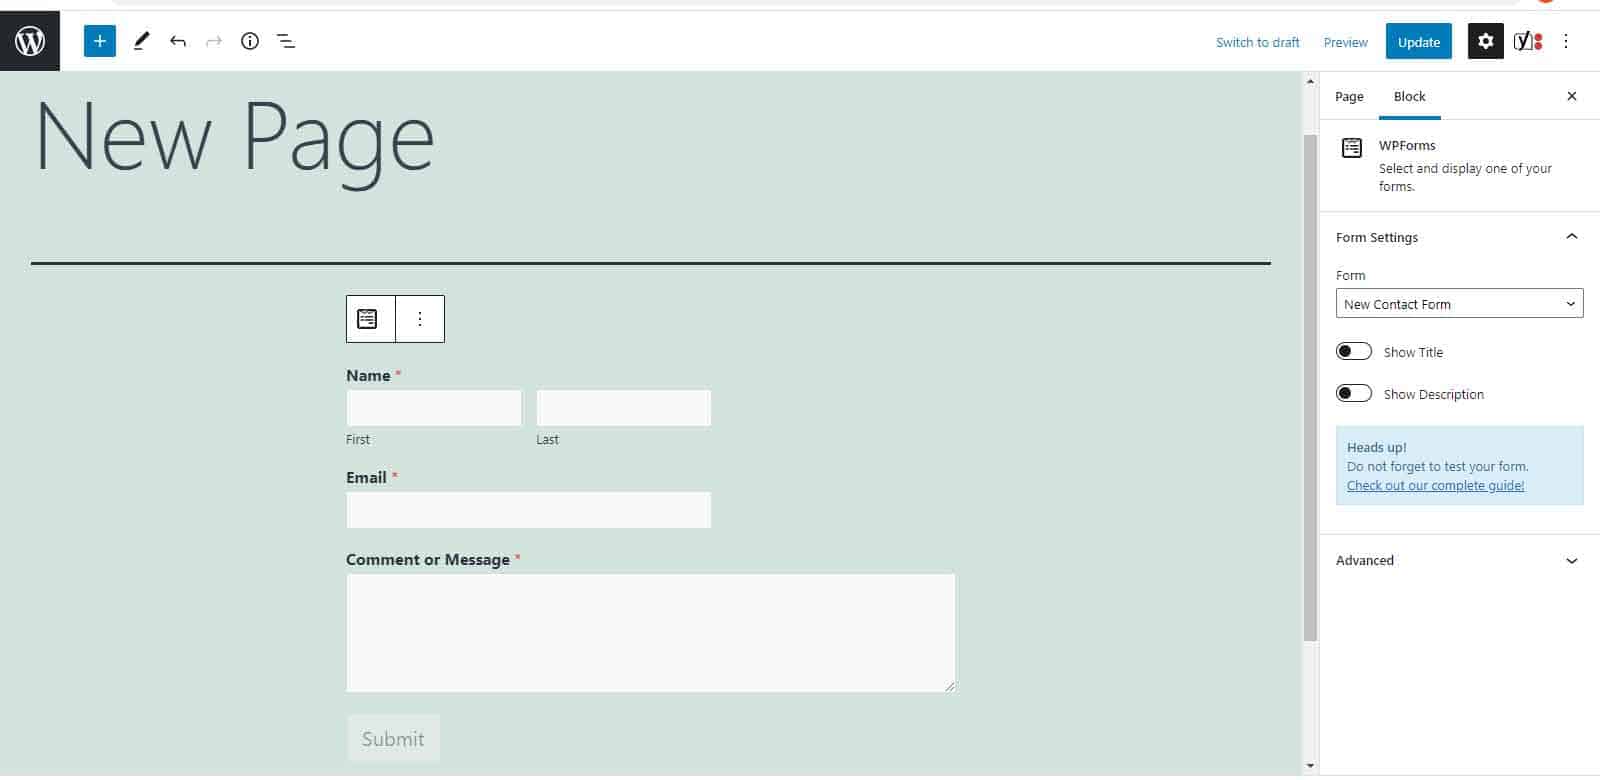
How to add contact form in WordPress?
Every website should have a contact form to make it as easy as possible for visitors to contact you.
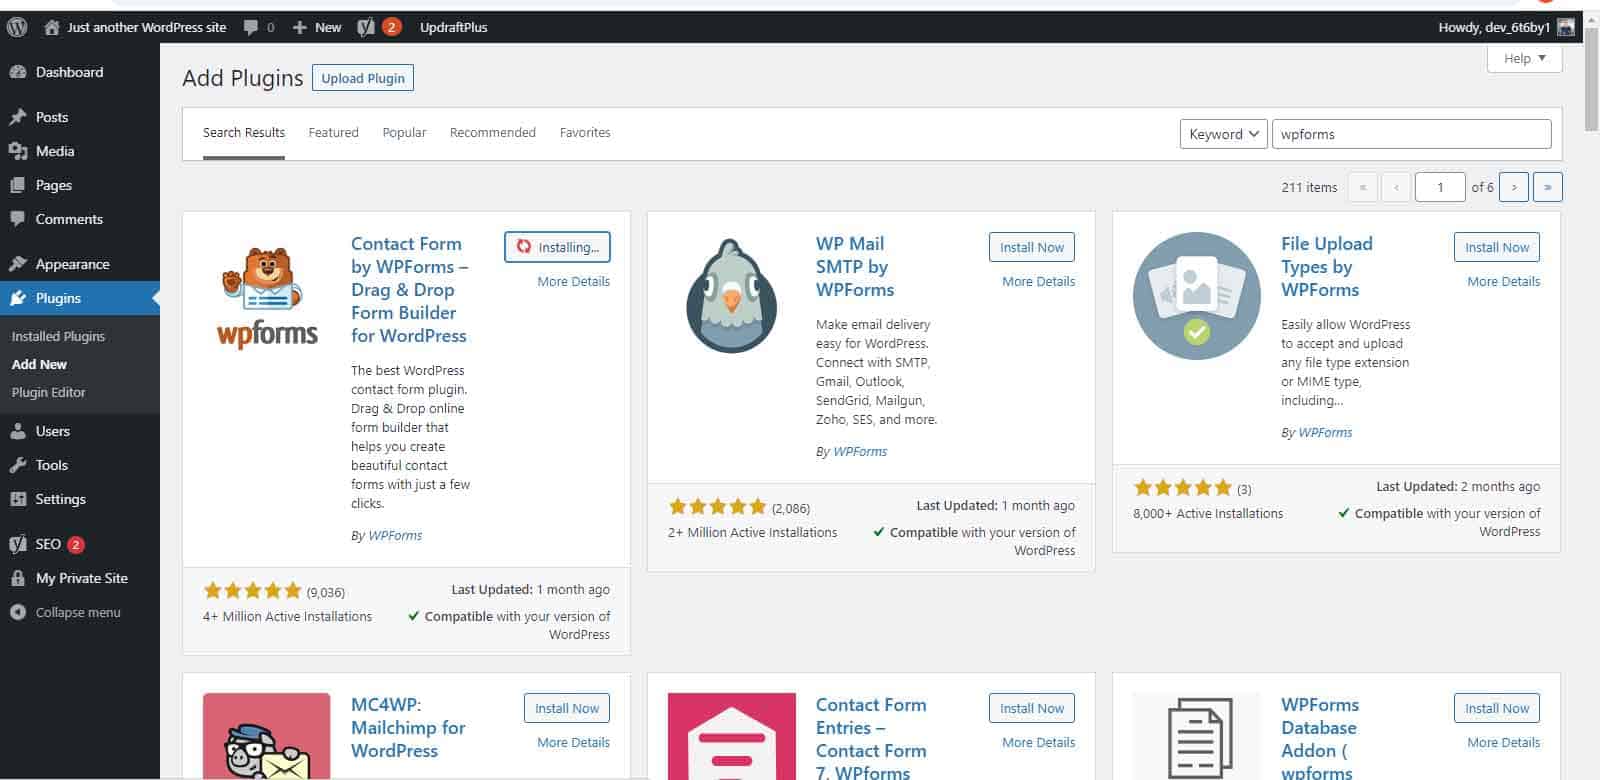
Adding a contact form to your WordPress website is easy with the WPForms plugin.
Step 1: Download the WPForms plugin
Install and activate the plugin.
Step 2: Create a contact form
Go to WPForms » Add New. Add a name for your contact form and select a contact form template.
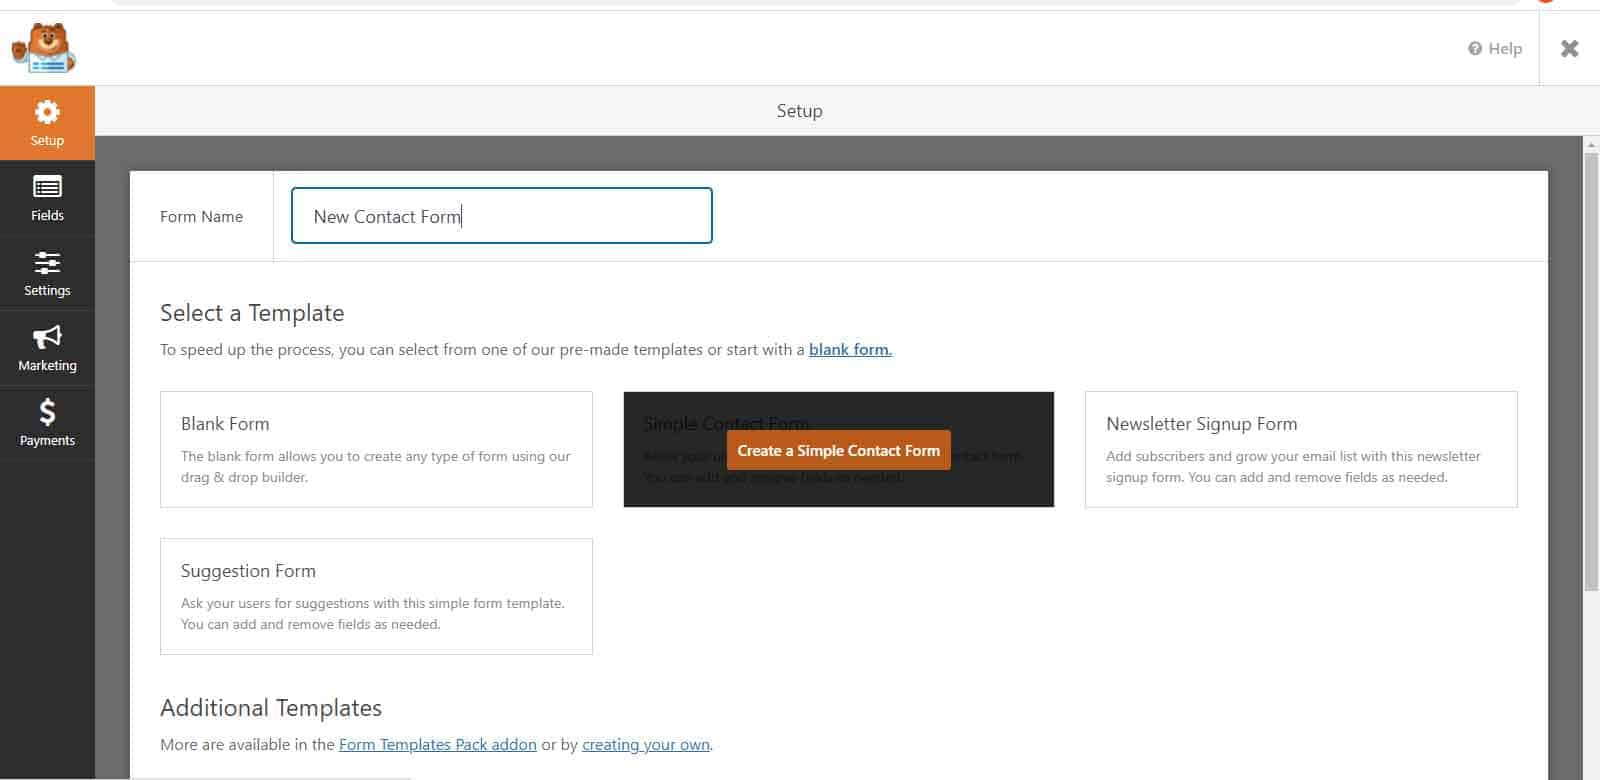
Simply click on a field to edit it and use the drag and drop form builder to change the order of the fields. Additional fields on the left can also be added to your form.
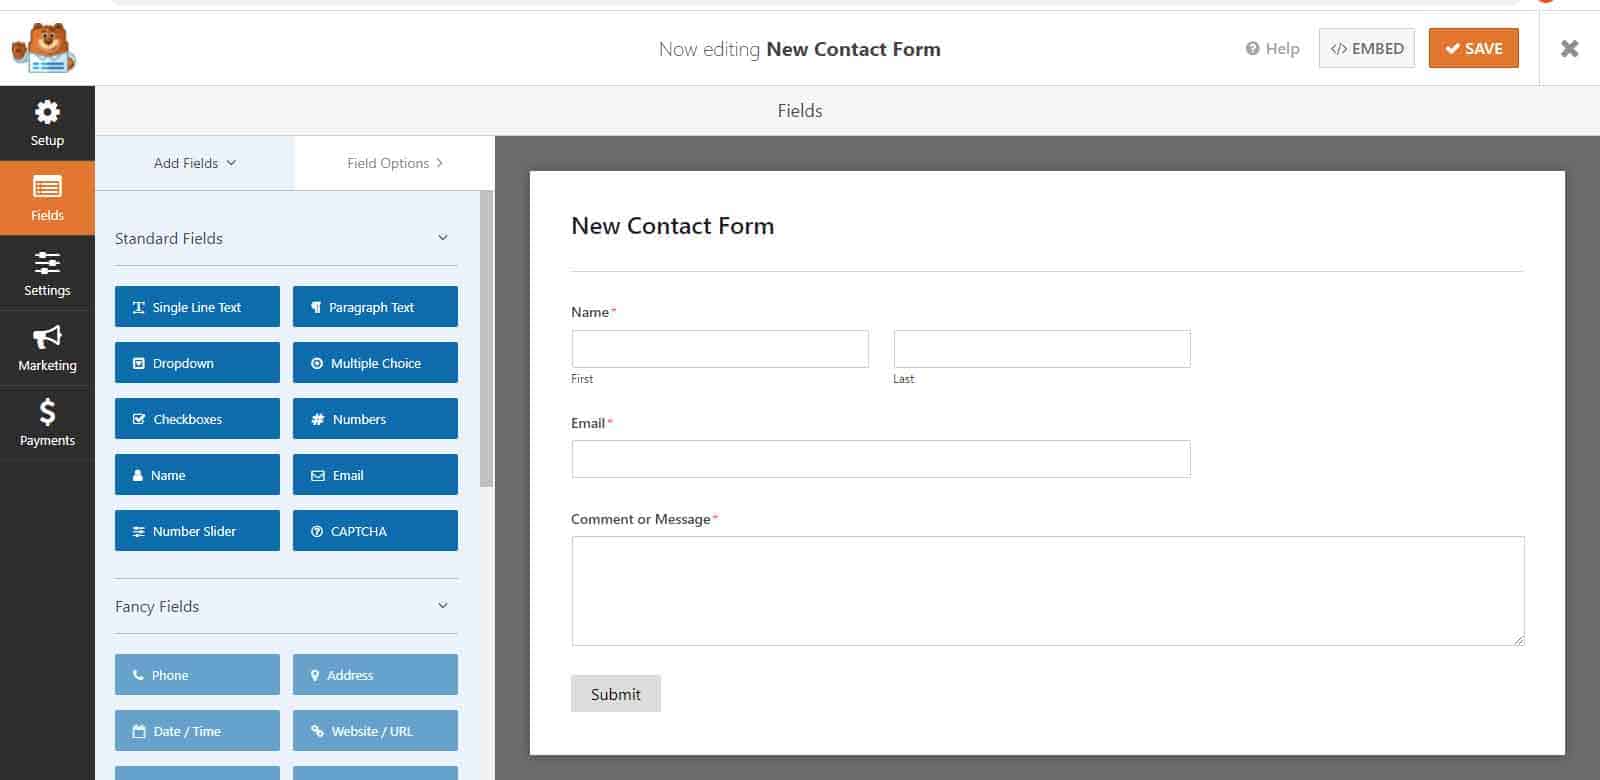
Click “Save”.
Step 3: Set up notifications and confirmations
Now you need to set up the confirmation that is displayed when a user submits the form. It is also important to configure notification emails, so that you are alerted when a new contact form submission is received. To do this, go to the settings tab inside the form builder.
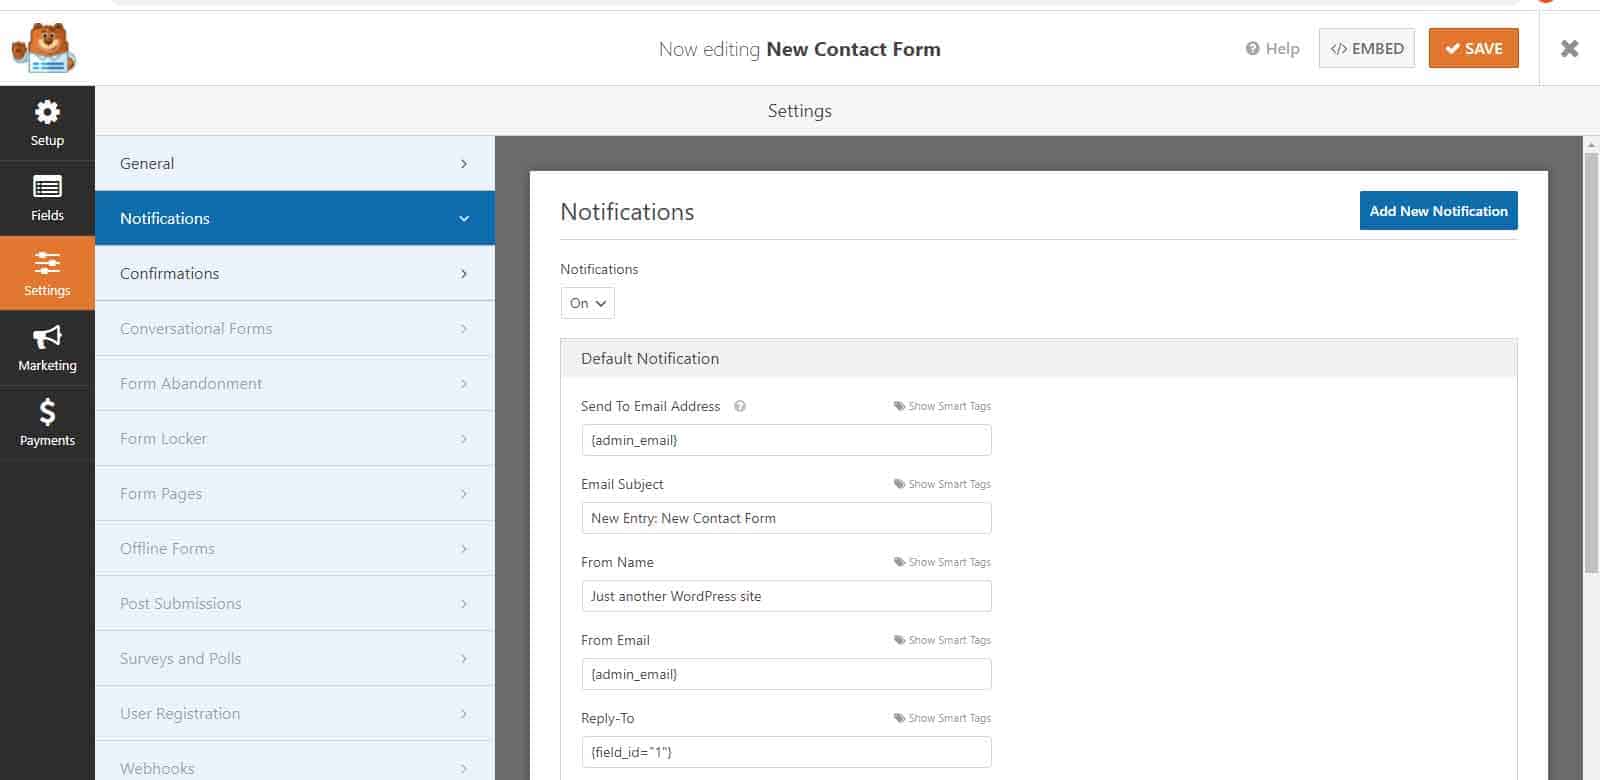
Notifications will automatically be sent to your WordPress admin email address. However, you can also change this in the settings.
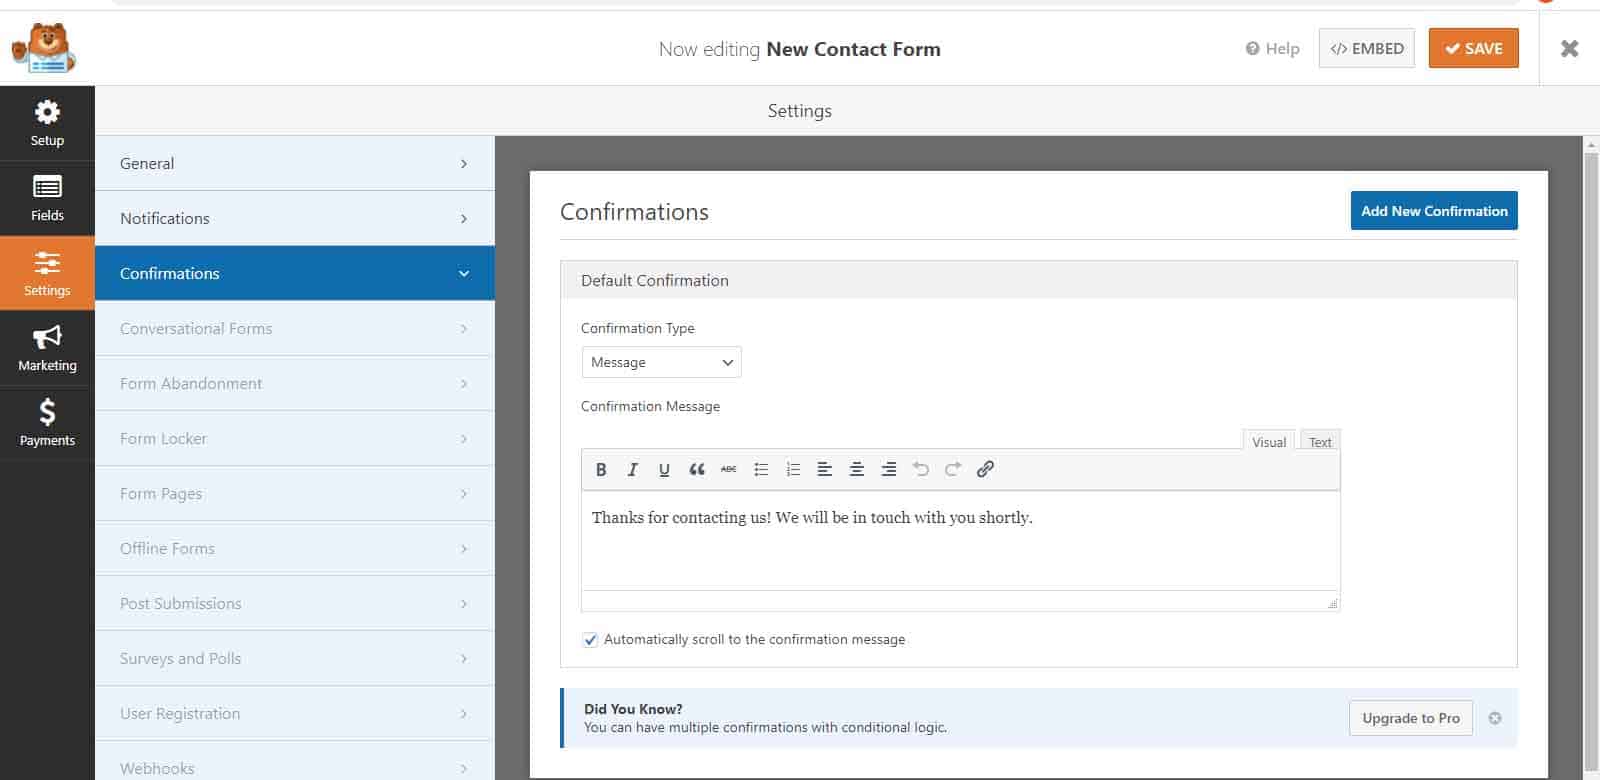
You can either leave the form confirmation as the default “thank you” message or edit it to redirect to another page.
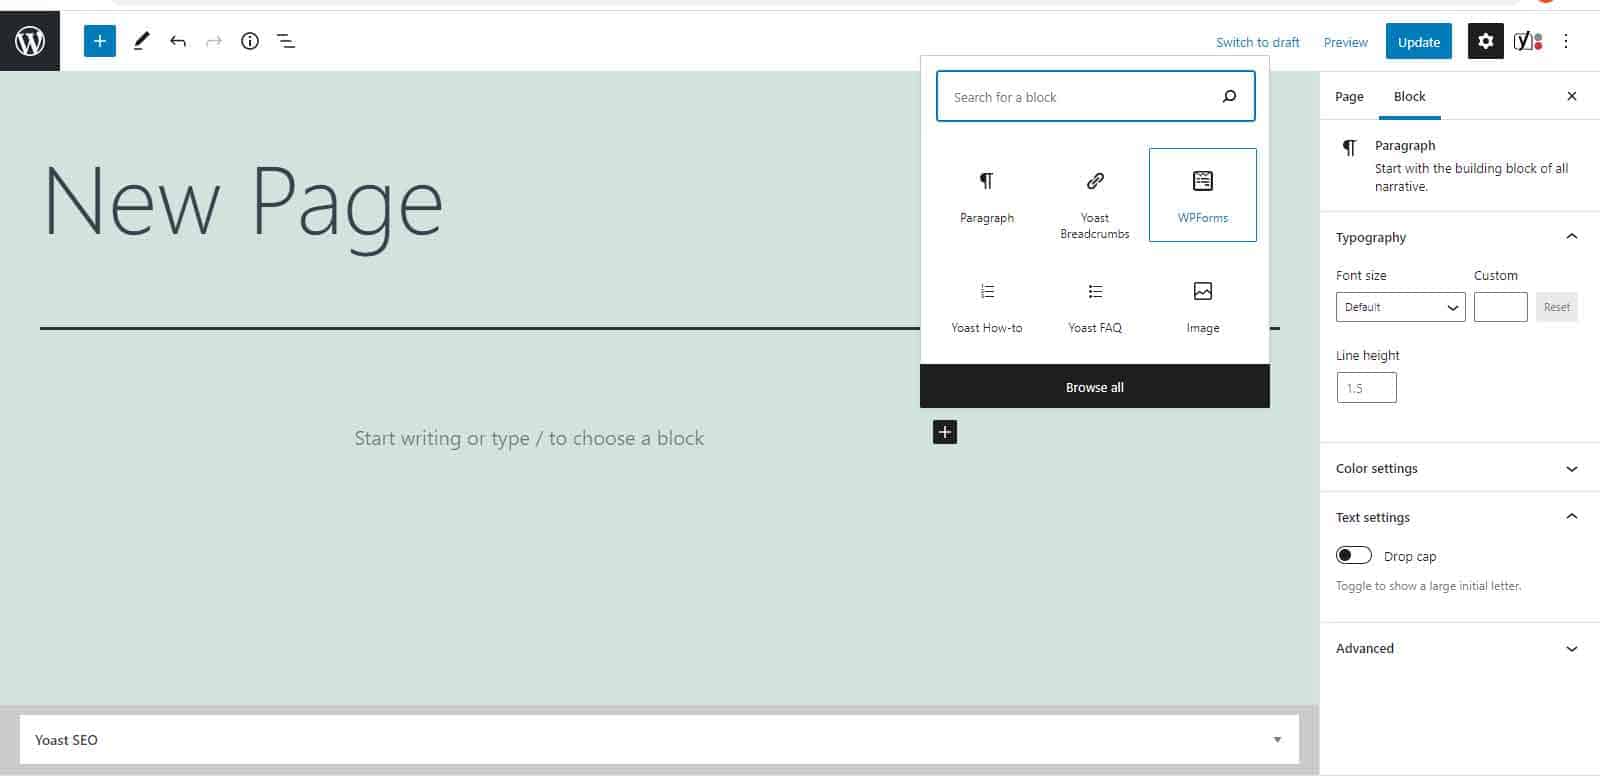
Step 4: Add your contact form to a page
On the page editor, click “Add new block” and select “WPForm”.
Select your form from the drop-down menu.
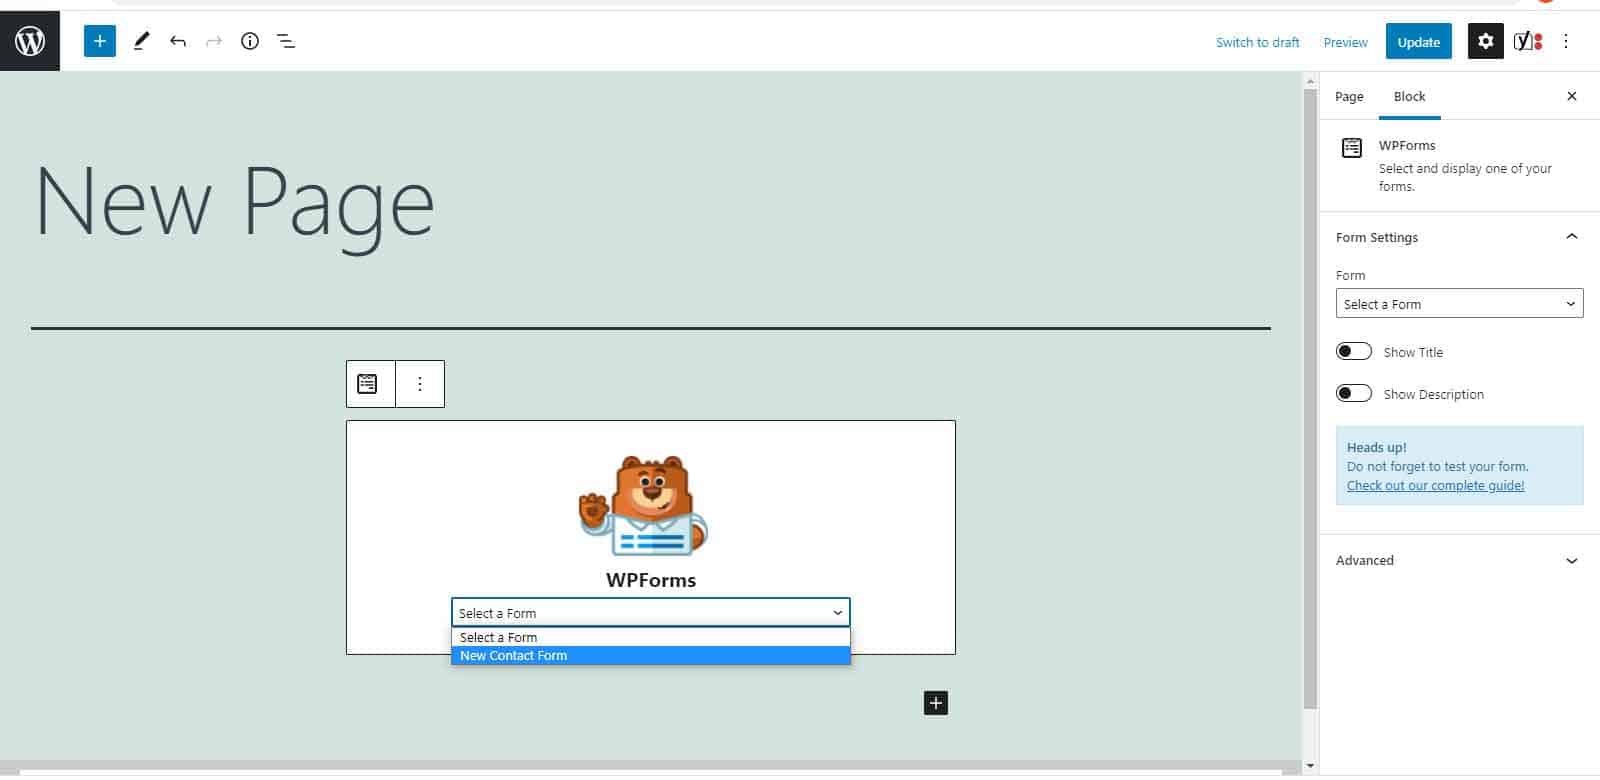
The WPForm block will now be added to your page.
How to customise theme in WordPress?
Customising your WordPress theme is a great way to improve your website design and make it unique. There are several ways to do this, including using the WordPress Customiser or editing the code directly.
Method 1: Using the Customiser
The easiest way to customise your theme is in the WordPress Customiser, which you can find by going to Appearance » Customise.
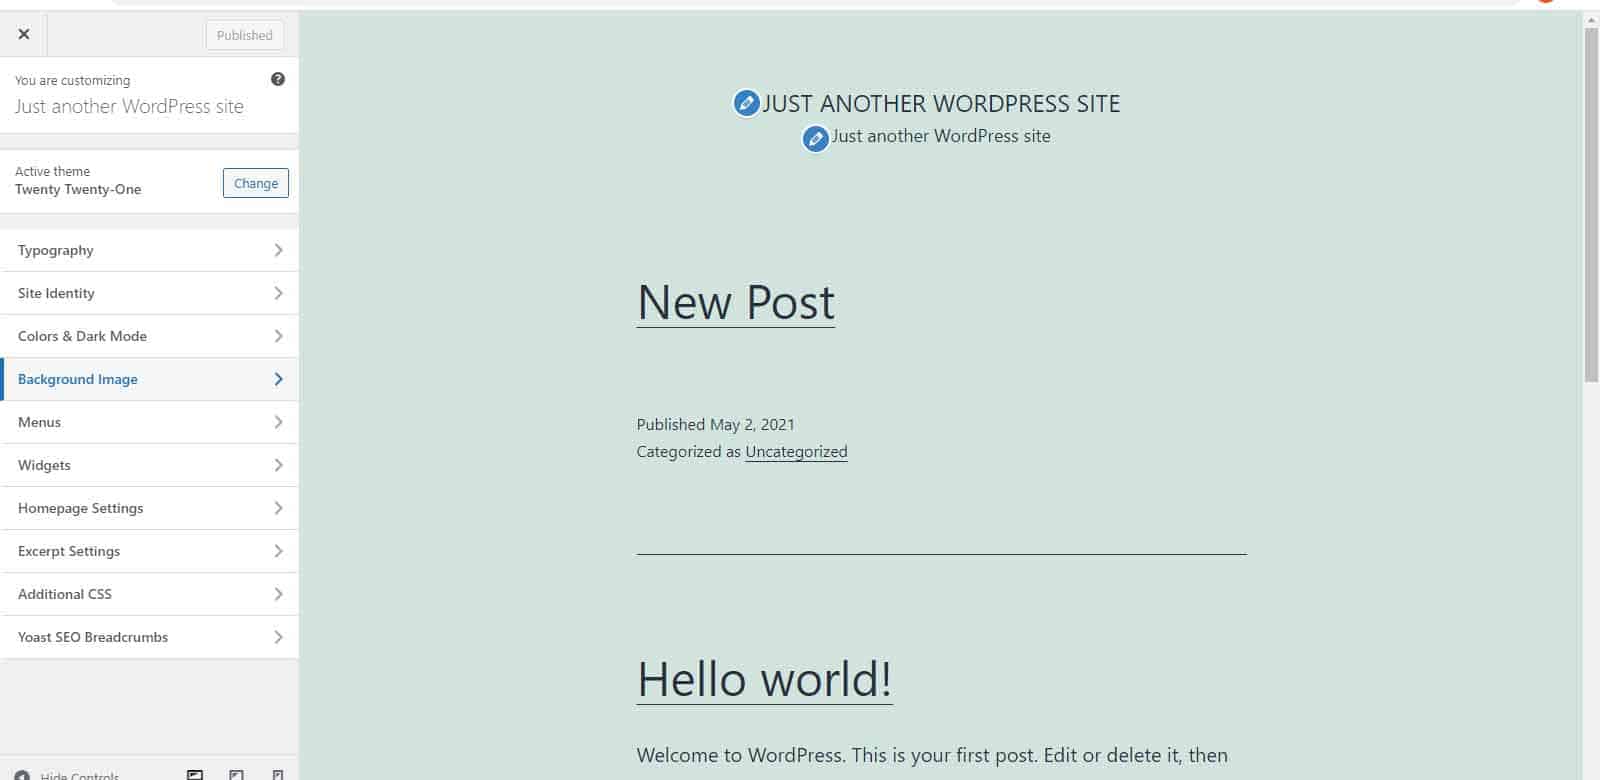
Depending on your theme, you will be able to edit simple design features such as fonts, colours and buttons.
Method 2: Editing your theme’s code
If you want more control over your theme and have experience editing CSS or PHP, you may wish to customise your theme by editing its code. WordPress warns against editing the files directly in your theme editor, so you should use a HTML editor and a staging site to test your changes.
We recommend making a child theme before you edit the code. A child theme is a copy of your main theme, but its files are kept separate. Creating a child theme is the safest way to customise your theme, and it means you won’t lose any changes when you update the theme.
You can edit the below files in your WordPress theme.
Stylesheet:
Your theme stylesheet (style.css) contains all of the code used to style your website. You can edit the stylesheet to make changes to elements such as layout, fonts and colours.
Functions File:
The code in your functions.php file makes your theme elements work (such as featured images and widgets). You can add functional code to this file, but if you are adding new functionality to your website, it would be easier to do this with a plugin.
Theme Template Files:
These files establish which content WordPress will display on a page or post, based on the template hierarchy. You can edit the template files, or add a new template file, if you would like to customise this.
How to migrate WordPress site?
If you are changing your hosting company, your new provider might move your website for you. However, don’t worry if you need to do this yourself; you can move your WordPress website to a new host or server without the need to reinstall the software.
Migrating your WordPress website can be a straightforward process when you follow the steps below.
Step 1: Backup your website
Before you begin, it is important to run a backup in case any problems occur. This means any changes can easily be reverted if anything does go wrong.
Step 2: Export your database
Login to the control panel of your current web server and open phpMyAdmin.
On the list on the left, select the database that contains your WordPress installation. Use the default settings for a quick export in the SQL format.
Click “Go” to export and download the file.
Step 3: Create a database in your new server
Login to the control panel of your new web host and open the MySQL Databases application.
Create a new database.
Create a new MySQL user with full access to the new database.
Step 4: Edit your wp-config.php file
Within the folder you downloaded onto your computer in Step 2, find the file called wp-config.php.
Make a copy of this file and store it in a new folder on your computer. You will need this if something goes wrong and you need to reverse the changes.
Open the original file and locate these lines:
define(‘DB_NAME’, ‘db_name’);
define(‘DB_USER’, ‘db_user’);
define(‘DB_PASSWORD’, ‘db_pass’);
The top line will include the name of your original web host. Update this to the name of your new database.
Amend your old username in the second line to your new username.
Finally, update your password in the third line.
Save the file.
Step 5: Import the database to your new host
Open phpMyAdmin from your new server and select your new database.
Select “Import” from the menu and choose the SQL file you exported in Step 2. Ensure the format is SQL and the “Partial Import” option is unticked.
Click “Go” to import your new database.
Step 6: Upload the files to your new host
Connect to your new host using an FTP programme. Locate the folder that you will be uploading your files to (this is usually the public_html folder).
Upload all of your website files, including your updated wp-config.php.
Step 7: Reconfigure your DNS settings
Your domain’s DNS settings need to be updated to point to your new server IP address.
At this stage, you will need to contact the company that registered your domain as the process varies. They will be able to advise how to change your DNS settings.
Reconfiguring your DNS takes up to 48 hours to propagate.
Step 9: Delete the files and database from your old host
When you visit your website after this 48-hour window, you should be doing so on your new web host. You can now delete the files and database from your old web host. Your database files, including the original wp-config.php file, should still be kept on your computer as a backup.
How to download WordPress?
Installing WordPress is very simple and many hosting providers will automatically install WordPress for you. However, if you would prefer to install WordPress manually, you can follow the instructions below.
Step 1: Download WordPress
Visit WordPress.org to download the latest version of WordPress.
Step 2: Create your database and user
Your hosting provider may have already set this up for you, but if not, you can create your database and user using phpMyAdmin.
Step 3: Upload your files via FTP
Before you do this, you should decide where on your domain you would like your website to appear. If you want to integrate WordPress into the root of your domain (e.g. www.yourwebsite.com), use an FTP client to upload the contents of your WordPress directory into the root directory of your web server.
Alternatively, if you want your website to appear in a subdirectory, you can create a new folder (named “blog”, for example) to install WordPress. This will make your website accessible at www.yourwebsite.com/blog. When uploading your files to your server, rename the directory to your chosen name and use an FTP client to upload the entire directory to your chosen location.
Step 4: Run the WordPress installer
Finally, run the install script. If you uploaded the WordPress files into the root directory, you should visit: http://yourwebsite.com /wp-admin/install.php. If you uploaded the WordPress files in a subdirectory, you should visit: http://yourwebsite.com/blog/wp-admin/install.php.
How to embed YouTube video in WordPress?
Videos are powerful tools to attract and engage your website visitors but uploading videos to you own server can have a negative impact on your website’s performance. We would therefore like to share the below two methods to easily embed a YouTube video in WordPress, in just two or three steps.
Method 1: oEmbed
This is the easiest method, as you simply need to enter the YouTube URL and WordPress will automatically embed the video onto your website.
Step 1: Find your YouTube video
Copy the URL of the YouTube video you would like to embed.
Step 2: Embed the video onto your webpage
Paste the URL into your WordPress page editor. The video will now be embedded onto the page.
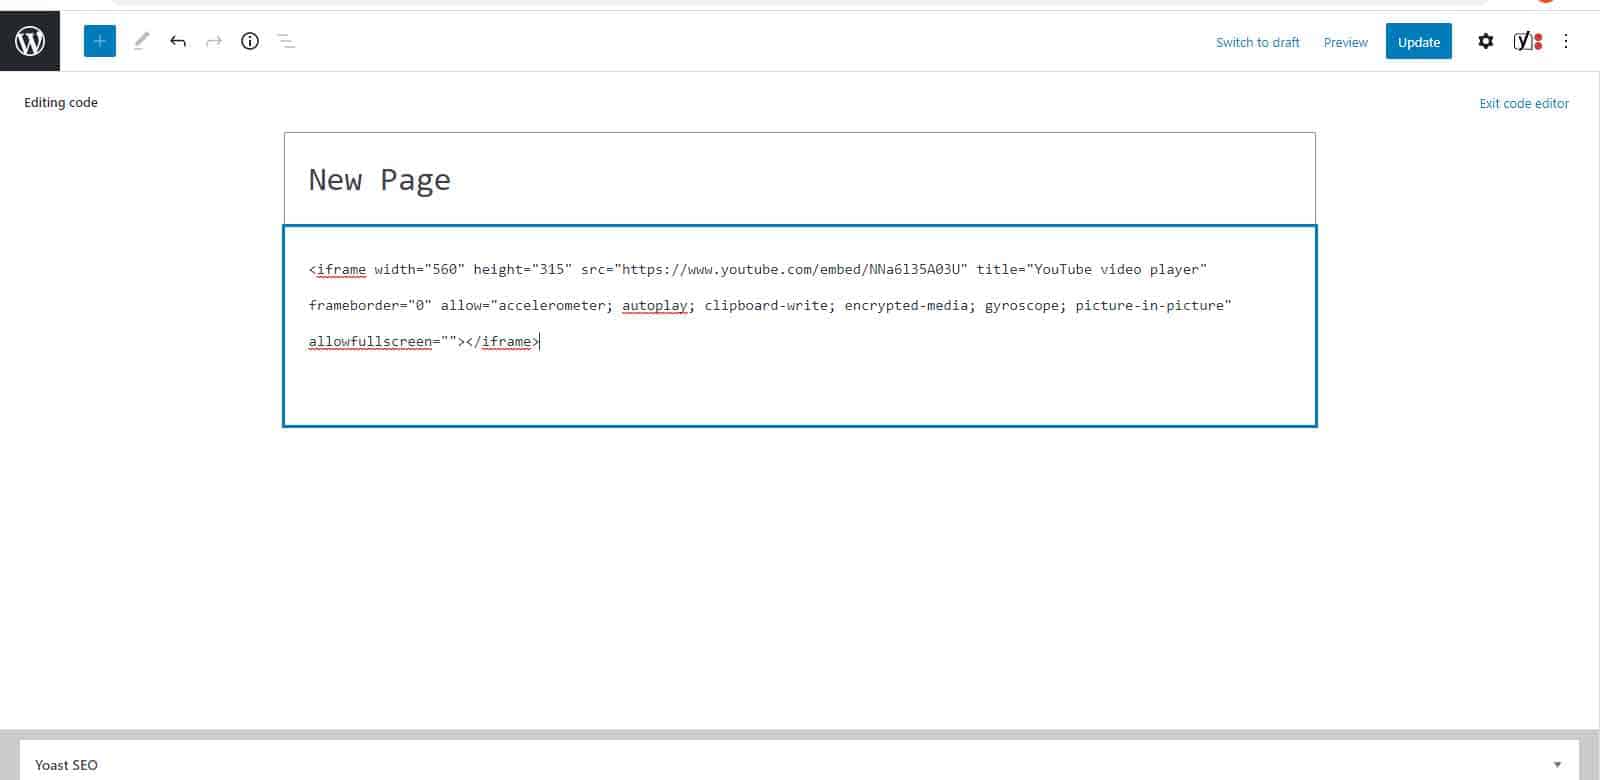
Method 2: Iframe
If you want more flexibility over how your video appears on the page, you should use this method.
Step 1: Find your YouTube video
Click the “Share” button on the YouTube video you’d like to embed. Click “Embed”.
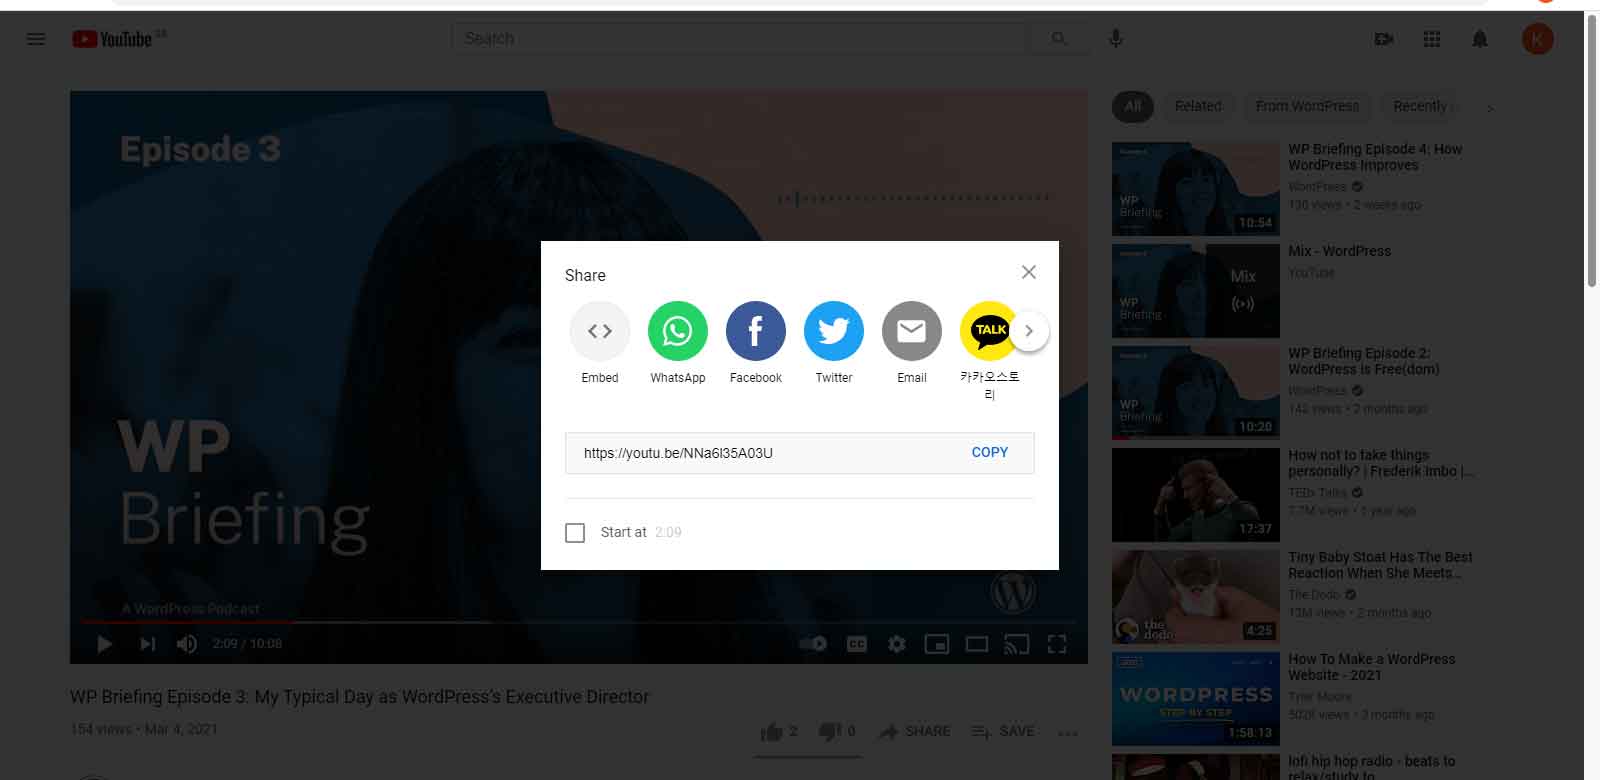
Step 2: Copy the iframe code
YouTube will now provide you with the iframe code. There will also be options to adjust the start time and include the player controls. Adjust these settings as desired and copy this code.
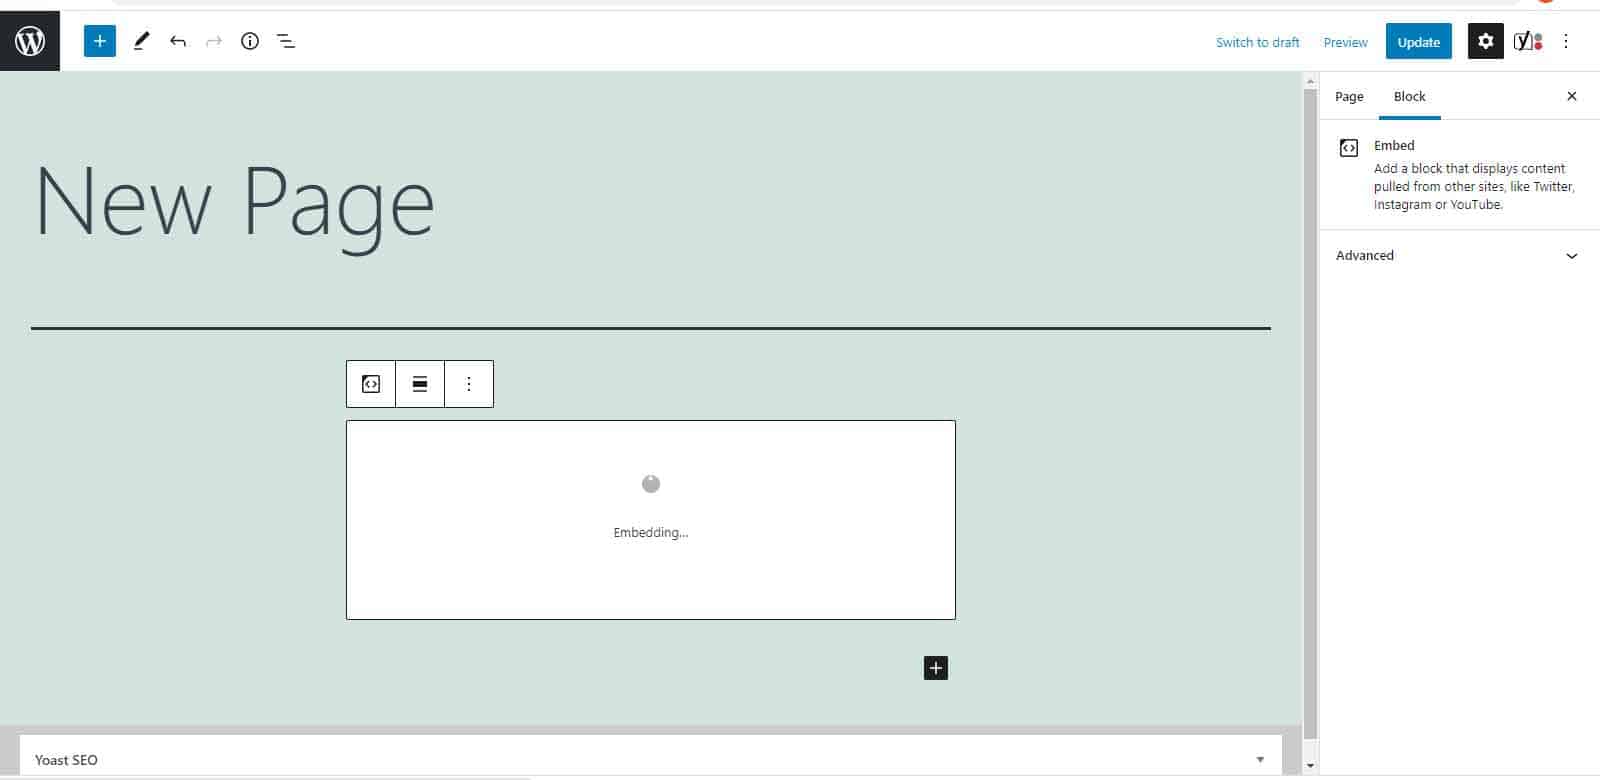
Step 3: Add the iframe code to WordPress
In your WordPress page editor, switch from visual mode to the code editor. Paste the code to embed the YouTube video on the page.
How to downgrade WordPress?
WordPress regularly releases new versions to add new functionalities. Each update also fixes bugs and vulnerabilities, so it is not usually recommended to downgrade your WordPress.
However, it could be that the latest release is not compliant with a plugin or theme you are using. In this case, you might need to downgrade to an earlier version.
You can either downgrade WordPress manually or using a plugin. We will cover both methods below.
Method 1: Downgrade using a plugin
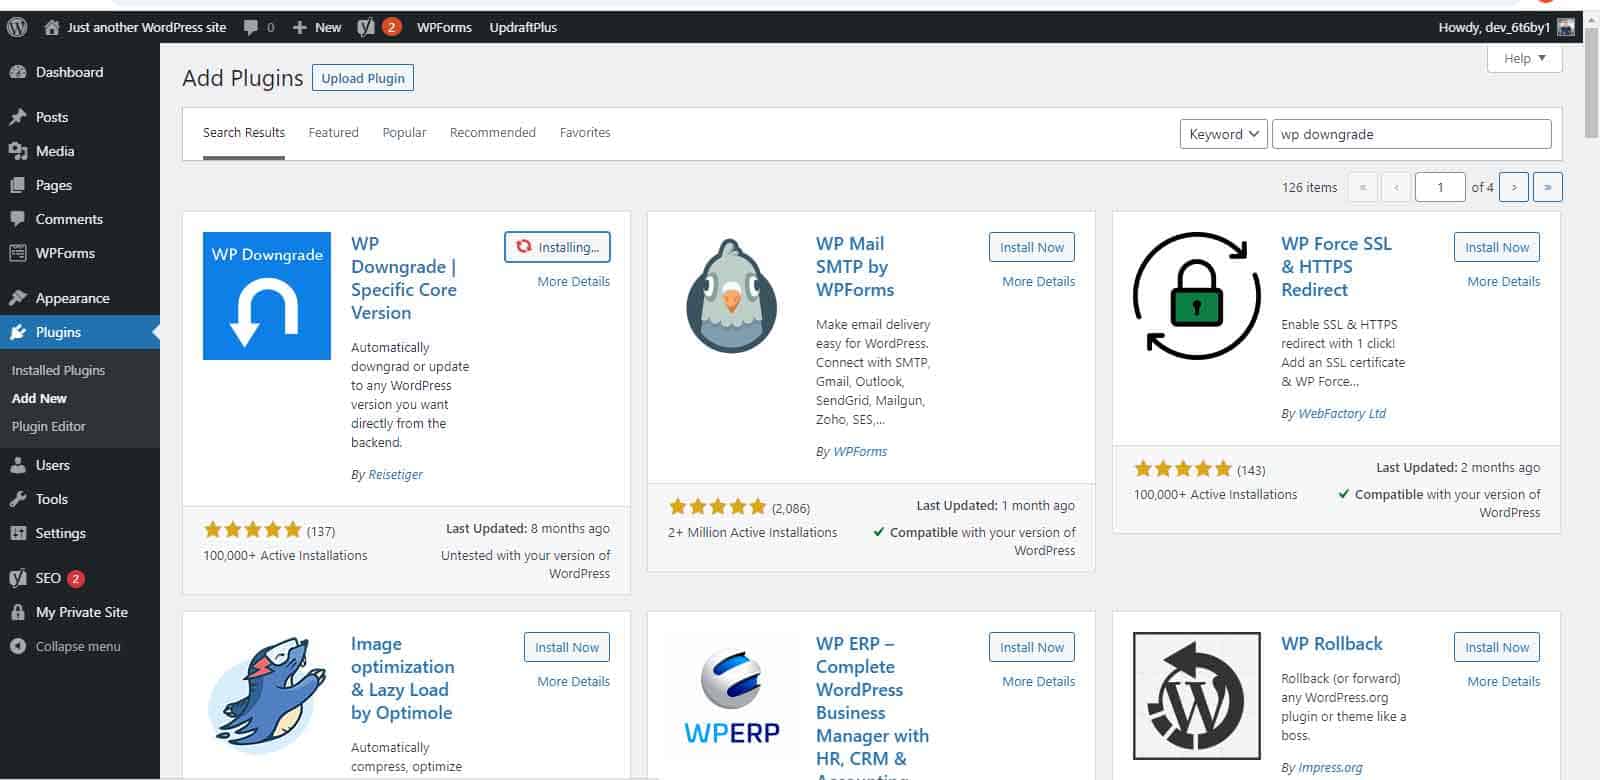
There are lots of plugins available that will help you to downgrade WordPress, such as WP Downgrade. With this plugin, you can install a specified WordPress release.
Step 1: Download the plugin
Install and activate the WP Downgrade plugin.
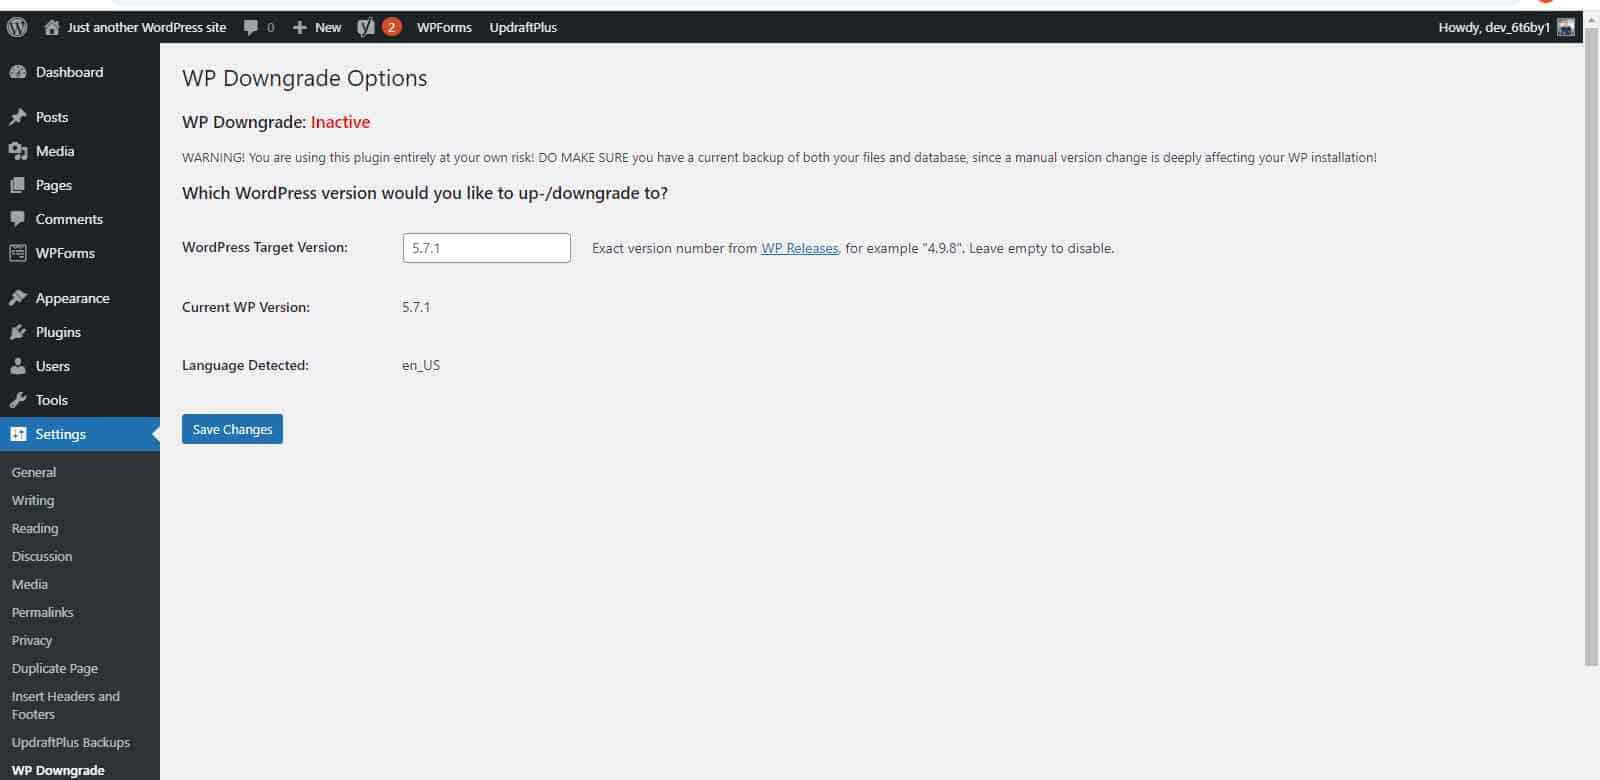
Step 2: Downgrade WordPress
Go to Settings » WP Downgrade. Select a version of WordPress and click “Save Changes”.
Method 2: Downgrade manually
Step 1: Download your chosen release
Browse the WordPress releases archive and download your required version.
Step 2: Backup your website
Using FTP, download a backup copy of your website.
Step 3: Delete the wp-admin and wp-includes folders
Be careful not to delete the wp-content folder, as this contains important files.
Step 4: Upload the new folders
Upload the wp-admin and wp-includes folders from the new release. Next time you login to WordPress, you will see a confirmation of your WordPress upgrade.
How to change WordPress URL?
To change your WordPress URL, you need to update both the WordPress Address and the Site Address. Your WordPress Address is the location of your website files, while the Site Address is the address that your visitors type in to visit your website. The WordPress Address and the Site Address are usually the same.
Step 1: Find your URL settings
Within your WordPress Admin area, go to Settings » General.
Step 2: Edit your URL
Edit the WordPress Address and Site Address fields as required.
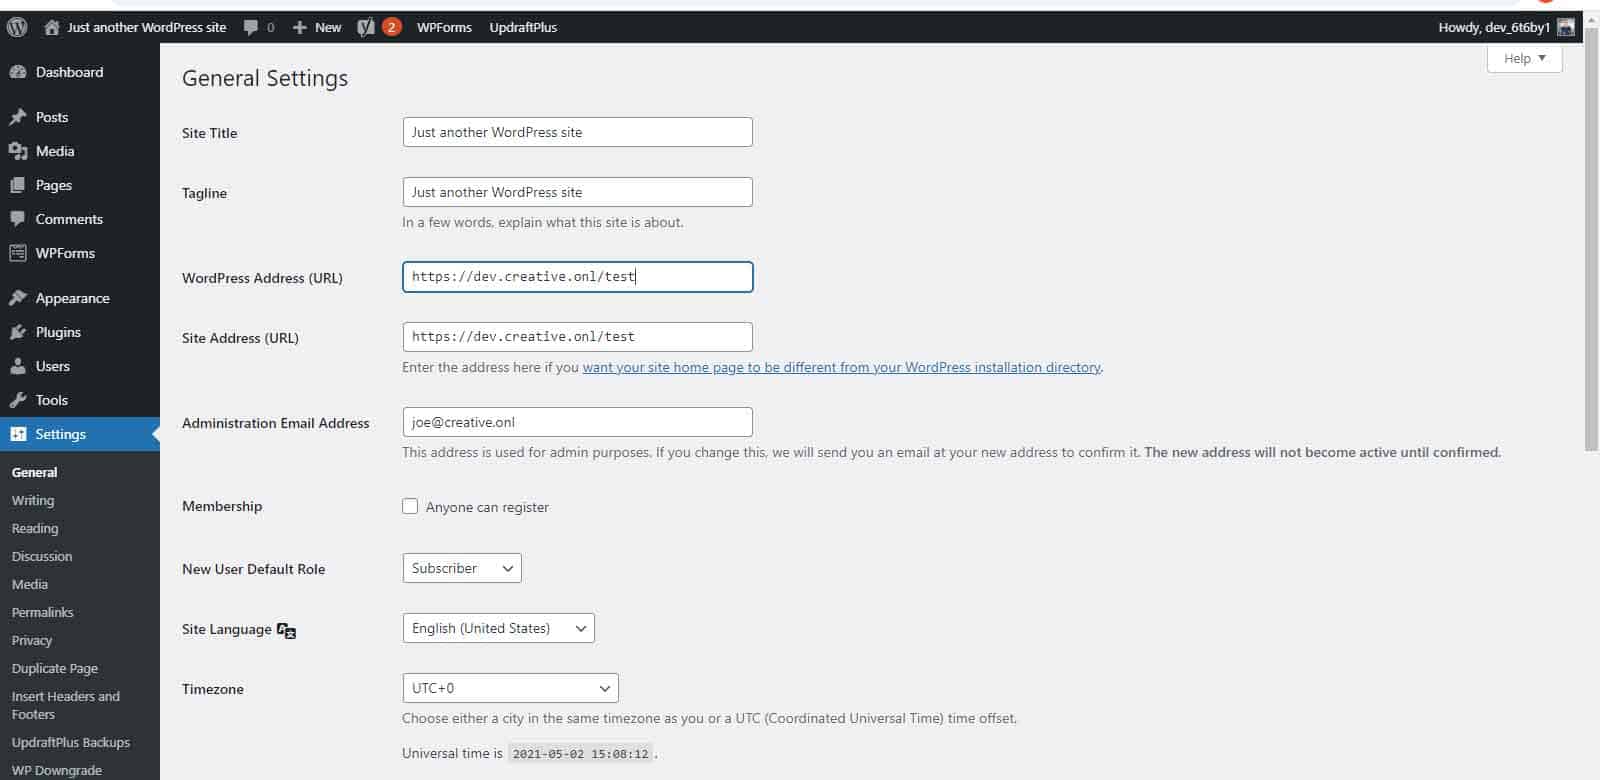
Click “Save”. You should now be able to visit your website using the updated URL.
How to delete a theme in WordPress
You may have recently switched to a new WordPress theme, or you may have pre-installed WordPress themes that you are not using. It is recommended to delete any WordPress themes that are not being used.
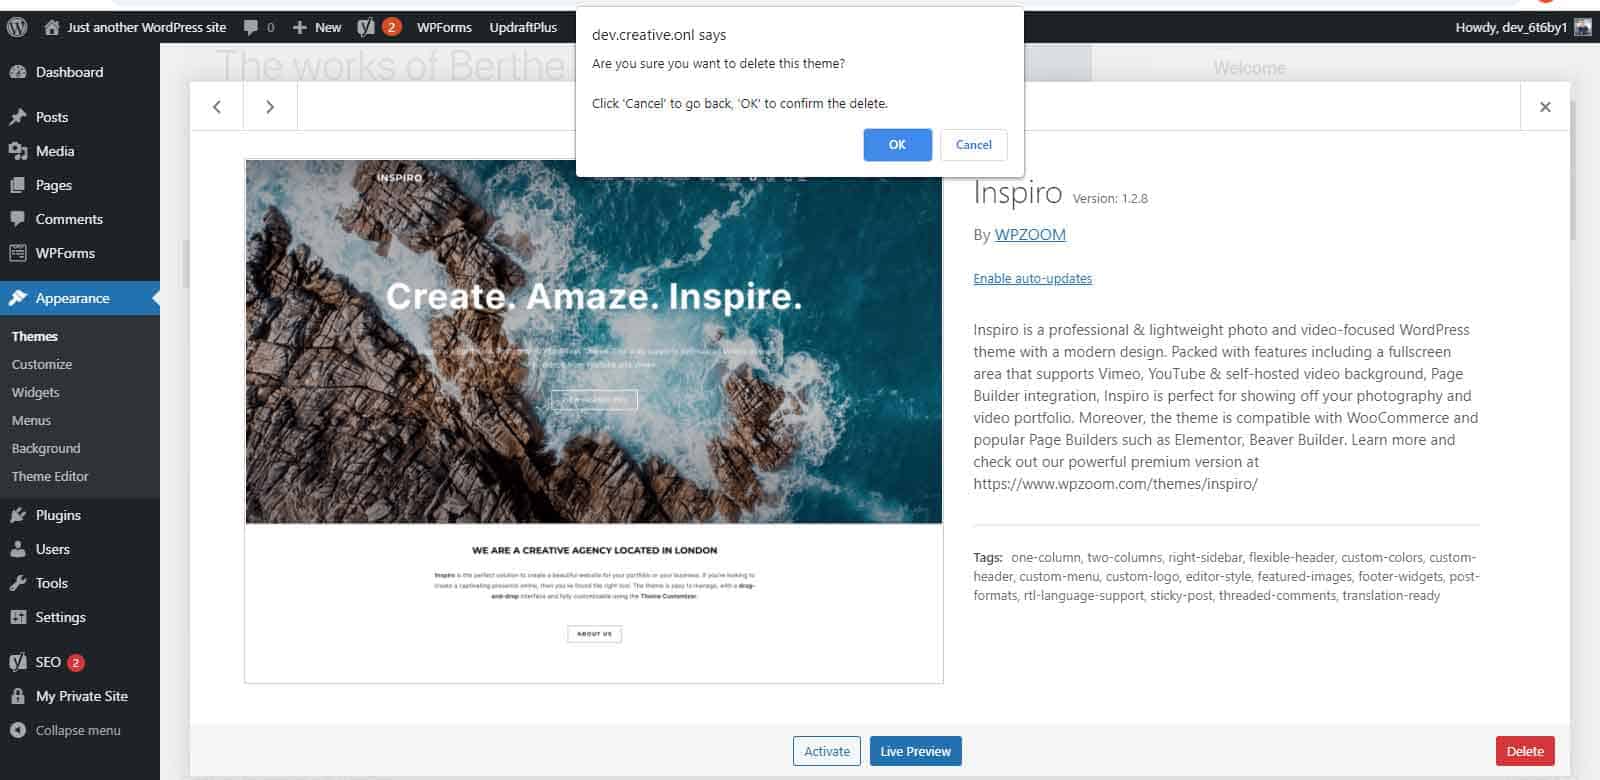
Go to Appearance » Themes. Select the theme that you would like to delete.
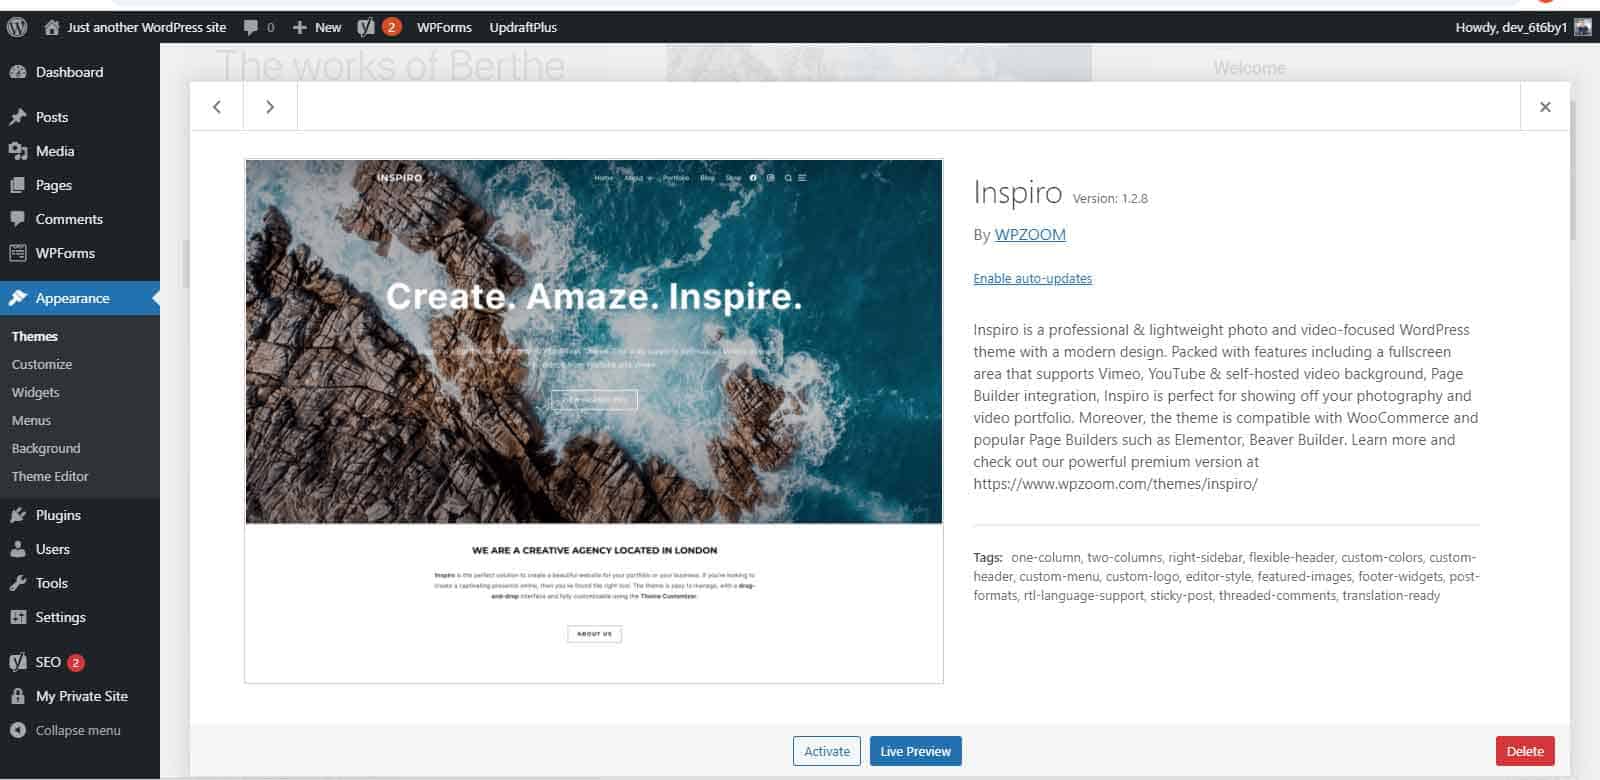
Click “Delete” at the bottom of the popup window. You will now be asked to confirm that you would like to delete the selected theme. Click “Ok” to continue.
How to edit header in WordPress
Your website header is located at the top of every page and post of your WordPress website. It is an extremely important element of your website and should capture the attention of your website visitors.
If you want to edit your header in WordPress, read our three methods below (including options with or without a plugin).
Method 1: Using the Customiser
If your theme enables you to edit your header using the WordPress Customiser, this method is the easiest option.
Go to Appearance » Header to open the Customiser. From here, you can add text, images and styling.
Method 2: Editing your theme’s code
This method offers more flexibility over the design but does involve coding. We would recommend creating a child theme before you begin.
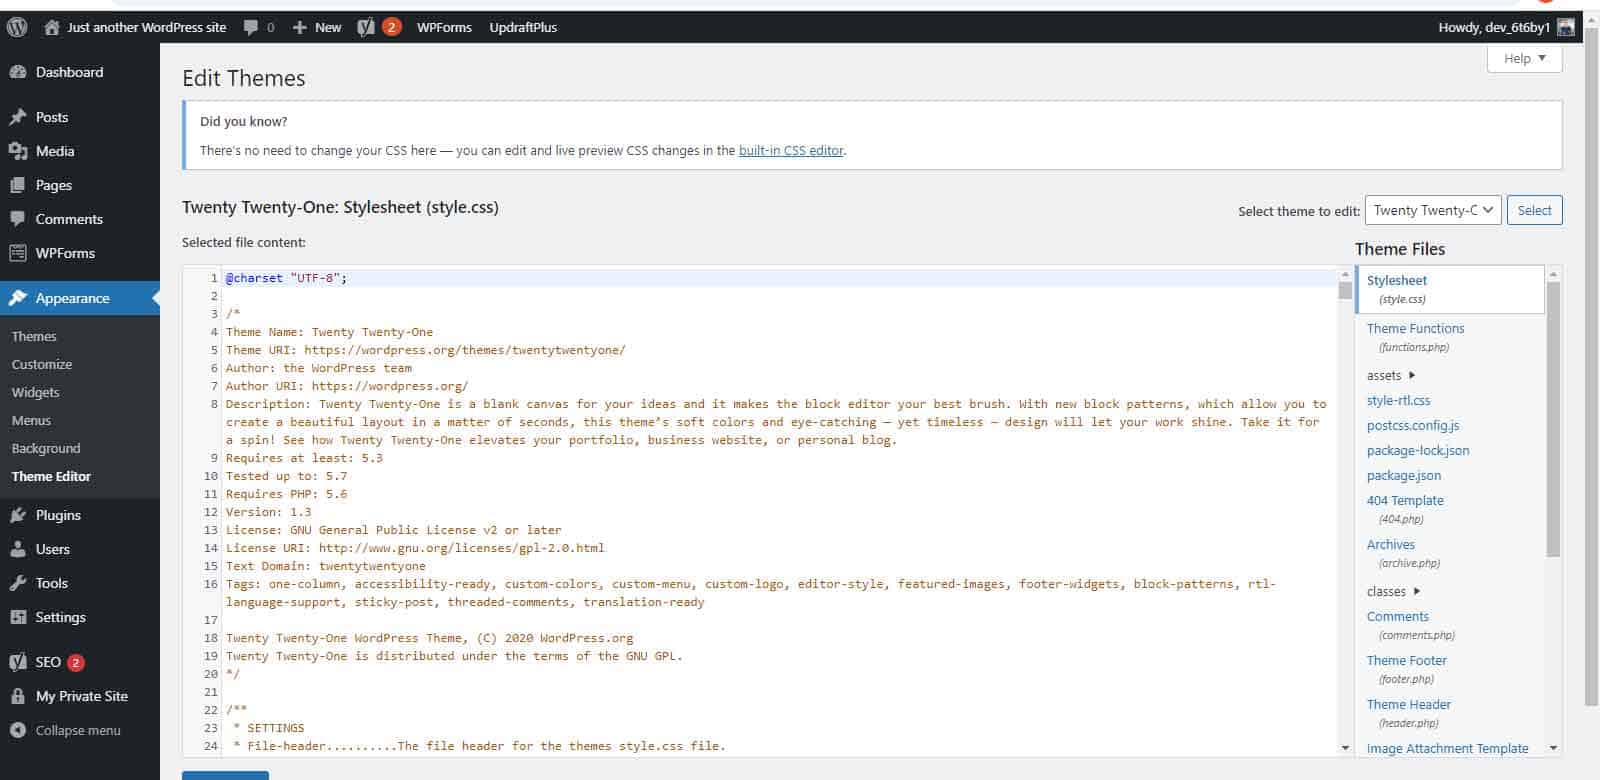
Step 1: Edit the style.css file
Go to Appearance » Theme Editor. Open your theme’s “style.css” file. You can edit the code within the “Site Header” section. Here you can edit the stylistic features of your header such as font size, padding and text formatting.
Step 2: Edit the header.php file
Open and edit your “header.php” file if you also want to make changes to the functionality of your header.
Method 3: Using a plugin
If your theme doesn’t have the built-in Customiser, you can use a plugin such as Insert Headers and Footers to easily insert code into your WordPress header.
Step 1: Download the Insert Headers and Footers plugin
Install and activate the plugin.
Step 2: Insert code to your header
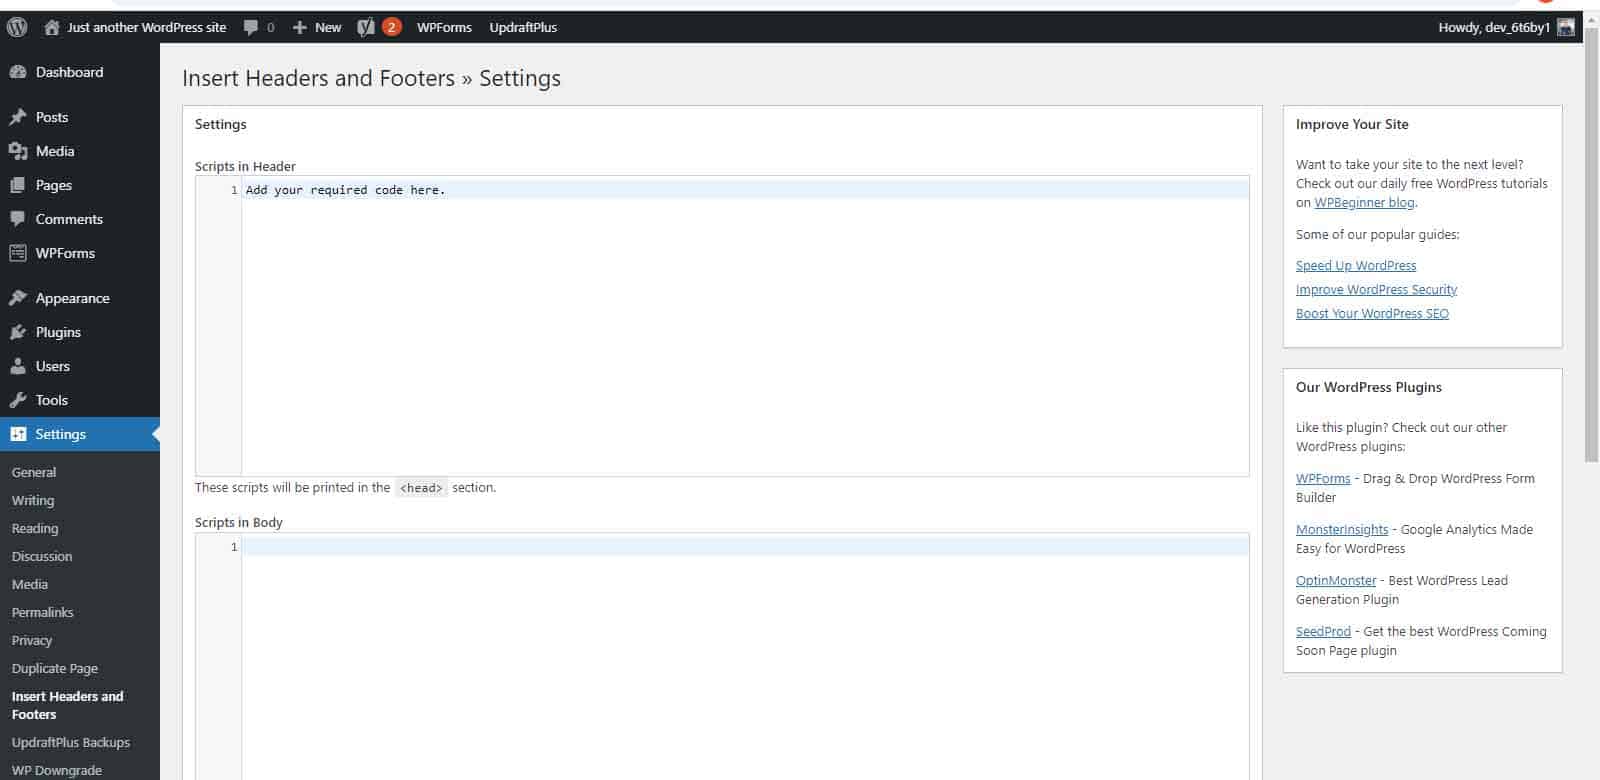
Go to Settings » Insert Headers and Footers.
Add your code to the “Scripts in Header” section. Click “Save”.
The plugin will automatically add this code to your website. It also will not let you amend code in the wrong place.
How to add slider in WordPress?
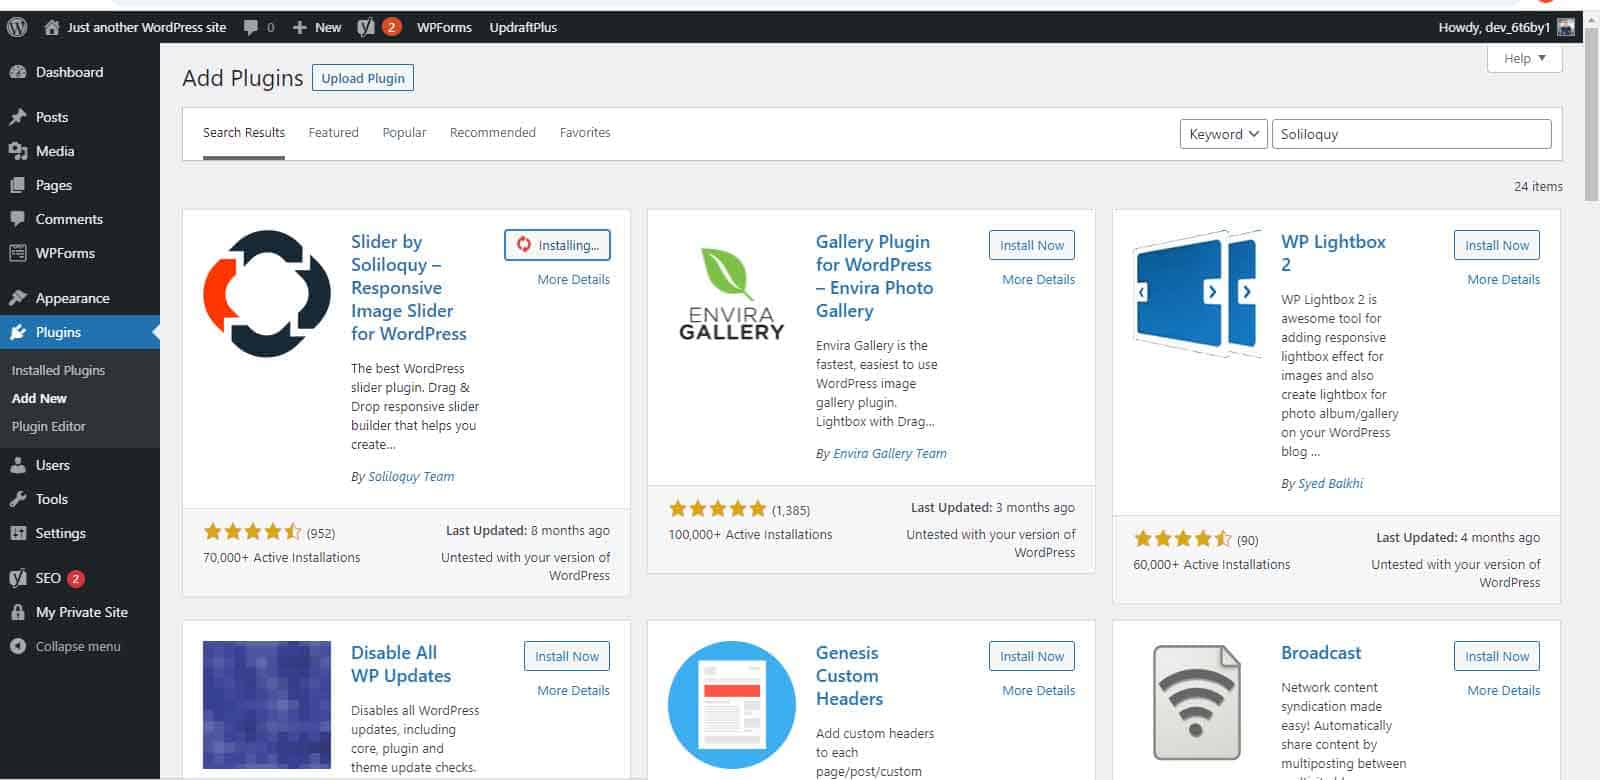
By adding a slider to your WordPress website, your most valuable content can be displayed in an attractive and easily absorbed slideshow format. There are lots of plugins available that can help you with this, such as Soliloquy.
Step 1: Download the Soliloquy plugin
Install and activate the plugin.
Step 2: Add a new slider
Go to Soliloquy » Add New and add a title for your slider. Click “Select Files” to choose the images you’d like to include.
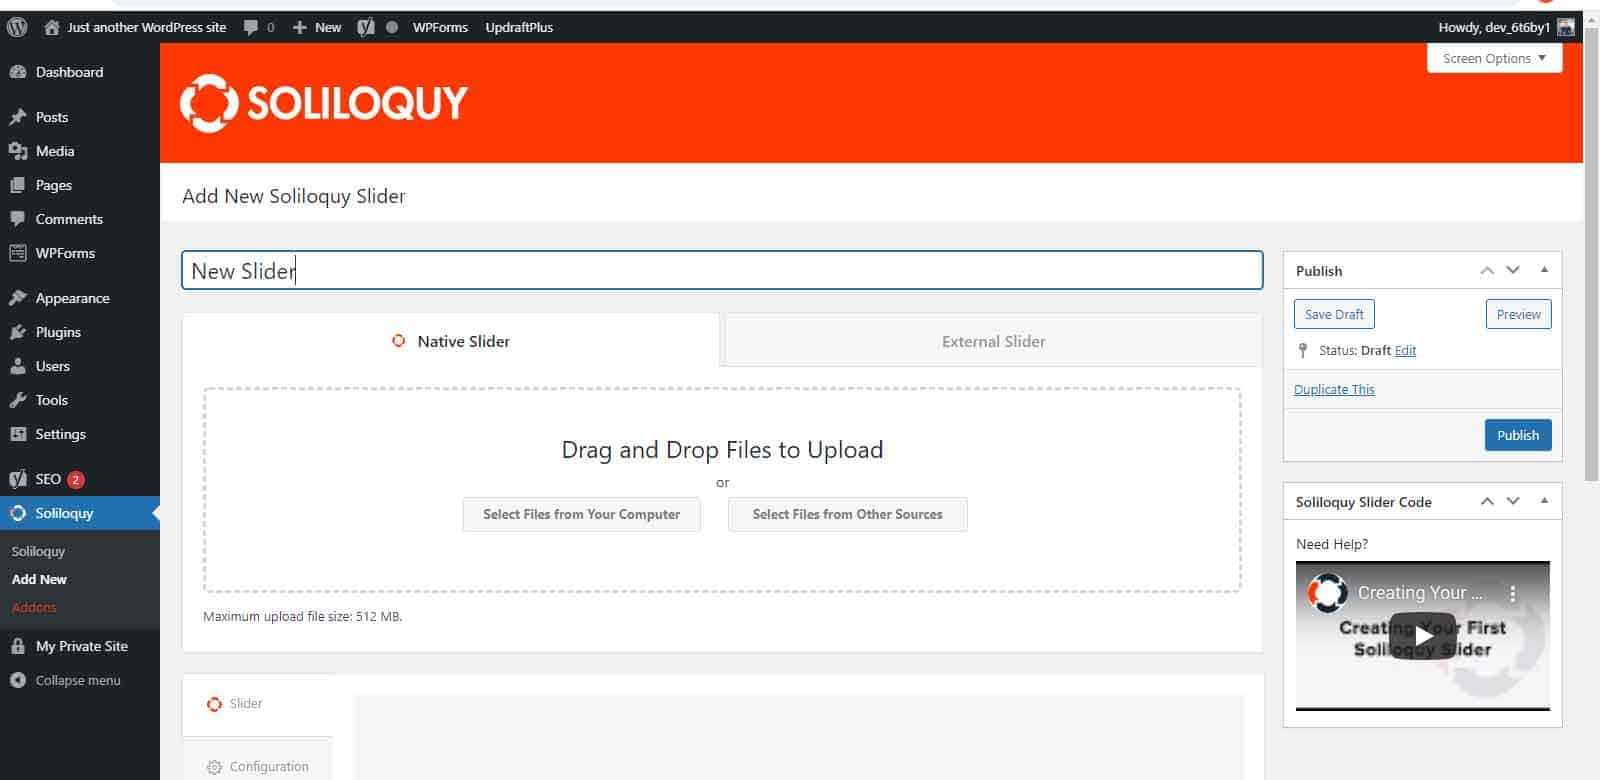
You can also create video slides by adding a YouTube link, or HTML slides (to include a button, for example) by pasting in HTML code.
When you are ready to add the slides to your slider, click “insert slides”. Now you can edit your slider settings, including speed and transition.
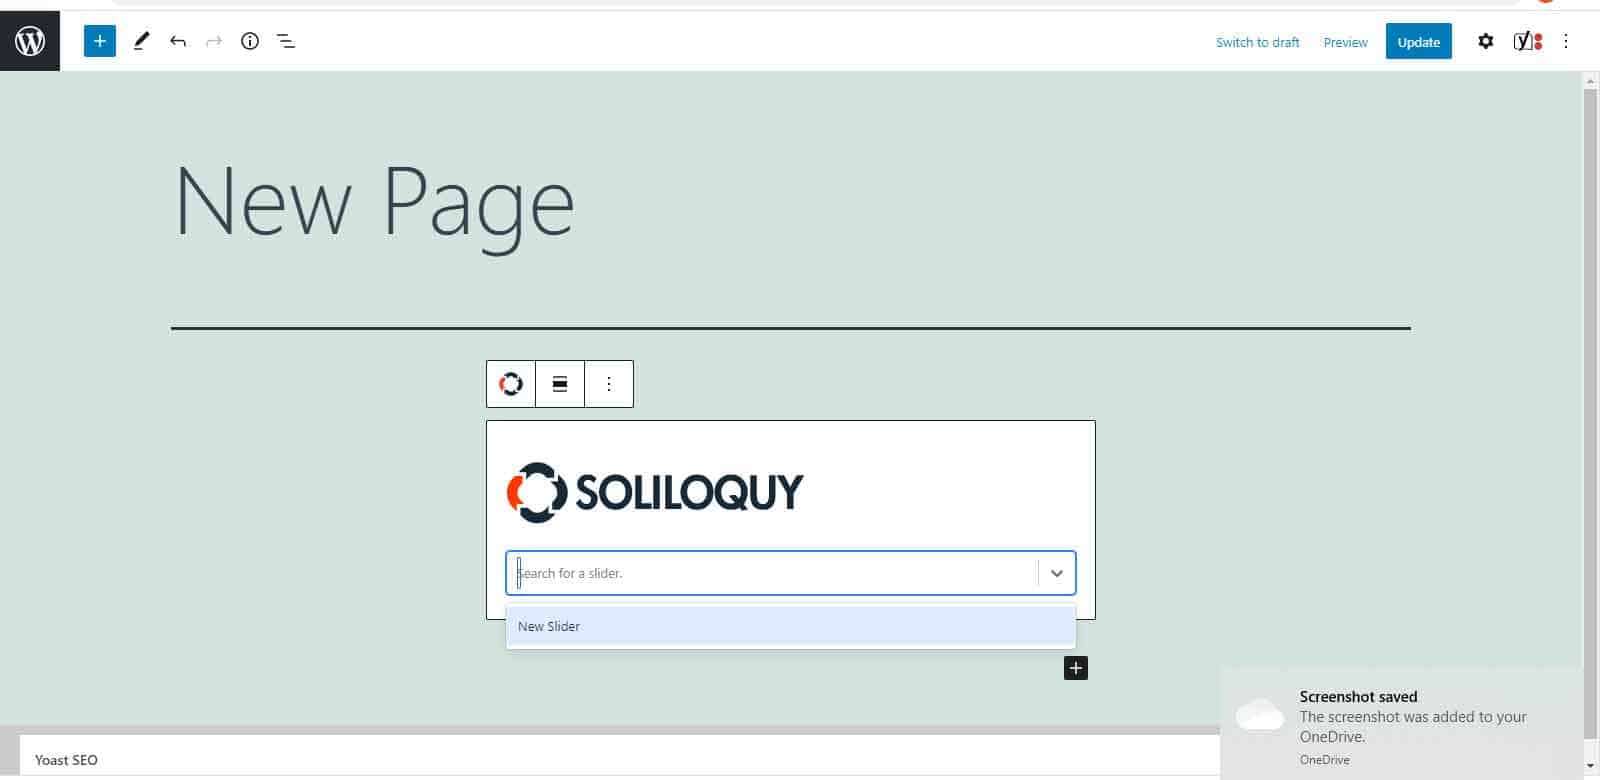
Step 3: Add your slider to a page
Go to your page editor and add the Soliloquy block.
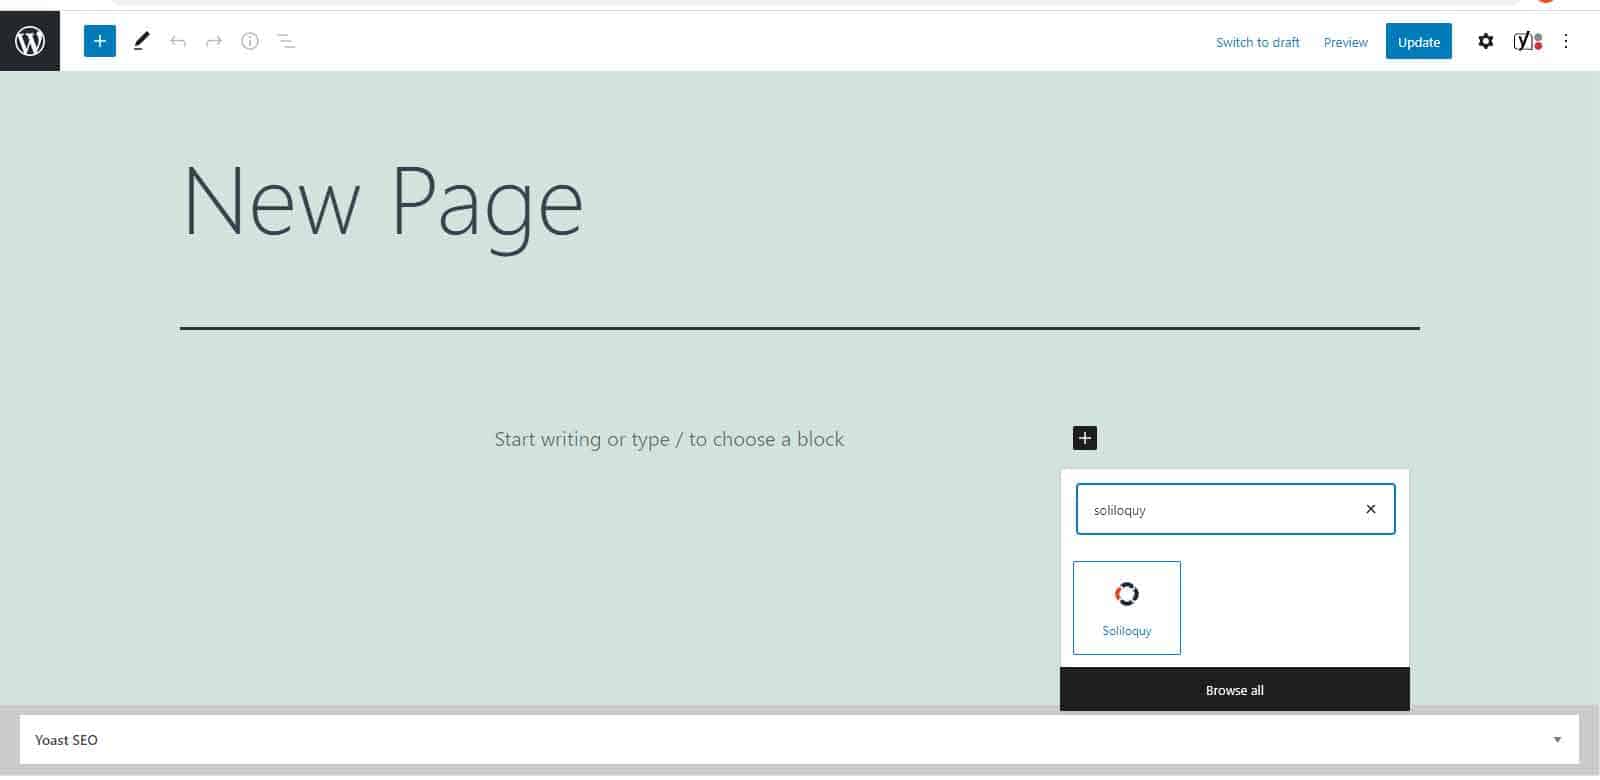
Select your new slider from the drop-down menu to add it to the page.
How to create a landing page in WordPress?
Users coming from specific marketing campaigns will land on your landing page before any other webpage. If your landing page is well-designed, it can help you generate new sales and leads.
Creating a powerful landing page in WordPress is easy with the SeedProd plugin.
Step 1: Download the SeedProd plugin
Purchase the plugin from the SeedProd website.
Download the plugin and copy your license key. Install and activate the plugin in your WordPress dashboard. On the welcome page, enter your license key and click “Verify Key”.
Step 2: Create your landing page
Click “Create your First Page”. You will now be taken to the SeedProd dashboard. Click “Add New Landing Page”.
Choose a SeedProd page template or choose the blank template.
Step 3: Design your landing page
Use SeedProd’s drag and drop builder to design your landing page. You can add content such as text, images, buttons and contact forms. You can also customise the design, including background colour, layout, text style and alignment.
Click “Save”. If you like, you can integrate your email marketing provider by clicking on the “Connect” tab (this is only required if you want to add an email opt in form).
To make your landing page live, click the dropdown arrow next to “Save” and then click “Publish”.
What is the best ecommerce plugin for WordPress?
The best ecommerce plugins make it easy for you to sell your products and services on your WordPress website. There are many options to choose from, such as Shopify, BigCommerce or WP eCommerce.
Our top pick is WooCommerce, which is used by millions of ecommerce websites.
With WooCommerce, you can easily add shopping basket functionality to your WordPress website and securely take payments from over 100 payment gateways, including PayPal and Stripe.
WooCommerce is a powerful platform. It is also extremely flexible and there are thousands of plugins that you can use to add features and enhance your online shop, such as product reviews, product recommendations and subscriptions.
Despite this, it is still easy-to-use for beginners; simply choose from a variety of available designs and templates to get started.
Best of all, as WooCommerce is open source, it is completely free!
We hope you have found the information in this guide useful.
How to make a WordPress website – step-by-step
WordPress is a popular choice because it is so easy to use; anyone can create a WordPress website. However, it can be difficult knowing where to start. We have simplified the process for you, with our step-by-step guide on how to make a WordPress website.
How to make a WordPress website
- Choose your domain name and set up your hosting account
To start building your WordPress website, you will need to purchase your domain name and web hosting. We would recommend a provider such as Bluehost. You can purchase both your hosting and your domain name from Bluehost.
Bluehost offers WordPress-specific hosting plans which currently start at just £2.13 a month. They also offer managed WordPress hosting, which you might want to consider if you are worried about the technical elements of running your website. - Install WordPress and choose your theme
Most hosting providers, including Bluehost, will automatically install WordPress for you. You will simply have to login and choose a theme.
There are thousands of themes available in the WordPress Theme Directory. It is important to take the time to choose the right theme for your website, as this will improve the appearance and functionality of your website.
Don’t worry, you can customise your theme later. - Add your content
Now it’s time to add content to your website!
Create a page:
If you want to create static content, such as an “About” page, you can create a page. To publish a page, go to Pages » Add New.
This will bring you to the page editor. From here, you can add a page title and page content such as text and images.
Post a blog:
If you add a new blog post, it will appear at the top of your blog. To publish a post, go to Blog Posts » Add New.
You can now add your content in the post editor.
Add a navigation menu:
To help people find your pages and posts, you should also create a navigation menu. To do this, click on Appearance » Menus.
Simply enter a name for your menu and click “Create Menu”. To add pages to your navigation menu, select the pages and click “Add to Menu”.
Your selected pages will appear under your menu. If you would like to change the order in which they appear, you can drag them to move them around. Choose your display location and click “Save Menu”. - Install plugins
You may wish to install some plugins to add functionality to your website. Plugins that are beneficial for every WordPress website are:
• Yoast SEO to optimise your website for search engines.
• MonsterInsights to integrate your website with Google Analytics.
• WP Fastest Cache to provide a cache system and optimise the speed of your website.
Select Plugins » Add New and use the search bar on the top right to find a plugin you would like to install. - Make your website live
You are now ready to publish your new website!
If you need any help with your WordPress website or have a question that is not included in this guide, please feel free to contact us. We would love to hear from you!